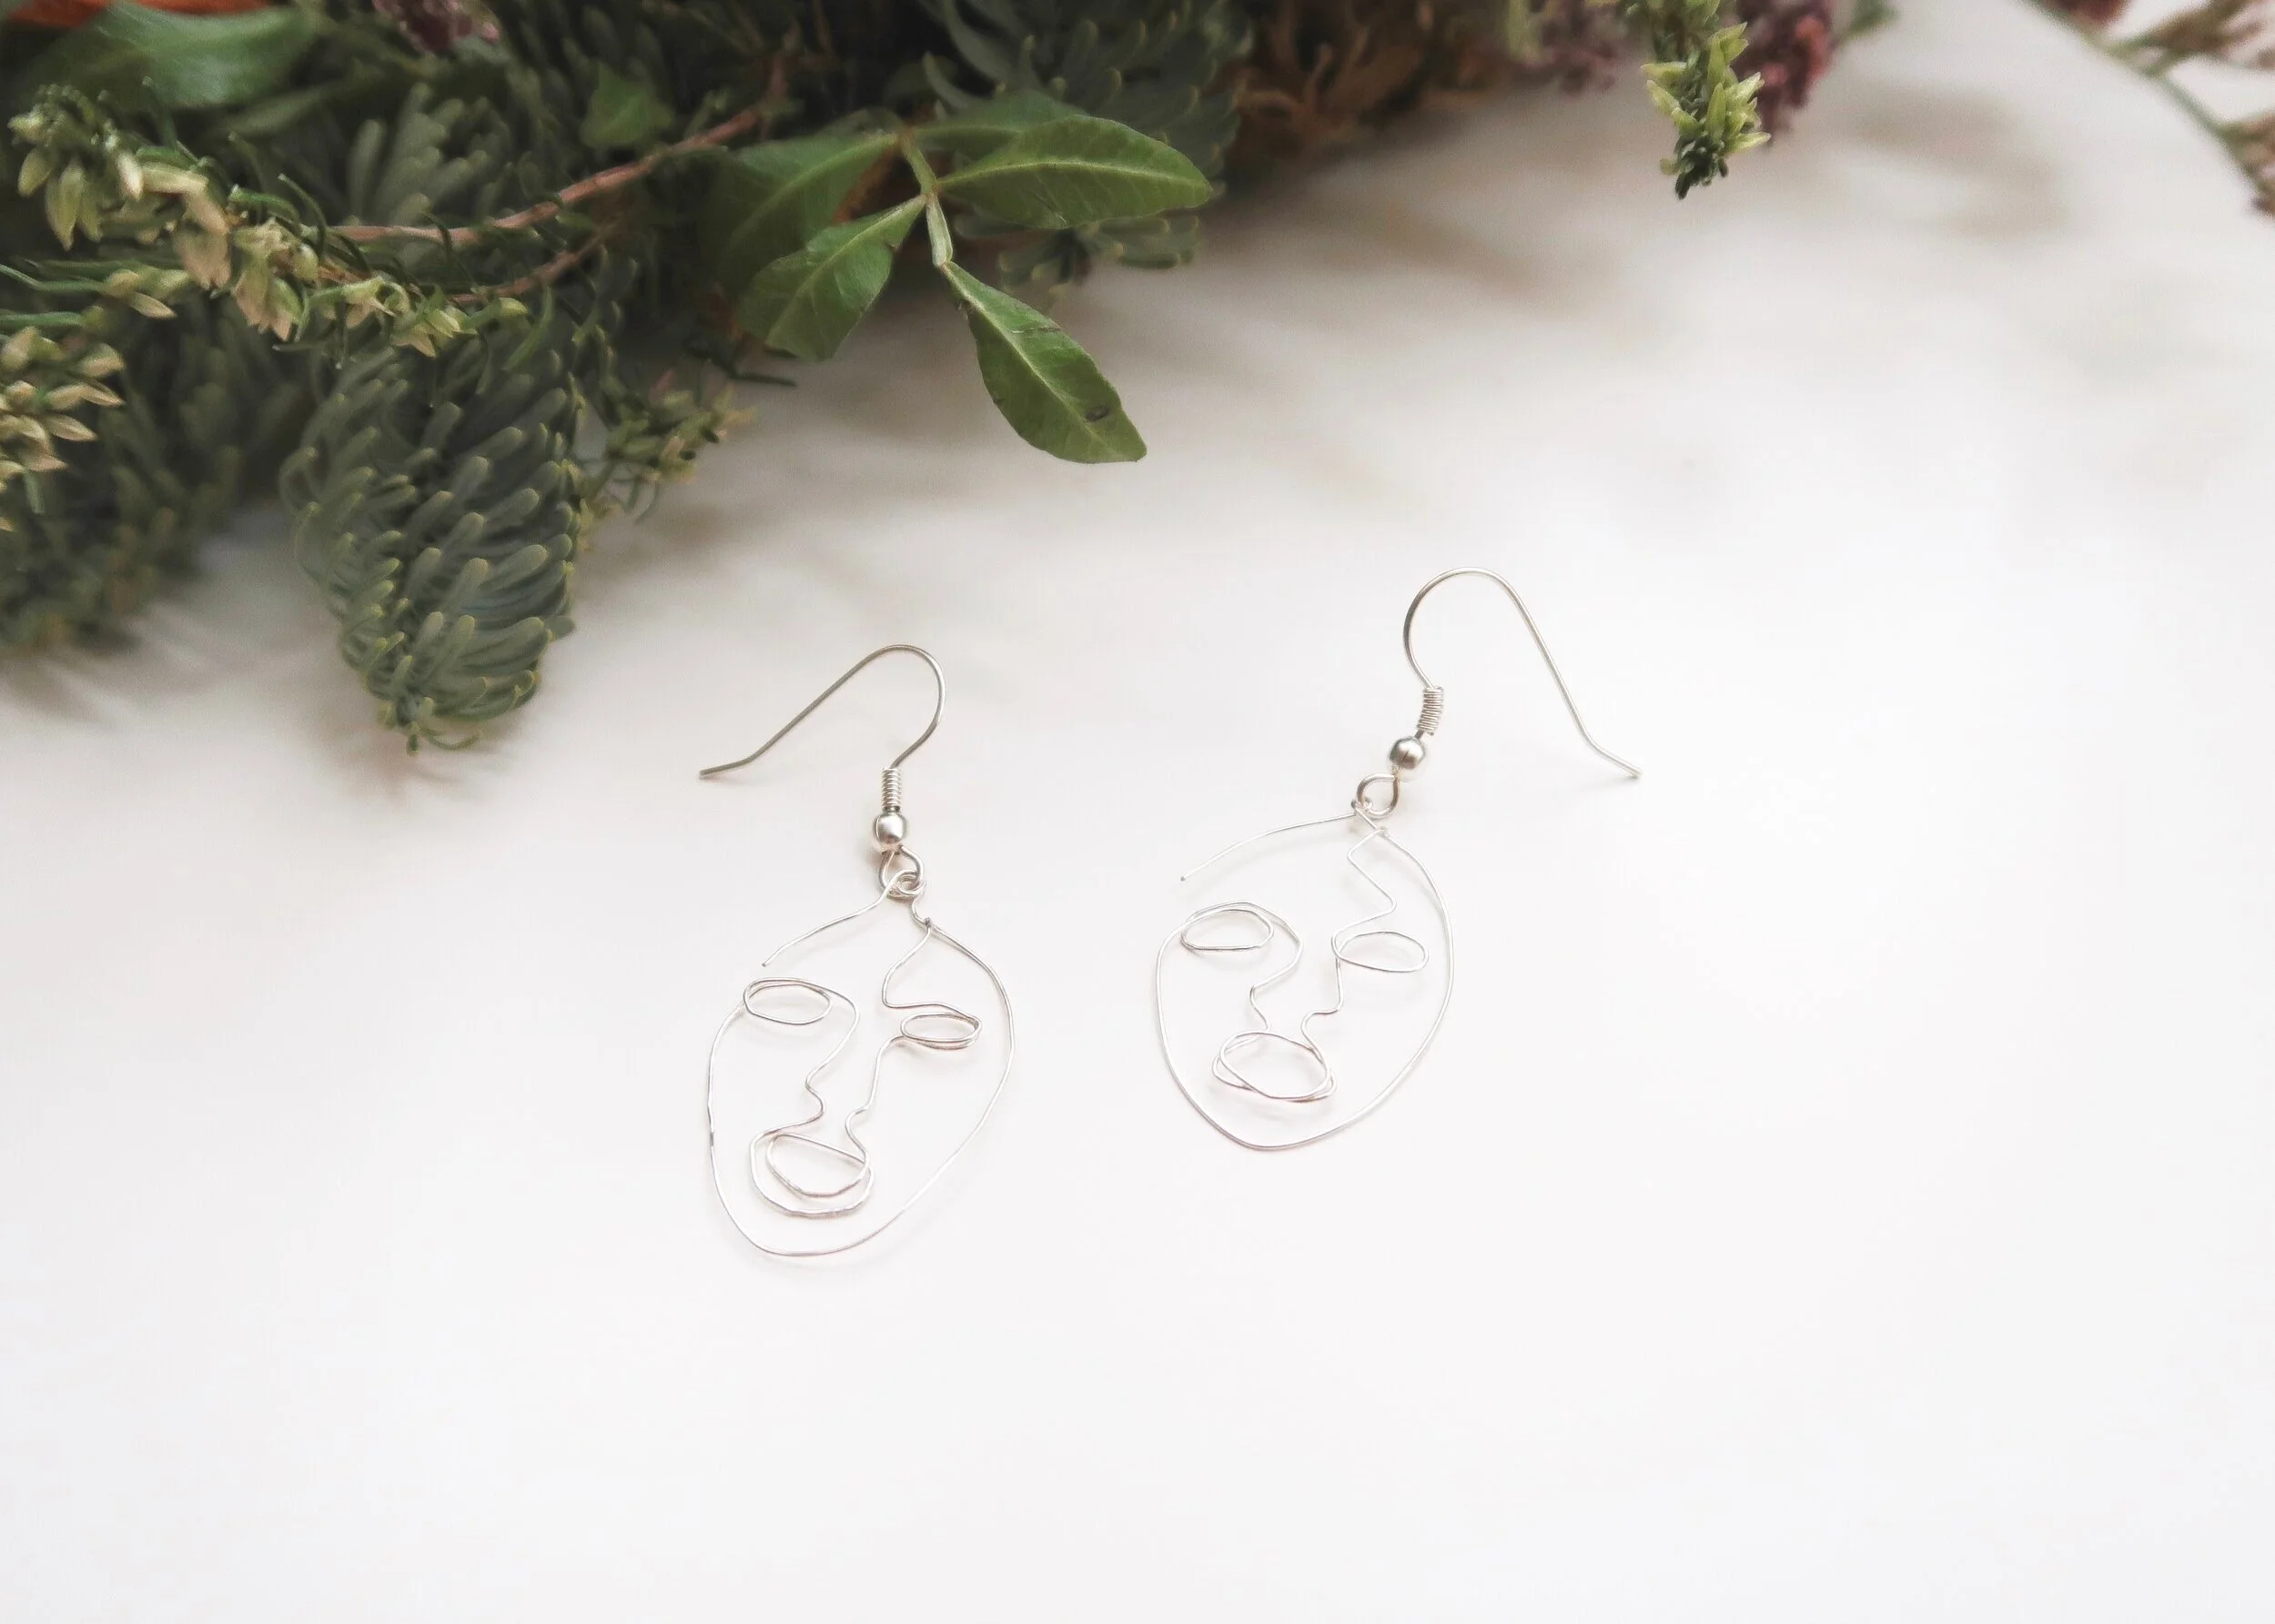
Get on board with the abstract earring trend with these quick and easy DIY wire face earrings!
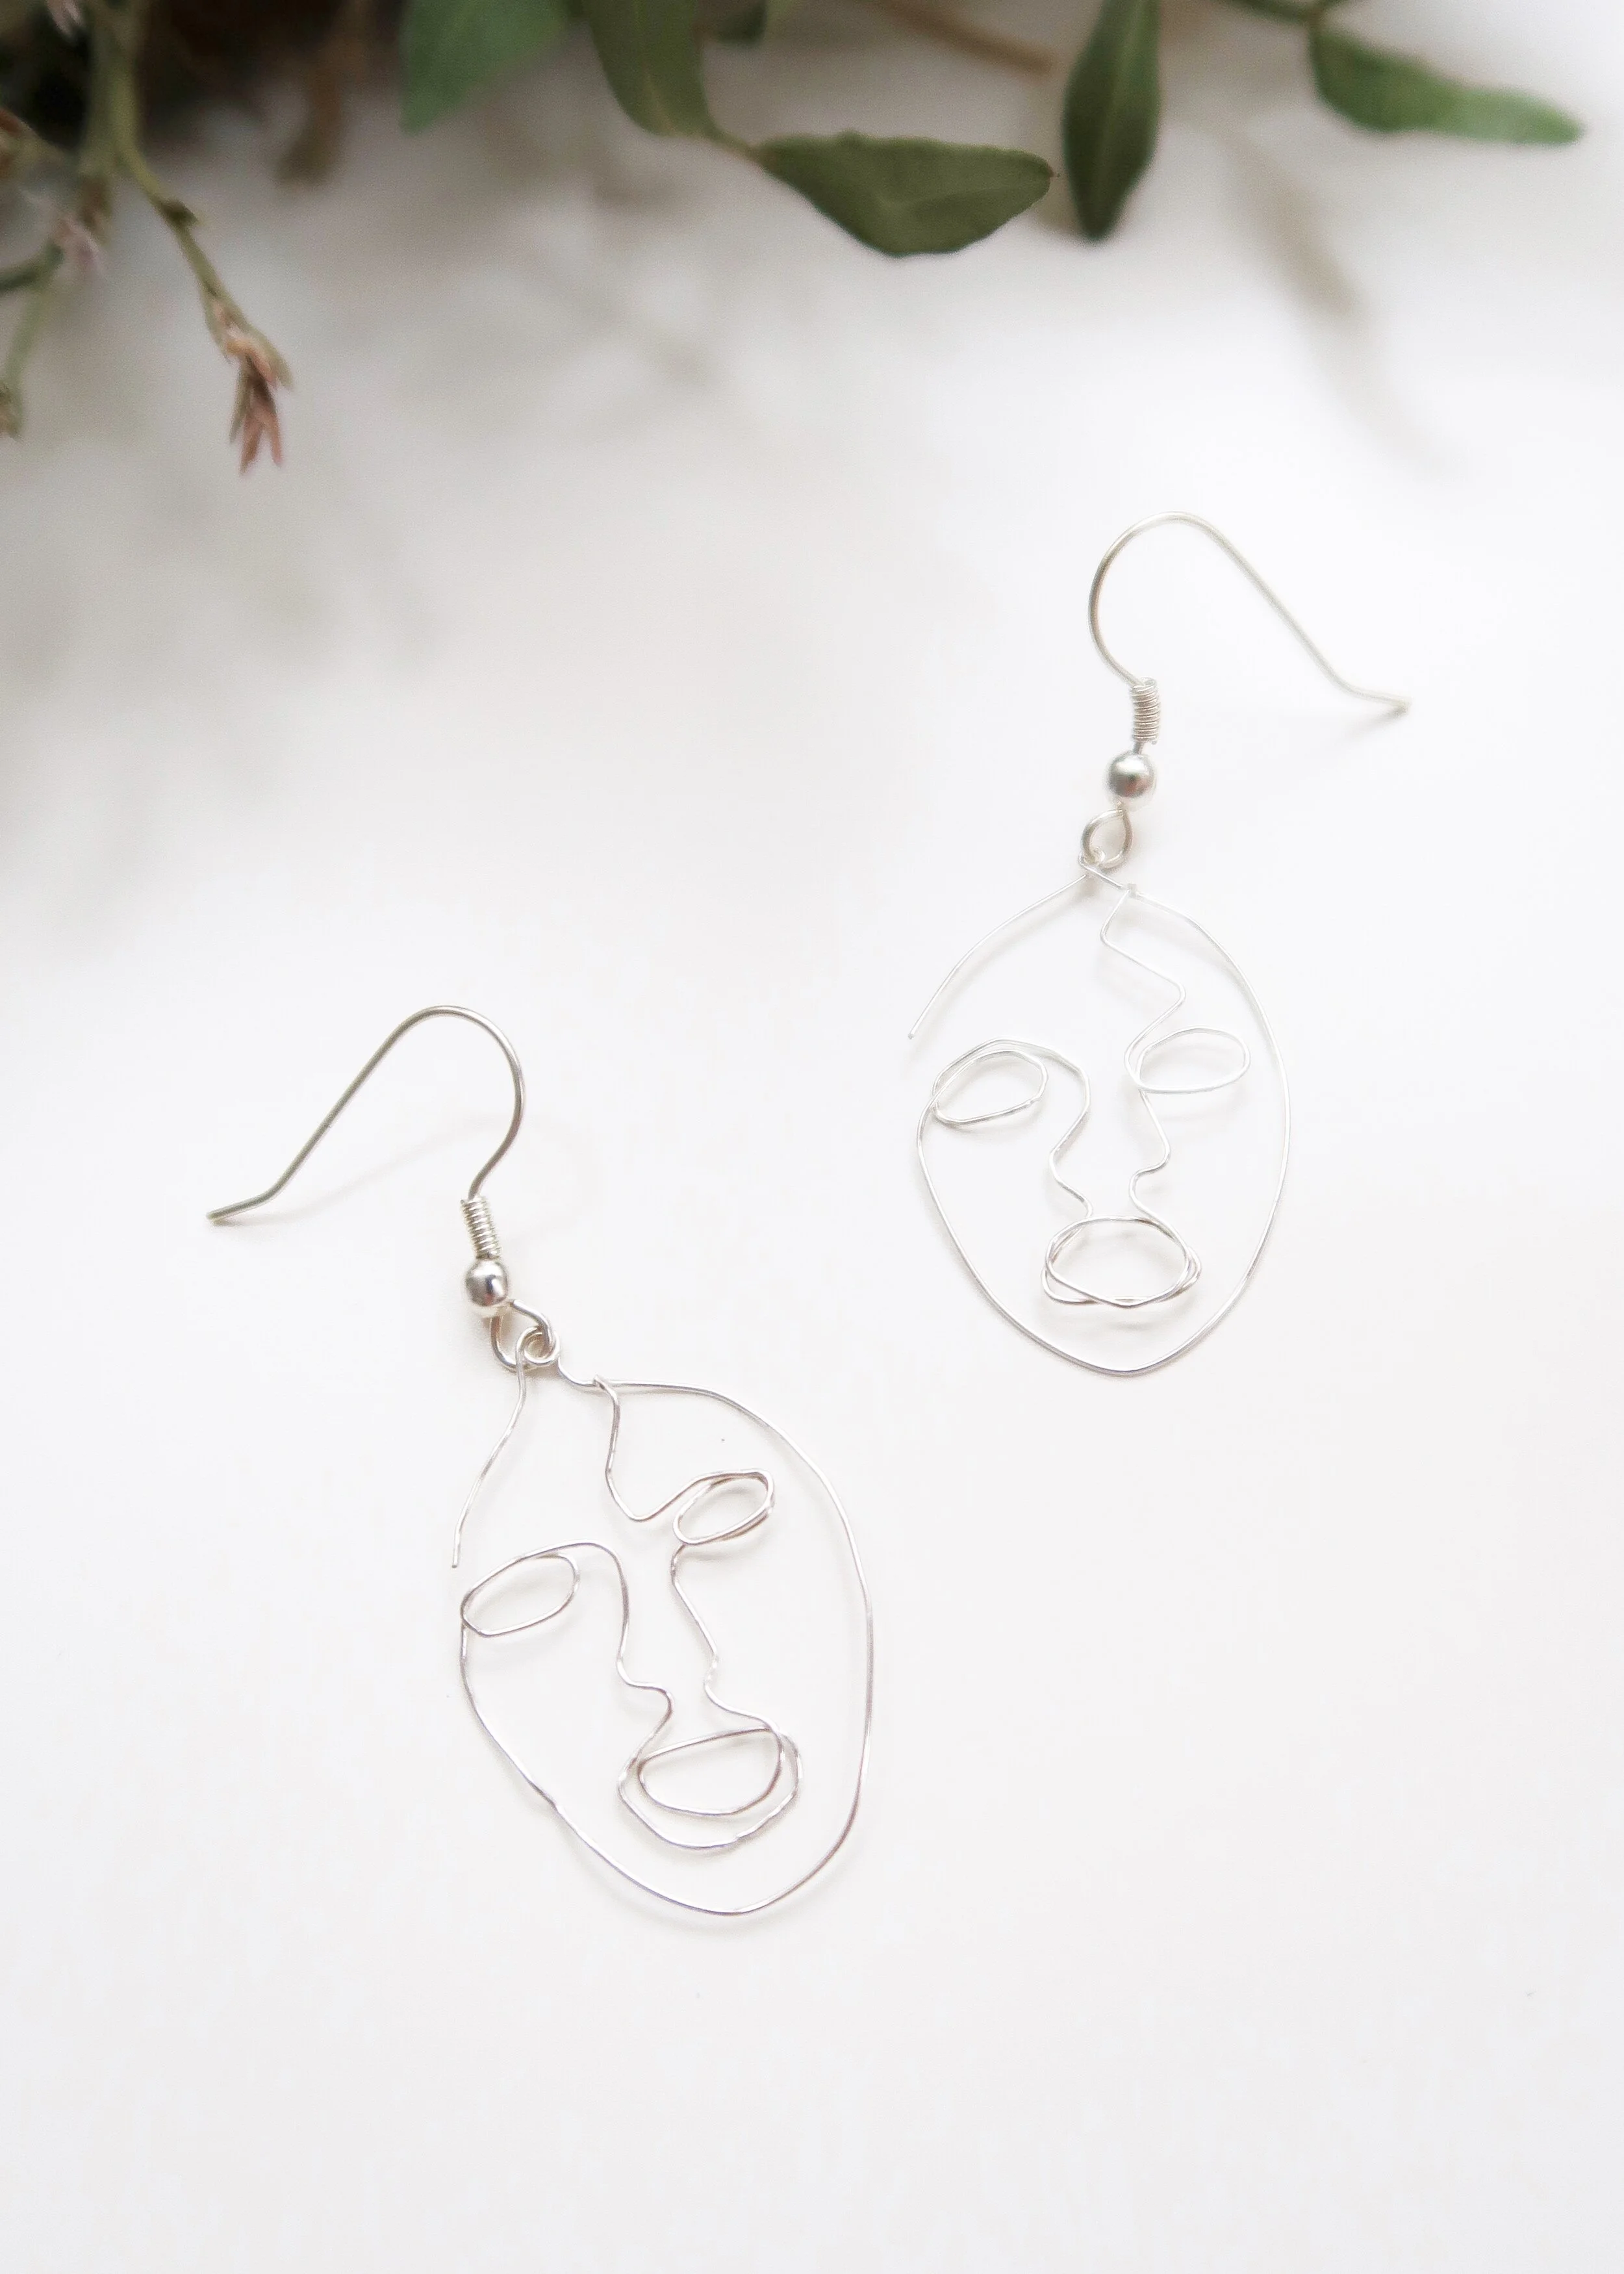
I can’t remember where I first saw a pair of abstract face earrings but I do remember feeling intrigued and unsure if I loved or hated them. Over time, they’ve really grown on me, and whilst looking at a pair on ASOS , I started wondering if and how you could make them. After a bit of a google, I couldn’t really find any tutorials for making your own that had the face detail I wanted, and so I sat down with a pen and piece of paper and worked out how I could make them with wire myself. Drawing it out was a lot easier than the actual making of them with wire, but I really love how they turned out and so I thought you might enjoy having a go at making them too.
I made them with some jewellery wire I already had, so the wire was great for moulding into shape, but in the long run, won’t be the most durable. So if you decide to make these, I’d recommend having a look at various thicknesses of jewellery wire and deciding what you want in terms of a good compromise between durability and malleability. Despite using the same template for each and a highly malleable wire, the faces still turned out quite differently, so be prepared to think of your earrings as sisters, not twins! Keep reading to find out what I used to make these wire face earrings and how I made them...

Jewellery Wire
Earring hooks
Round nose pliers
Flat nose pliers
Wire cutters


1.
First of all, draw out a face. I found it easiest to start at the top left, to draw a loop at the top of the head for the earring finding, and to then draw most of the outline of the face. You’ll then want to go into the face and without taking your pen off the pad or going backwards, draw the left eye, one side of the nose, mouth, other side of the nose, and then the right eye. Draw a line up from the eye with a slight bend to the outline to both ‘suggest’ an eyebrow and to make the earring more sturdy.

2.
Next, cut your length of jewellery wire, and be sure to give yourself slightly more than you think you’ll need. Hold the end down against the start of your line drawing, carefully bend your wire using pliers and your hands in to the same shape as your drawing. Use round nose pliers to ensure you have a loop at the top of your face.

3.
Continue all around to create the outline of the face, and then using the pliers, bend the wire in to create the features of the face. This can be a bit tricky, but it doesn’t have to be perfect, and if it ends up looking like a face, then I’d call that a success. Use the pliers to create the loops for the eyes and mouth, as well as the sharp bends of the nose.

4.
Once you’ve finished, cut any excess wire off and using some superglue, glue the end of the wire coming up from the eye to the wire at the top of the face. I chose to leave the left hand side of the face ‘open’ but you could also glue this closed if you wanted. Repeat steps 1-4 to create the other earring.

5.
Now you’ve got your pair of earrings, grab some earring hook findings and open the loop at the bottom using pliers. Hook the wire faces onto this using the loop at the top (making sure it’ll hang the right way round) and then close the loop on the finding.