• ABOUT ME
    • PRIVACY POLICY
  • COLLABORATE
  • BLOG
    • ART
    • WEDDING
    • LIBRARY
    • DECOR
    • JEWELLERY
    • STATIONARY
    • NAIL ART
    • BAKING
    • CHRISTMAS
    • EASTER
    • ART PRINTS
    • WEDDING STATIONARY
  • CONTACT
Menu

ISOSCELLA

Street Address
City, State, Zip
Phone Number

Your Custom Text Here

ISOSCELLA

  • ABOUT
    • ABOUT ME
    • PRIVACY POLICY
  • COLLABORATE
  • BLOG
  • ART
    • ART
    • WEDDING
    • LIBRARY
  • DIY
    • DECOR
    • JEWELLERY
    • STATIONARY
    • NAIL ART
    • BAKING
    • CHRISTMAS
    • EASTER
  • SHOP
    • ART PRINTS
    • WEDDING STATIONARY
  • CONTACT

DIY // ANTHROPOLOGIE MONOGRAM MUGS

May 23, 2016 isoscella

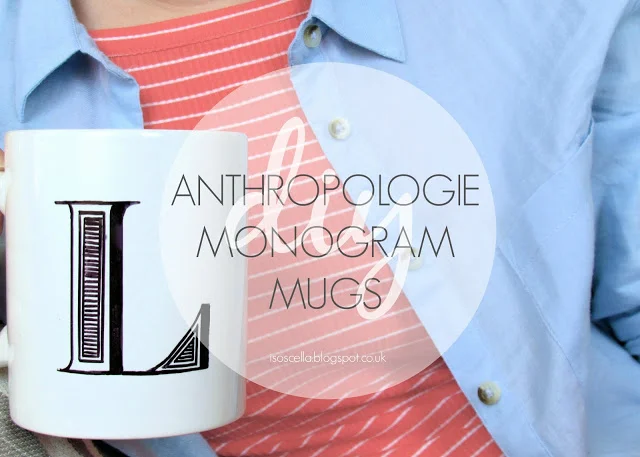
I'm probably about to completely live up to the 'British stereotype' but I just can't help it. For me, there really is nothing like a cup of tea. It's a hug in a mug. A pep talk before a big day. A comforting blanket after a rubbish day. And there's nothing better than having a fresh brew in a pretty mug. The Anthropologie Monogrammed Mug is an absolute classic, and DIY's of them have done their rounds on the internet time and time again. So, I'm probably a bit slow to the uptake, but I recently realised that I had a monogrammed-mug-sized hole in my life and so set about to create some of my own.

Plain white mug  |  Sharpie  |  Tracing paper  | Pencil | Scissors |  Scotch tape

1. Take your plain white mugs and make sure that they are clean. For this I just washed them as I would any mug (by hand, we don't have a dishwasher!) and made sure they were completely dry.

DIY Anthropologie Monogram Mugs by Isoscella

2. Print your chosen letter in the Roman Print font and place tracing paper over this before tracing the monogram with a pencil and ruler. My printer is currently out of action and so I adjusted the monogram on my laptop screen until it was the right size for mug and placed my tracing paper over this before lightly tracing around the letter.

DIY Anthropologie Monogram Mugs by Isoscella

3. Turn the tracing paper over so that the monogram is facing down. Using the pencil and ruler, trace the monogram on the other side of the tracing paper. I then carefully traced the either side, using a ruler. This is the side that will come out on the mug so you want this side to be neat.

DIY Anthropologie Monogram Mugs by Isoscella

4. Cut around the monogram leaving approximately 0.5 cm of blank tracing paper around it. To make transferring onto the mug a bit easier, I cut around the tracing so that I could then stick it temporarily to the mug.

DIY Anthropologie Monogram Mugs by Isoscella

5. Fix the tracing paper to the mug with tape where you would like the monogram to be transferred to. This will stop the tracing paper moving about and ruining your tracing!

DIY Anthropologie Monogram Mugs by Isoscella

6. Using a pencil and some pressure, trace the monogram again so that when the tracing paper is removed a faint outline is left on the mug. It's really hard to see in this photo but there's a very faint outline on the mug - promise!

DIY Anthropologie Monogram Mugs by Isoscella

7. Using a black sharpie pen and a ruler, go over the faint pencil lines. I don't have the steadiest of hands and unfortunately the only sharpie I had to hand was quite thick, so I used a ruler to help keep my lines straight.

DIY Anthropologie Monogram Mugs by Isoscella

8. Remove any mistakes with your nail or some nail varnish remover before leaving your mug to dry for a day or so. Before it dries, tidy up any mistakes. I just used my nail and found that it came off easily but I've read else where that nail varnish remover is good for this.

DIY Anthropologie Monogram Mugs by Isoscella

9. Place your mug in your oven and turn the oven on to 180°C. Bake for 30 minutes. Now I chose this temperature and time from averaging some of the 'recipes' that I read elsewhere however I have more recently come across instructions to use a much higher temperature and to bake for longer. If you're braver than me, give it a go!

10. Switch the oven off and only remove the mug from the oven once the oven is completely cool. I read somewhere that it can be better to leave the mug in the oven to cool down with the oven which I assume is so that it does so slowly.

...and that's it!

Now this mug is by no means perfect and if I were to scrub at the monogram with the rough side of a sponge I'm pretty sure I could eventually get it off. But I've been happily drinking my tea from it and hand washing it (carefully I admit) with no issues. I'd love to hear about your sharpie mug creative endeavours and particularly if you do it any differently.

Let me know in the comments below!

♥

In DIY Tags home
← 5 FAVES FRIDAY // DIY HEN PARTY IDEASDIY // POM POM CUSHION →
 

Decorating, DIY-ing and doodling my way through life. Have a look around and let’s get creative!

>> FIND OUT MORE <<

Follow
The office is still one of my favourite transformations in the house! 😍

I started by panelling the wall with MDF strips and then painted the wall with a mix of colours. I used three IKEA drawer units for the base of the desk and then secured the de

ART

DIY

LIFE


THE LATEST

Featured
Wooden Mushroom Decor
Apr 26, 2025
Wooden Mushroom Decor
Apr 26, 2025
Apr 26, 2025
Hand-Painted Floral Mural Arch
Mar 29, 2025
Hand-Painted Floral Mural Arch
Mar 29, 2025
Mar 29, 2025
Easy IKEA Antilop Makeover
Mar 1, 2025
Easy IKEA Antilop Makeover
Mar 1, 2025
Mar 1, 2025
Clay Leaf Shelf
Jun 29, 2024
Clay Leaf Shelf
Jun 29, 2024
Jun 29, 2024
Nursery Feature Wall
Jun 15, 2024
Nursery Feature Wall
Jun 15, 2024
Jun 15, 2024


THE GREATEST

Featured
DIY // IKEA LACK TABLE INDUSTRIAL HACK
Sep 22, 2020
DIY
DIY // IKEA LACK TABLE INDUSTRIAL HACK
Sep 22, 2020
DIY
Sep 22, 2020
DIY
DIY // CLAY ALL-SEEING EYE MIRROR
Aug 14, 2020
DIY
DIY // CLAY ALL-SEEING EYE MIRROR
Aug 14, 2020
DIY
Aug 14, 2020
DIY
DIY // CLAY FACE DISH
Apr 29, 2020
DIY
DIY // CLAY FACE DISH
Apr 29, 2020
DIY
Apr 29, 2020
DIY
DIY // ABSTRACT ART FLORAL EGGS
Mar 25, 2020
DIY
DIY // ABSTRACT ART FLORAL EGGS
Mar 25, 2020
DIY
Mar 25, 2020
DIY
DIY // WIRE FACE EARRINGS
Feb 16, 2020
DIY
DIY // WIRE FACE EARRINGS
Feb 16, 2020
DIY
Feb 16, 2020
DIY

Follow
^^ BACK TO TOP
How does Monday come round so quick?!Wishing I could cosy up here today ✨

#mondaymood #storyofmyhome #mydailyhomesquare #interiordesign #budgetdiy #realstylishhomes #ourdiyhomes #femalediycollective #discoverunder5k #myhousethismonth #myhousedownsou
I&rsquo;ve got the day off today (woop!) and although it&rsquo;s not quite warm enough to sit out here yet, the sun is shining and I think a little walk to blow out the cobwebs is exactly what I need. Hope Monday is treating you well! ☀️

#summerdrea
Had such a lovely day seeing one of my besties and her adorable new baby that I completely forgot to share today&rsquo;s new blog post!

Head over to the blog for all the details of this easy DIY ring dish 🔝✨

#diy #diyhomedecor #diyhome #diyvalenti
That sunshine 👌🏻☀️

#mycosyhome #livingroomdecor #livingroominspo #mydiymydecor #homeobsessed #lovemydecor #homeinterioruk #discoverunder5k #diyhome #diyhomedecor #myhousethismonth #myhousedownsouth #realstylishhomes #ourdiyhomes #happythursday #in
A little corner our home on this chilly Tuesday morning ✨
.
.
#interior #homeobsessed #mycosyhome #homeinterioruk #instadecorating #homesofinstagram #happymonday #mondaymotivation #instainteriors #cornersofmyhome #myhousethismonth #myhousedownsouth #

Copyright 2021 isoscella. All rights reserved.

Powered by Squarespace