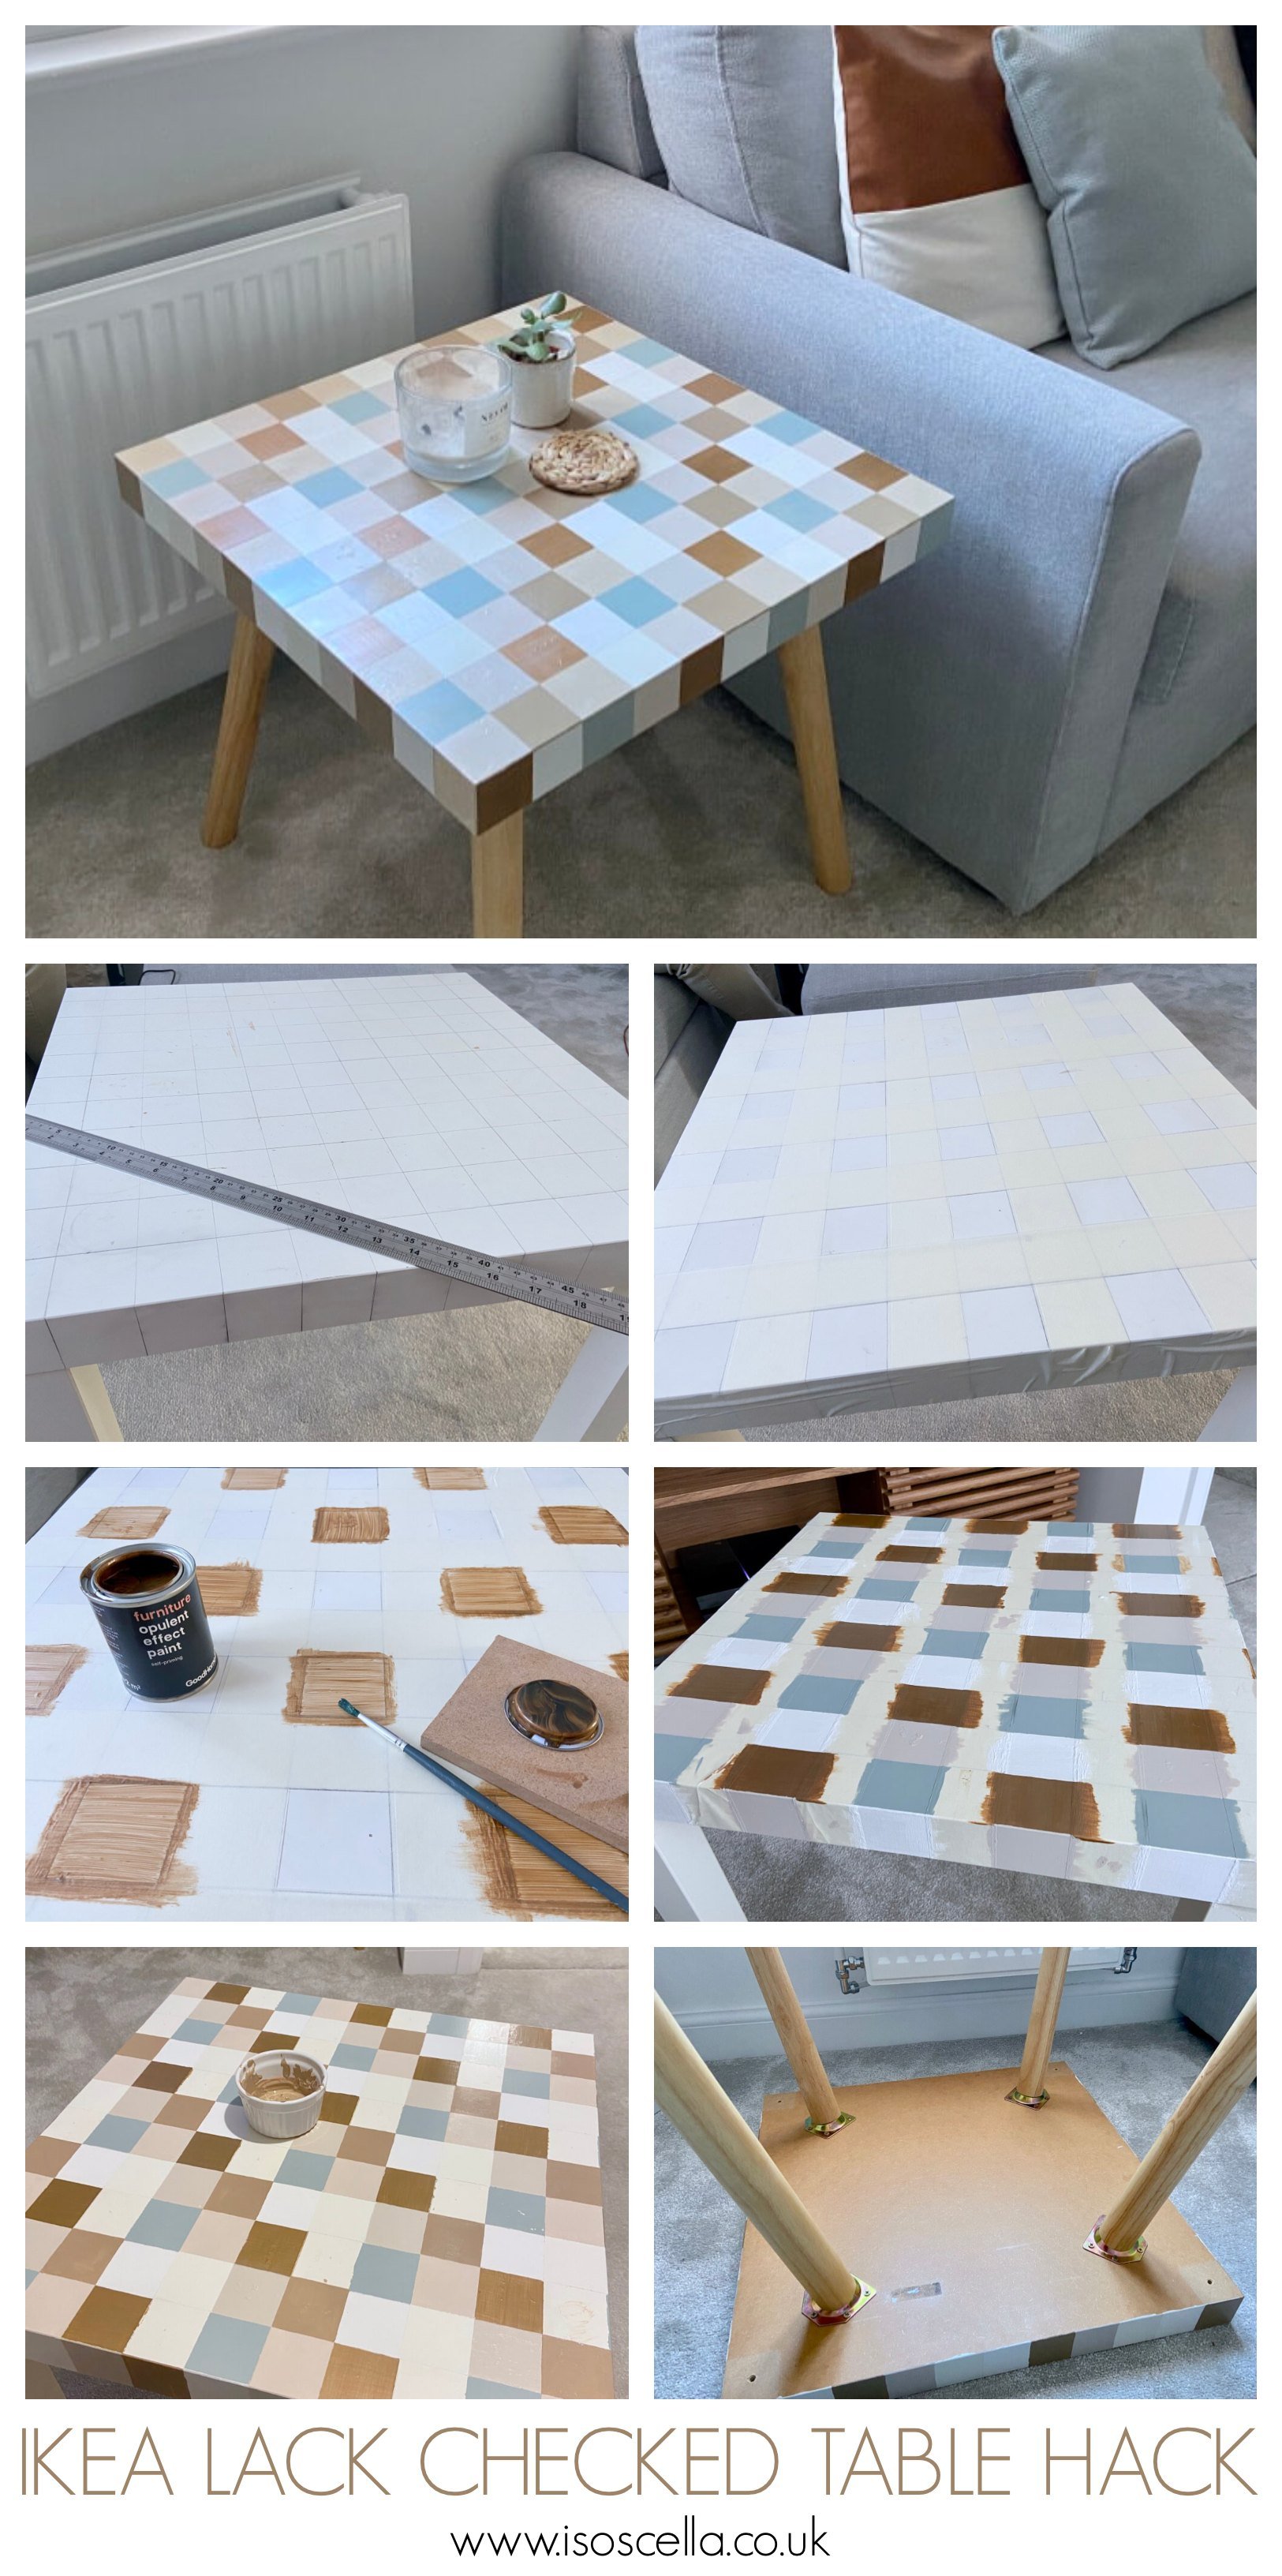
Hack an old Ikea lack side table to create this fun and modern checked table!
We’ve had our Ikea Lack side table since we first moved in together back in 2014 and it’s seen and been through a lot. Over the years I’ve used it to craft on in front of the TV and so it’s accumulated lumps, bumps, dents and chips all over it. Now that we’re in the house and we have our lovely desk, I no longer use it for crafting, and we actually use it as a side table in our office/games/guest room. The other half has been desperate for ages for us to get another side table given the state of it, but I thought I’d have ago at giving it a new lease of life. I’ve been seeing checked patterns and designs crop up all over the place, as well as more retro designs, so I decided to bring some of those ideas into my design. I’m really pleased with how it now looks, there are still a few lumps and bumps, but with the pattern on top it’s really not noticeable. If you fancy having a go at this yourself, keep reading to find out what I used and for the step by step tutorial…


1.
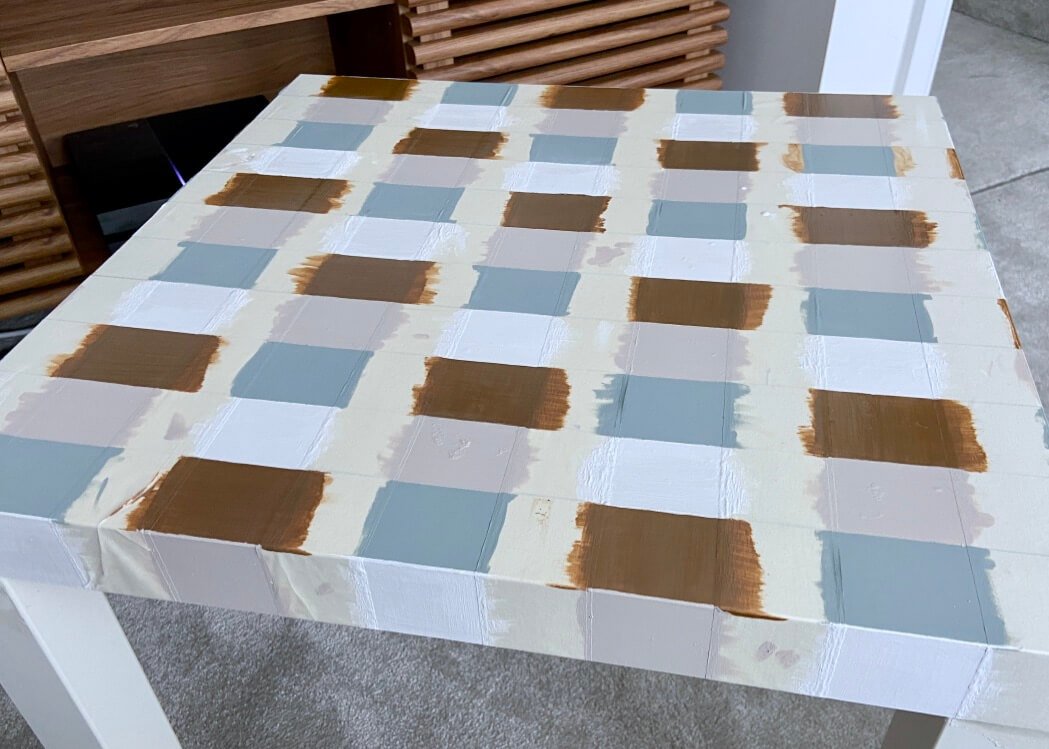
First of all, clean your Lack side table and draw out a grid over the top and sides. The table is 50cm x 50cm, so I chose to have my grid lines be at 5cm intervals. This gave me 5cm x 5cm squares all over the top and sides.

2.
Next, I blocked out every other vertical row using masking tape, and blocked out every other column using masking tape. This left a pattern of squares free for me to paint.

3.
I painted every other one of these exposed squares with a bronze coloured furniture paint. I did this in several light layers, and probably did around 3 or 4 coats in total.

4.
On the other exposed squares, I used a green blue to match my decor. This had a matt finish and only needed a couple of coats. Once these were dry, I removed the tape covering the columns.
5.
With the rows still taped, I then painted the newly exposed squares in different coloured furniture paint. Again, I did this until i was happy with the finish of each square. Once dry, I removed the remaining tape.
6.
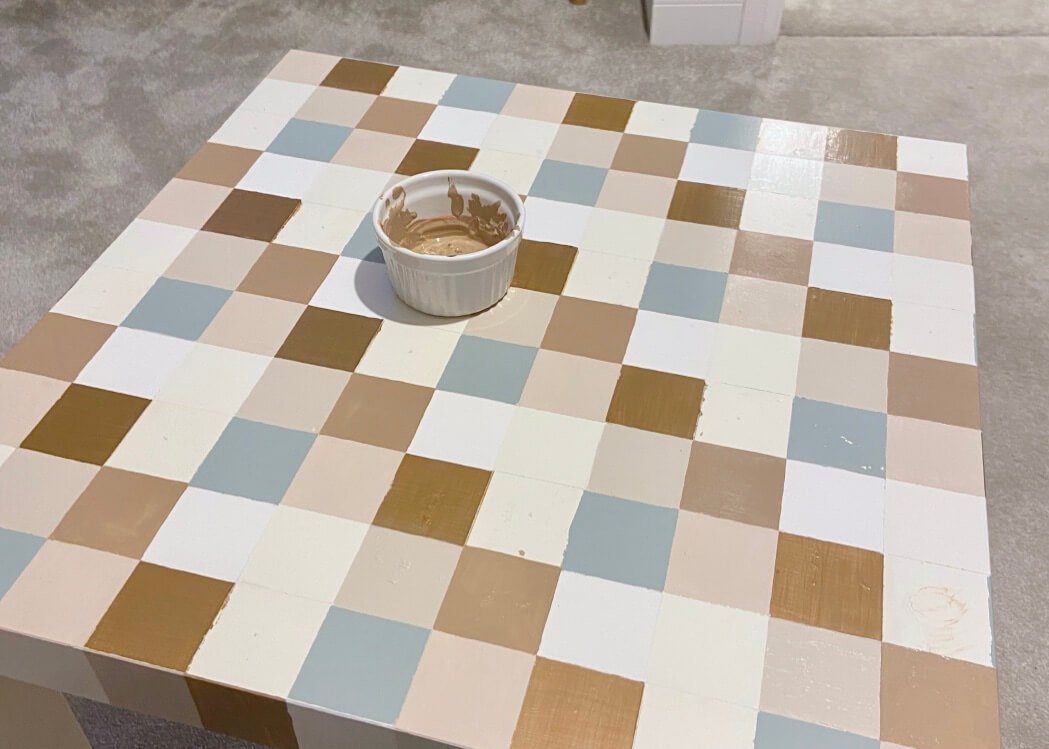
I then used some tape lightly covering the already painted squares to paint the remaining exposed squares in different furniture paint. For one of the squares, I decided to mix two of my colours to bring in another more earthy tone.
7.
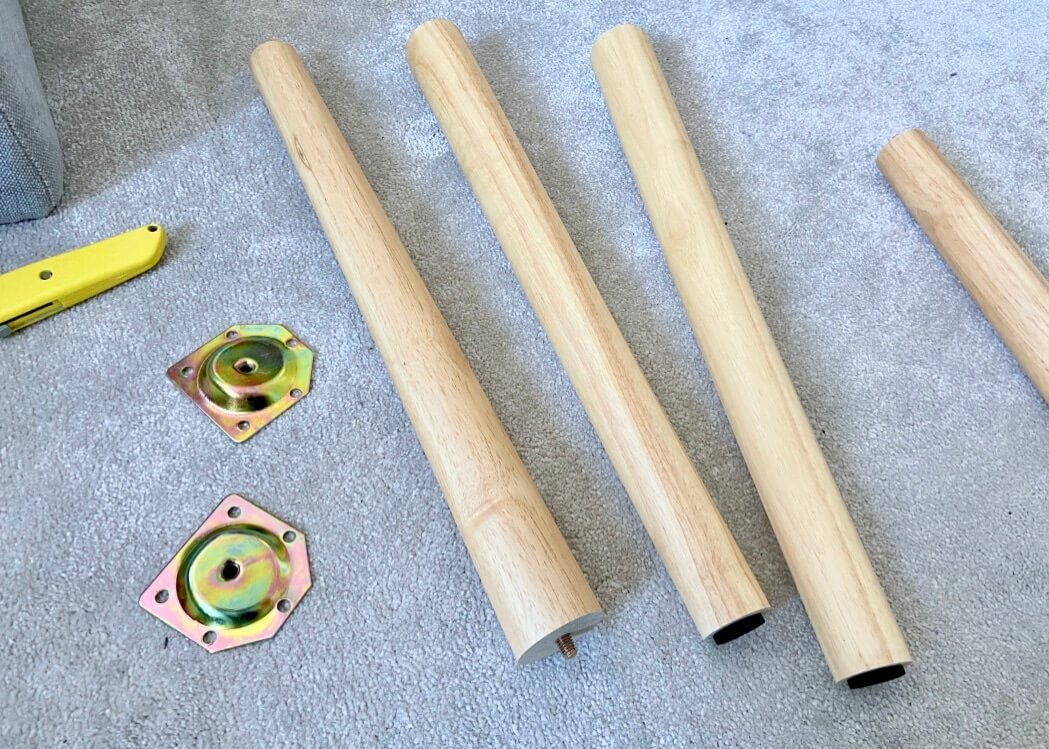
Once the table top was completely dry, I sprayed all over with a heavy duty sealant, before leaving this to dry. This dried pretty quickly but in the meantime I assembled my new wooden legs.

8.
When I was satisfied the sealant was completely set, I measured 8cm up and across from each corner and used this to screw in the table leg plates in the same place on each corner. I then screwed in the table legs.