A quick and easy way to create a faux brick effect in your faux fireplace!
I’m no stranger to creating a faux brick effect, I’ve previously used plaster and tape to create a brick effect on one of the walls in our office/guest room. That was quite a fun, although laborious process, and it came out so well. This time however, I wasn’t sure if I wanted to commit to the faux brick effect in our new faux fireplace, and so I opted for something removable.
PEEL & STICK TILES
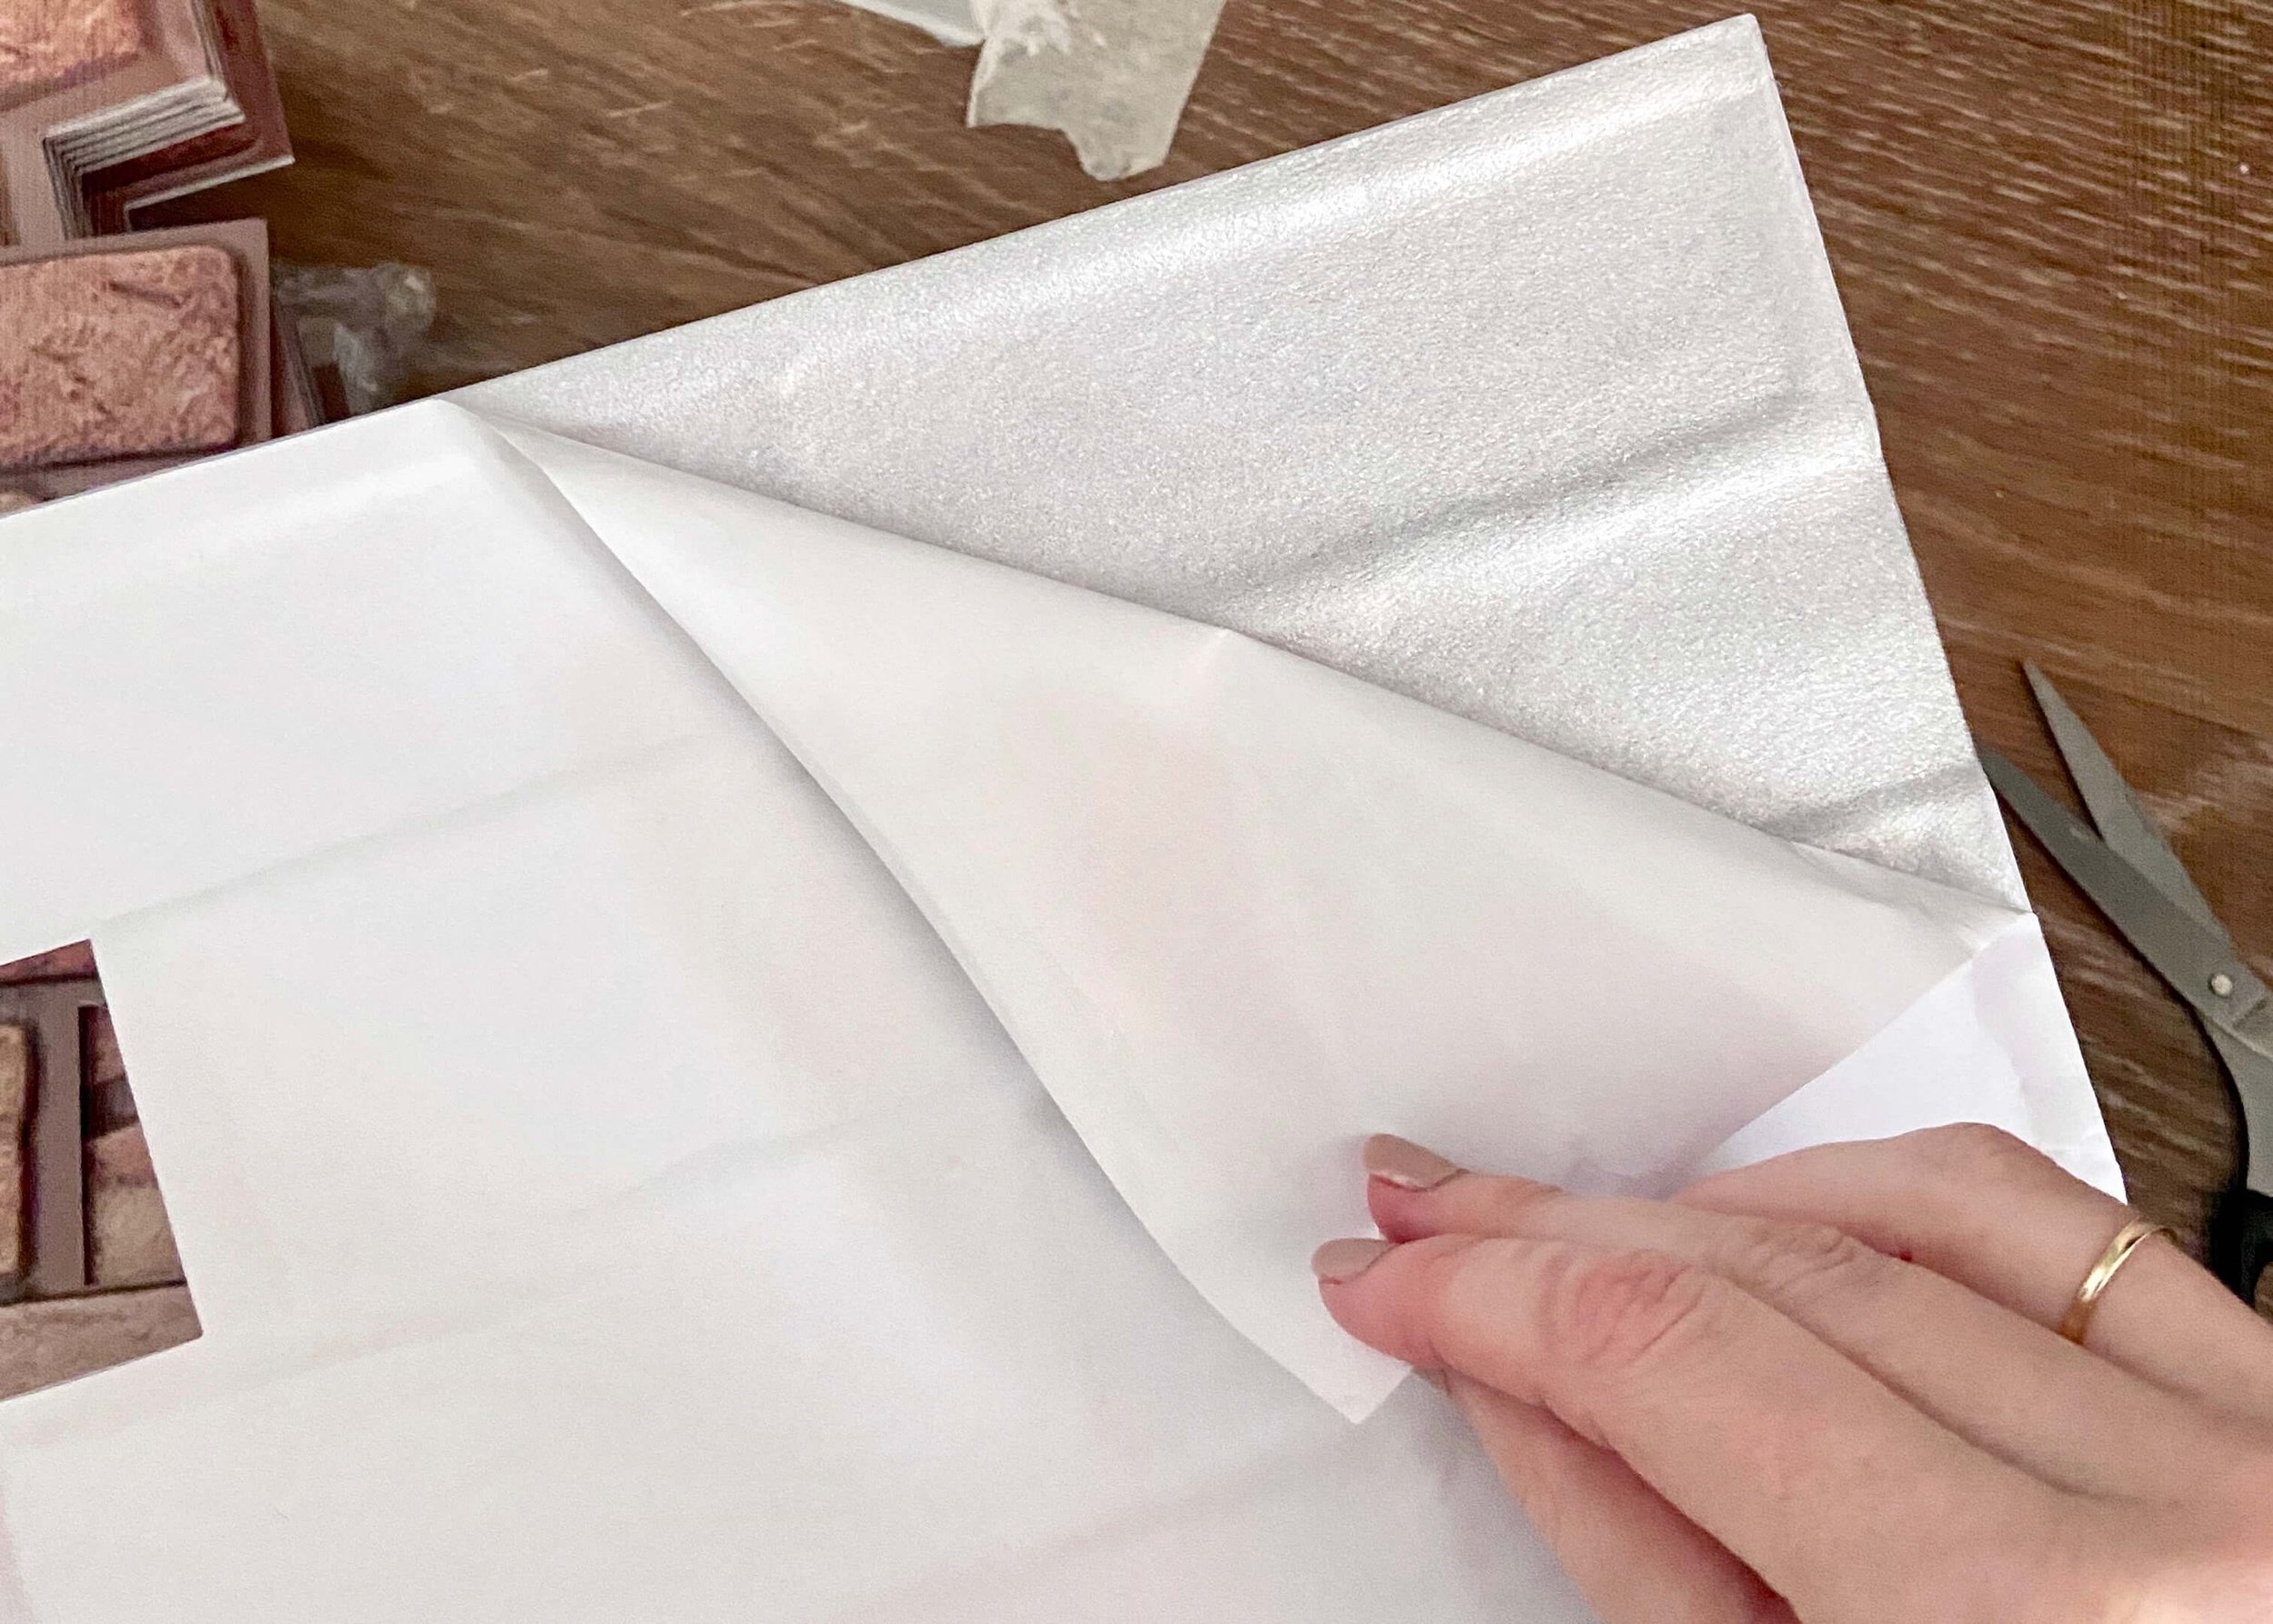
After a bit of research, I opted for some eel and stick tiles. When I was looking for what to buy, the main thing I was looking for was that they would be textured. I wasn’t too fussed by the colour of them, as I knew I would be painting them white, and so the style of brick and how textured they were, was what cemented my decision. I wasn’t sure how well this was going to work either, and so I also didn’t want to break the bank. I was pleasantly suprised by how well the tiles adhered to the fireplace surround, though I did notice when painting them that the colour started to come off of the tiles - so they probably weren’t the best quality.
With a bit of perserverence and a few layers of paint later, we finally got them to be white, and for a temporary solution we’re pretty pleased with it. For a more permanent and better quality solution, you could always use brick tiles which would give a much more realistic effect. As always, please do share this post if you enjoyed it, and keep reading to find out what materials I used and the step-by-step tutorial!


1.
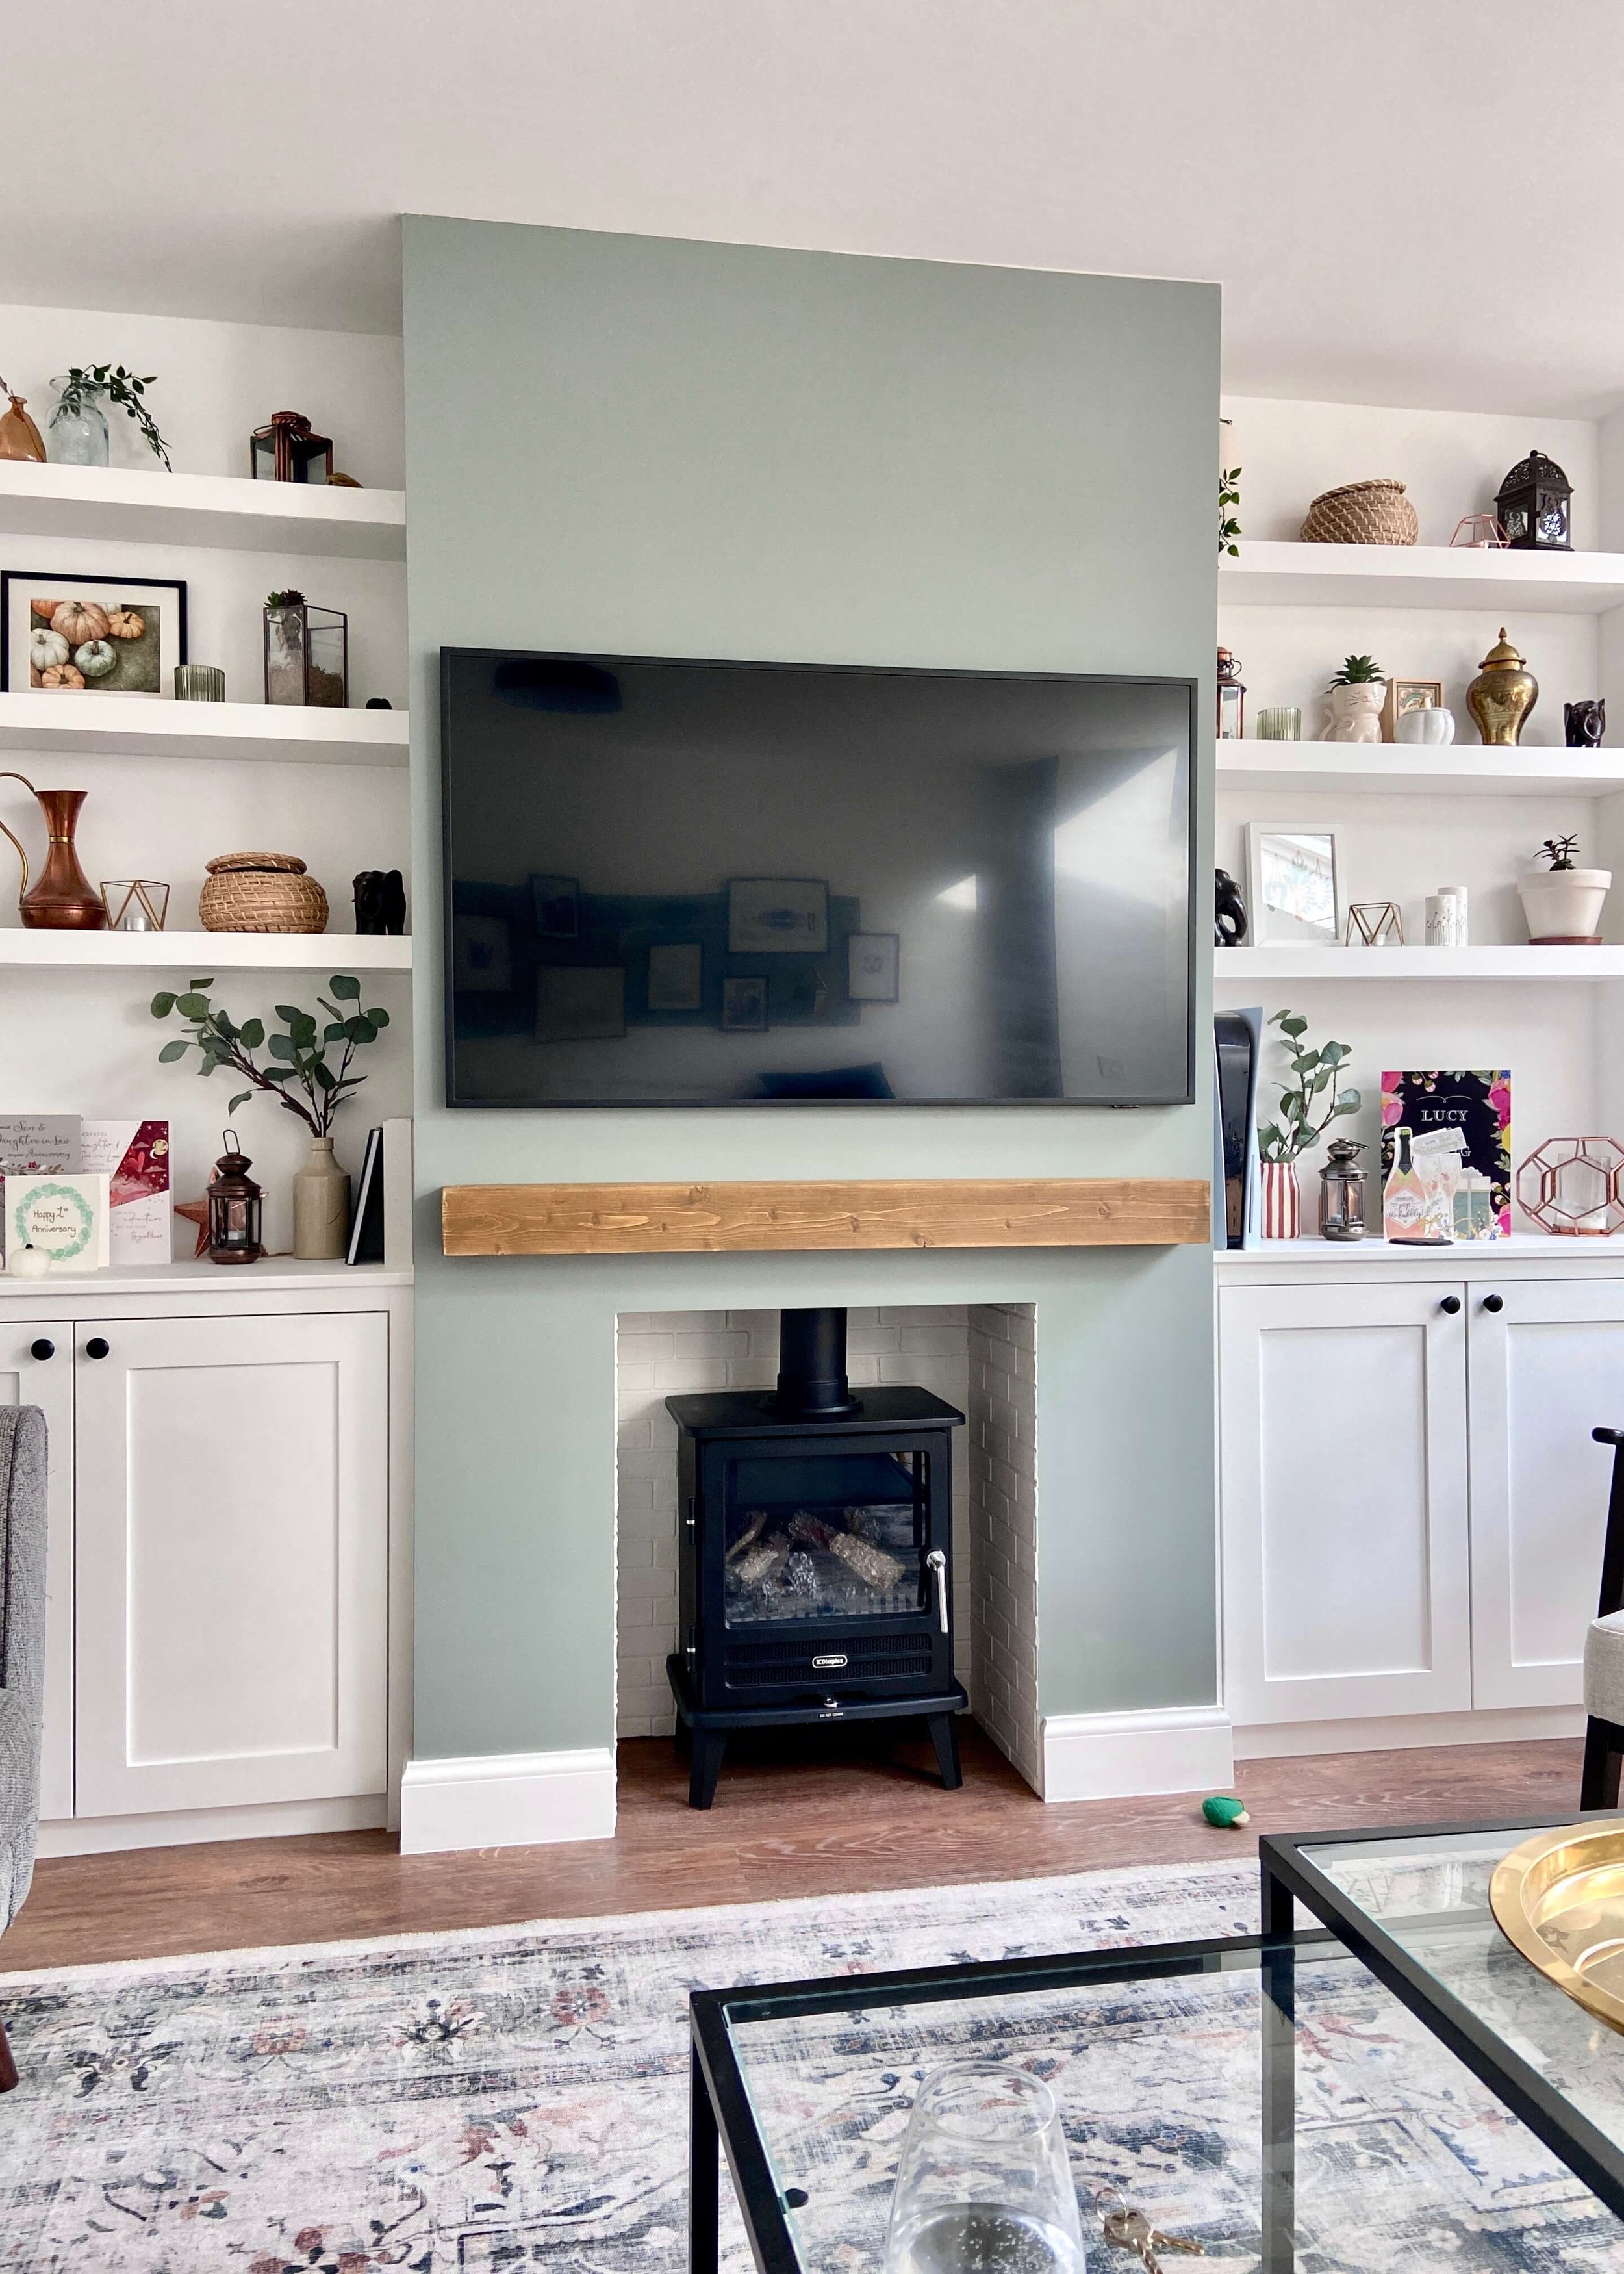
First of all, we primed the surround of our faux fireplace to make it easier to remove the tiles in the future. We have an electric fire which does not have a real flame and only gives out heat from the front (and which we don’t use all that often) so we felt confident to do this hack. I would not recommend it if you have a real flame or fire.

2.
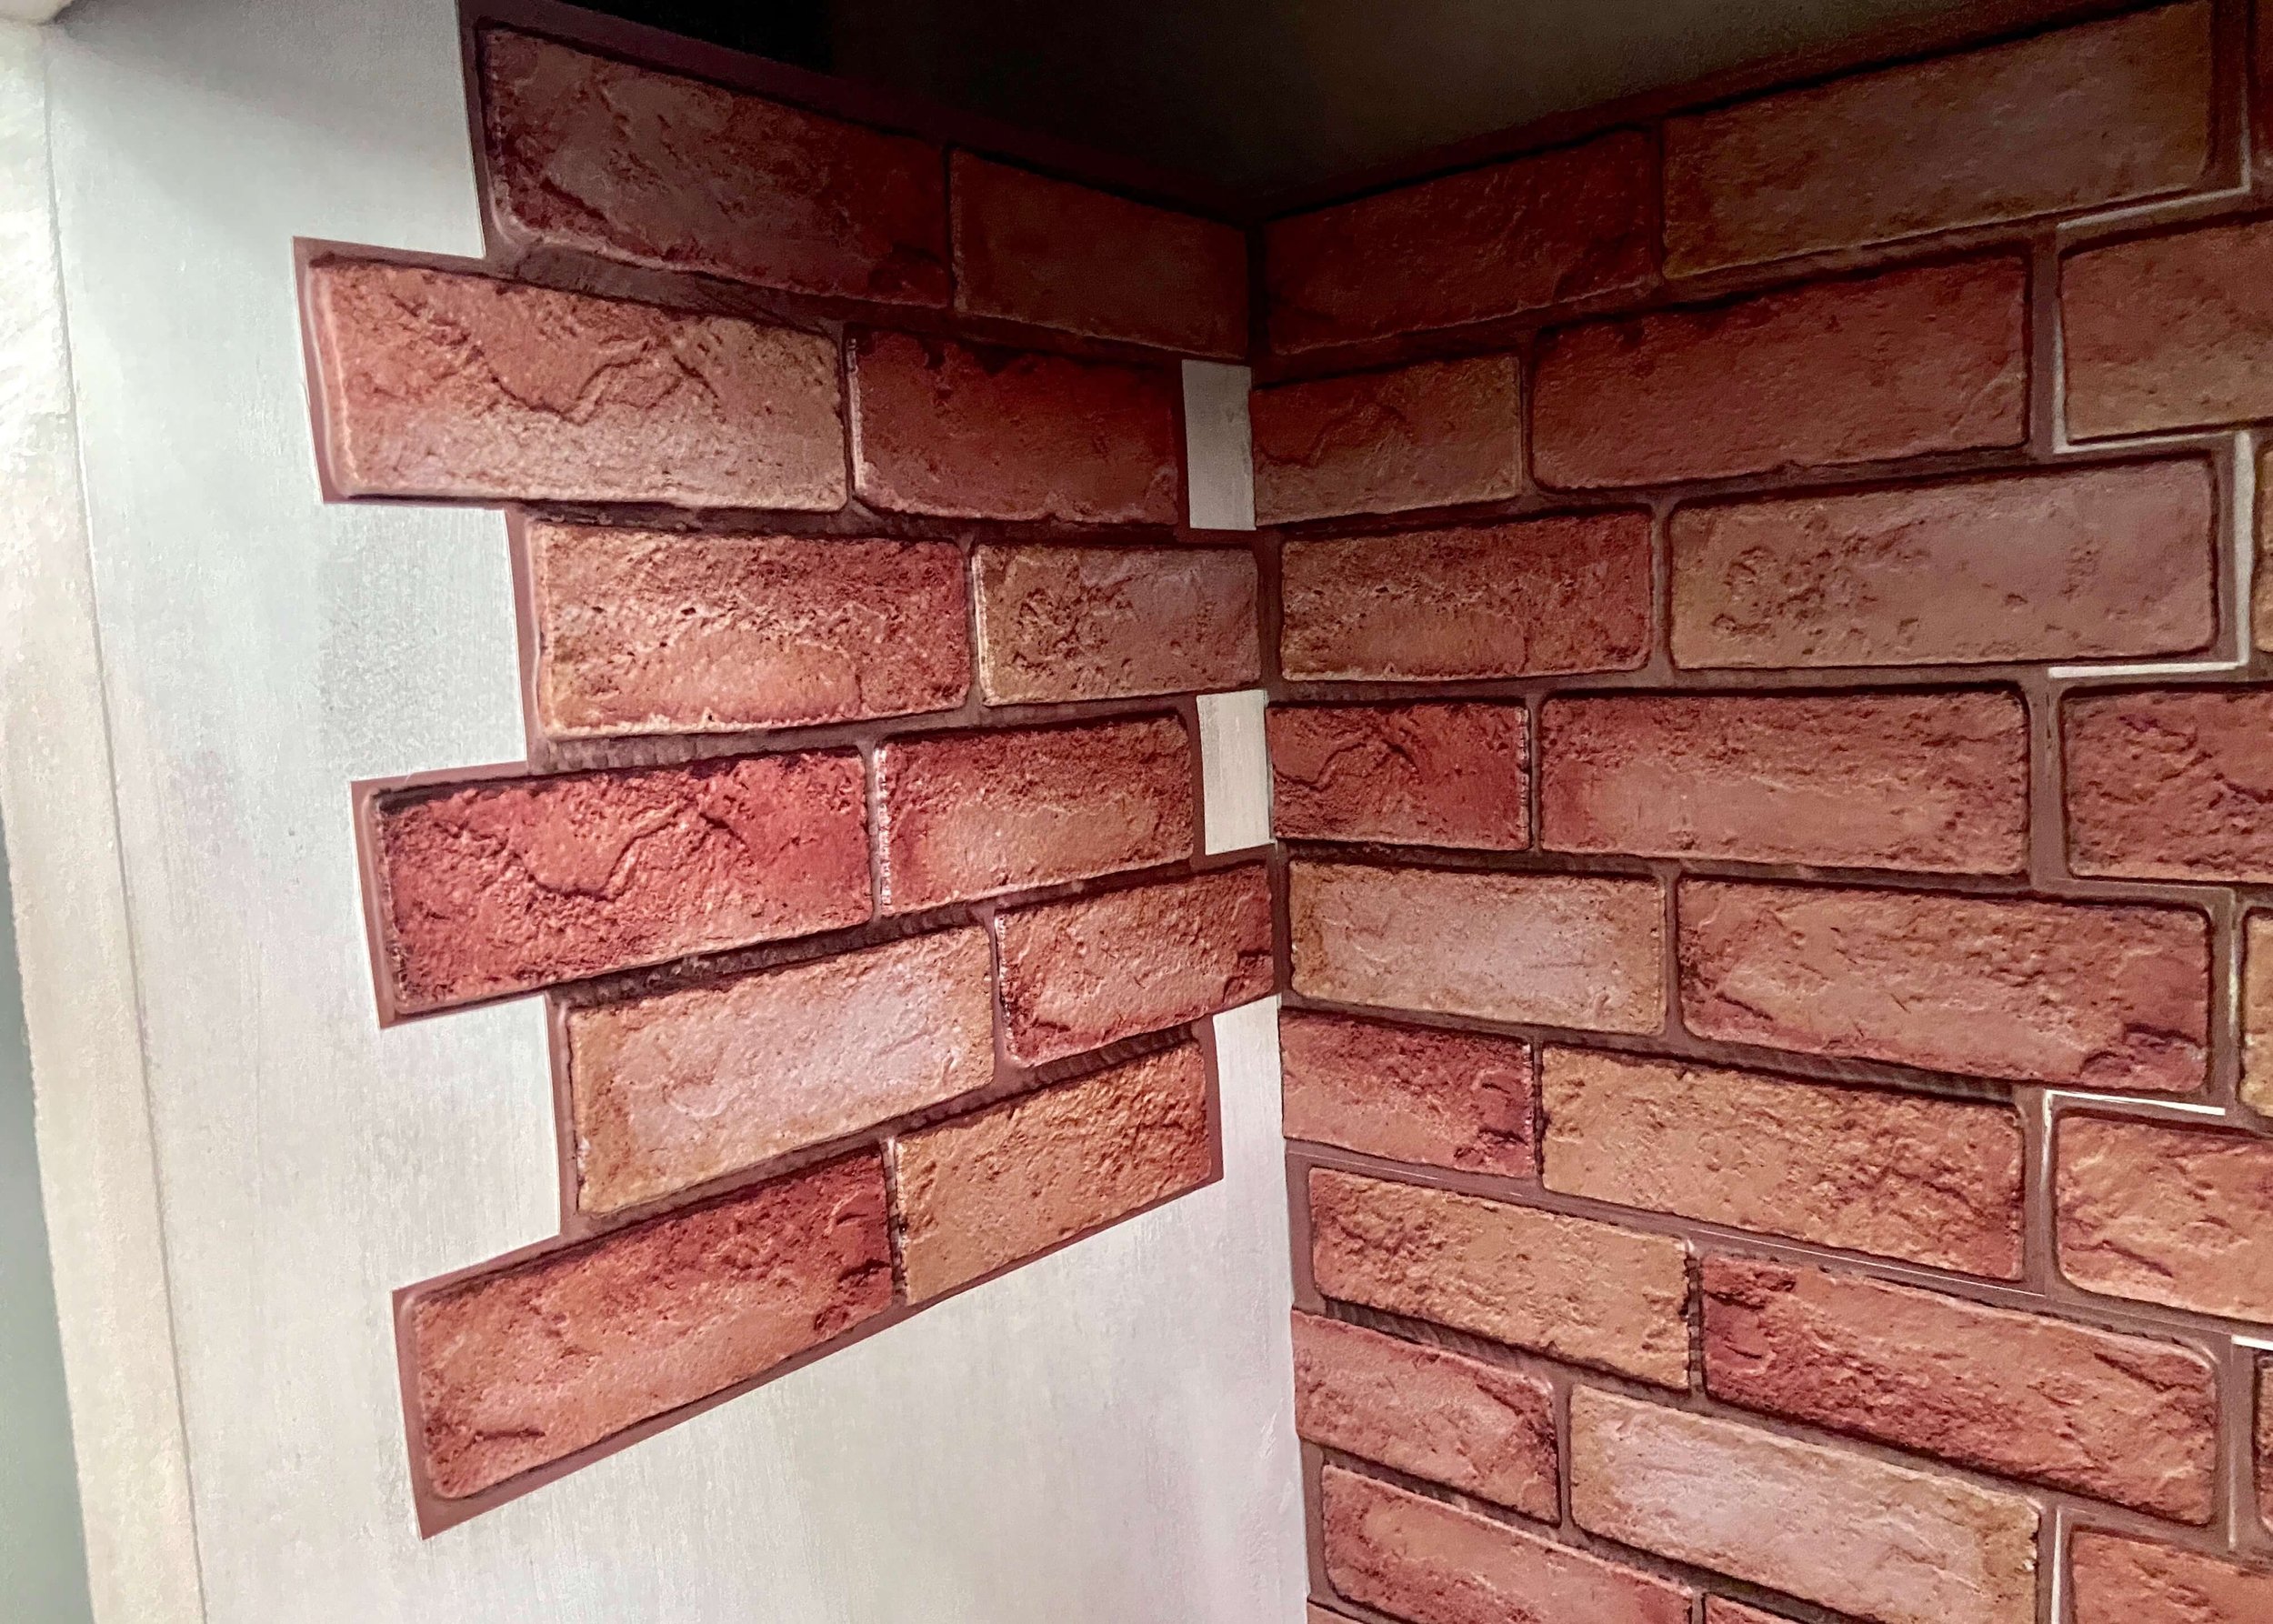
Once the primer was dry, we grabbed the brick tiles and started working out how they would most realistically interlink.

3.
Using scissors, we cut one side of the first tile so that it was straight and also removed some of the excess material around the brick effect on the right. This enabled the tiles to fit more snuggly together.
4.
We then peeled the backing off of the first peel and stick tile.

5.
We then placed the first tile on the back of the fire surround in the top left, ensuring that the lines between the bricks were straight with a level.

6.
We then chose our next tile, and dry fitted it to check it would interlink with the tile already stuck down. I used scissors to trim off any excess to make sure it did, but i wasn’t too worried about any small gaps. We continued this all over, using a stanley knife to cut out a gap for our electric fire cable.
7.
Once the back was covered, we then started on the sides. We again, through trial and error, found the tiles that would fit the best, but here we didn’t trim the edge of the tile that would be going up against the corner. Instead we kept a small gap, and cut off small bis of matching brick from other tiles to fill these gaps.

8.
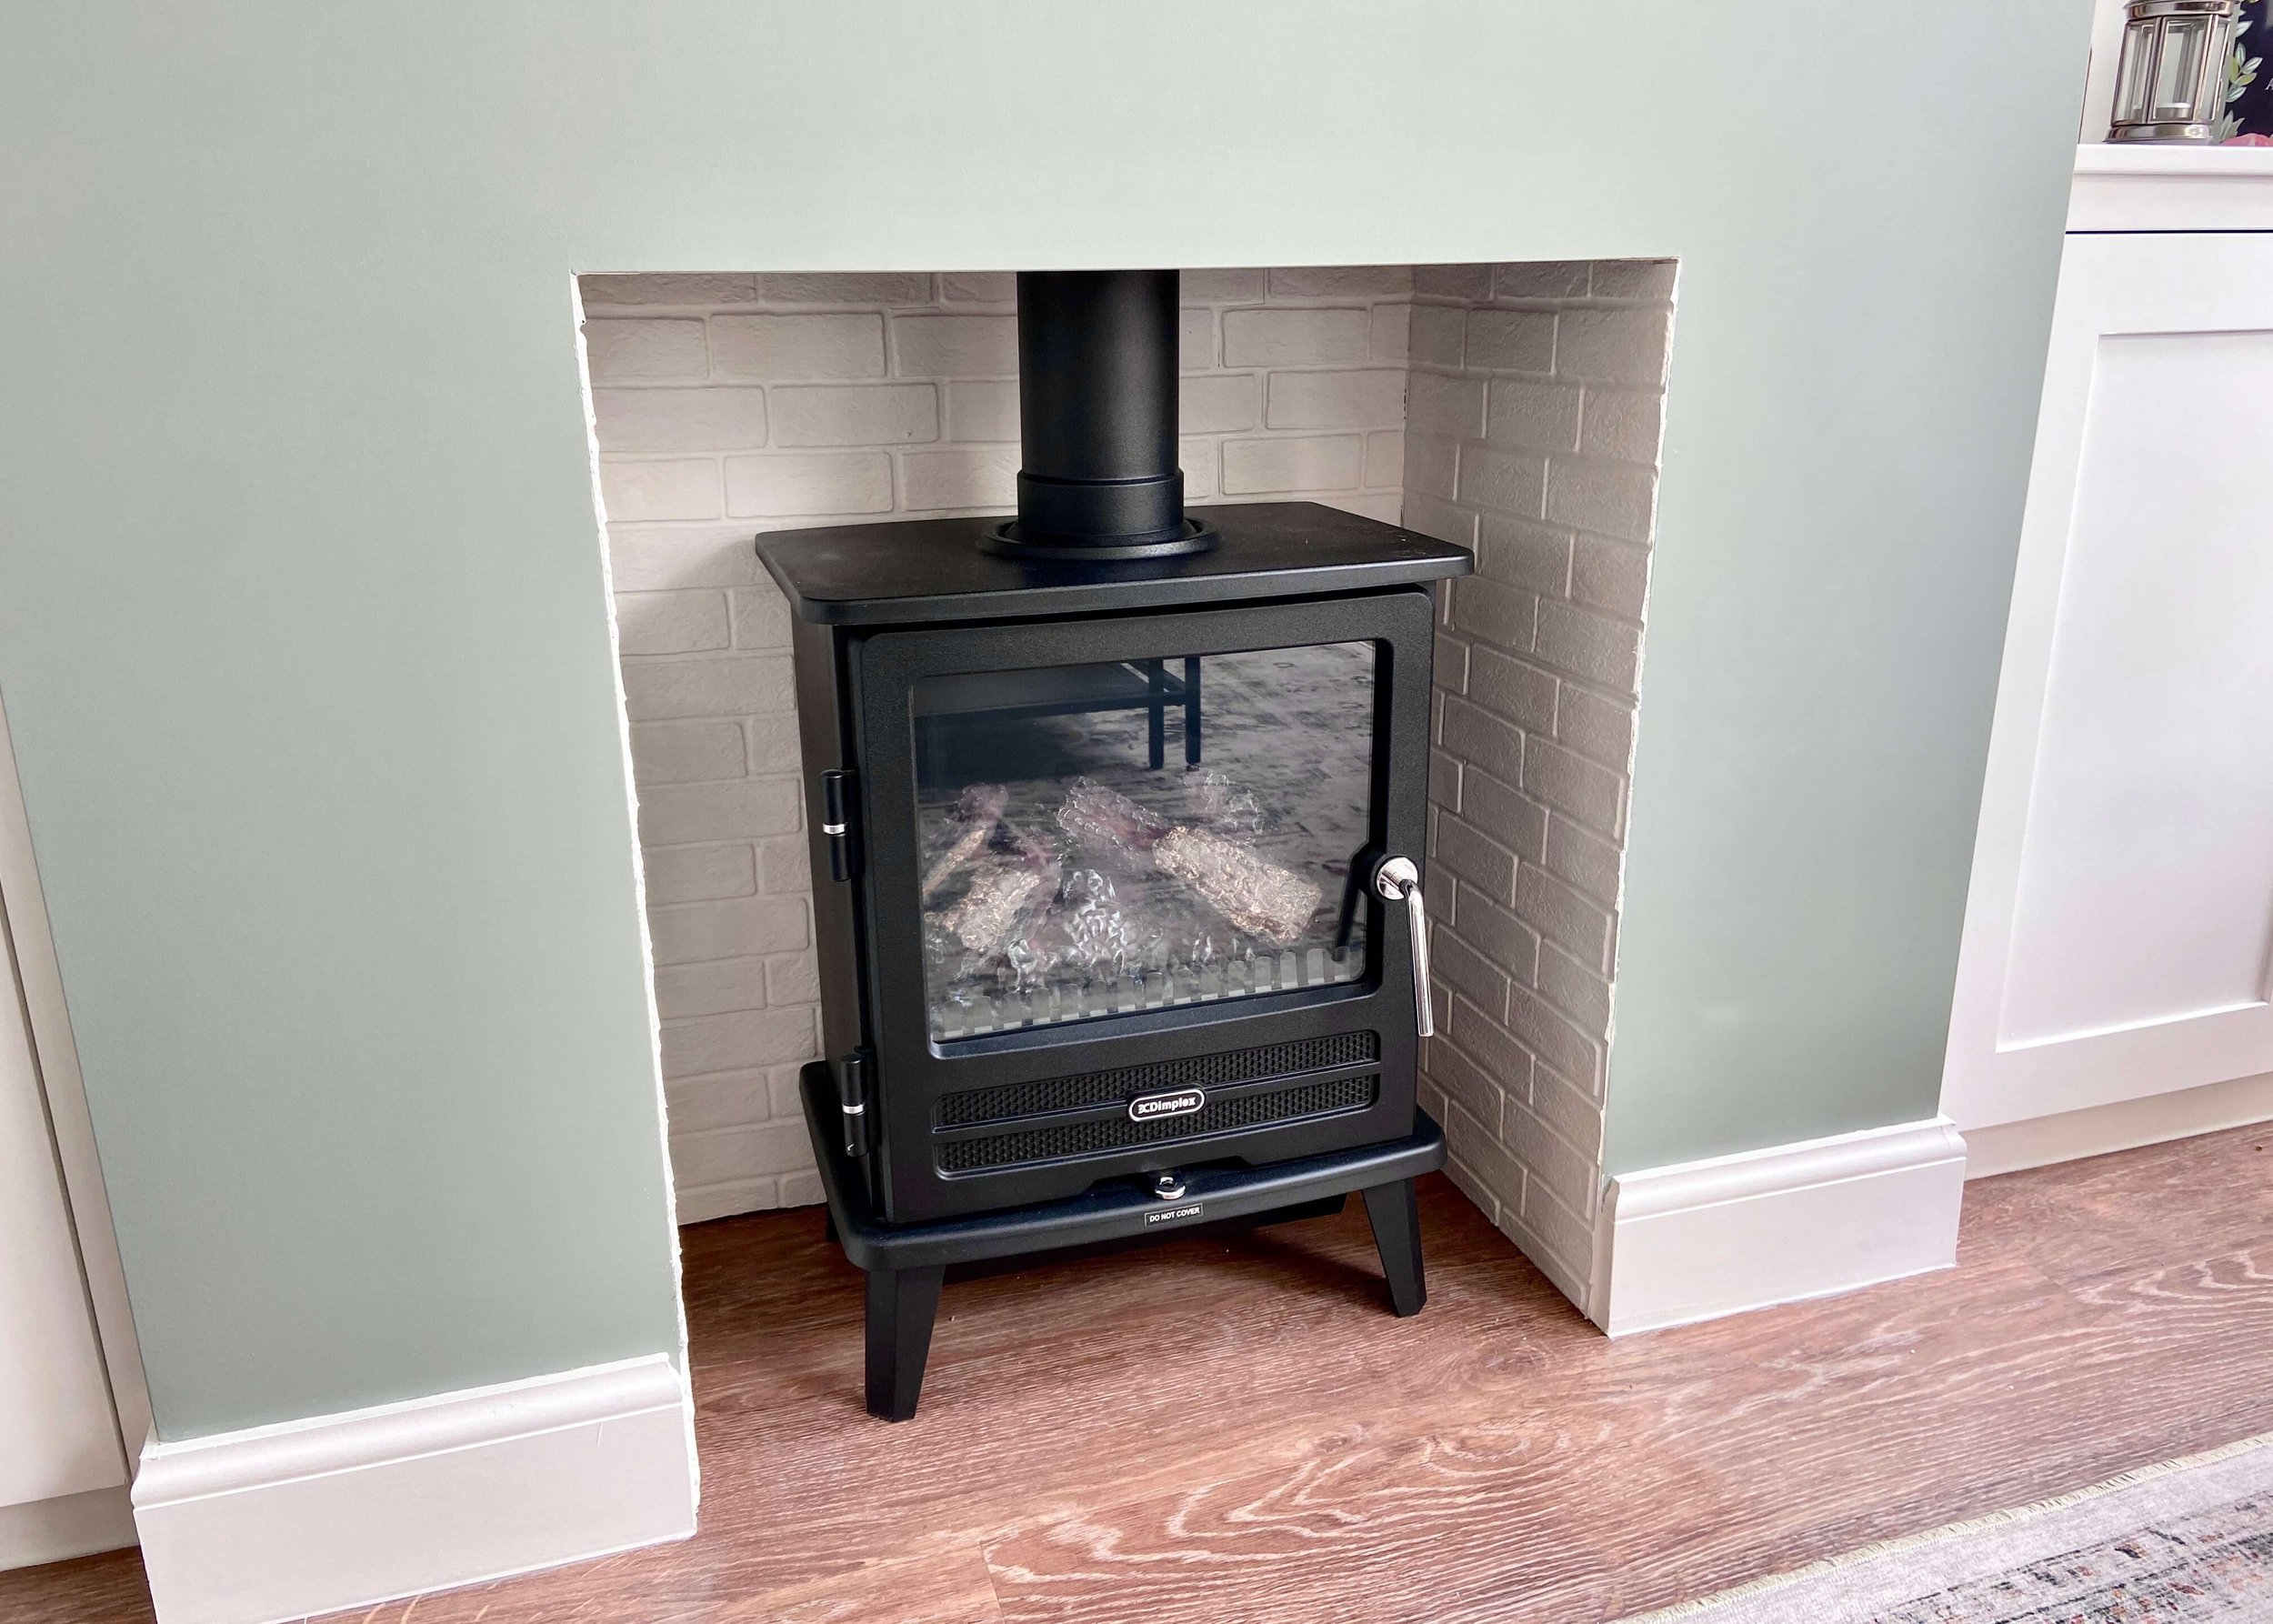
We continued this all over and used a stanley knife to carefully trim along the front of the fireplace to create a straight and smooth edge.

9.
Next we used decorators caulk to fill in any of the seams between the tiles, at the corners, and on the front edge of the fireplace surround to make it as neat as possible for painting.

10
We then painted the tiles in several coats of a white matt paint that we already had. It took a few coats to get it to completely cover the colour of the brick tiles.

11.
We then left it to dry, popped our electric optimyst stove back in and added a faux flue to make it look like a real log burning fireplace.