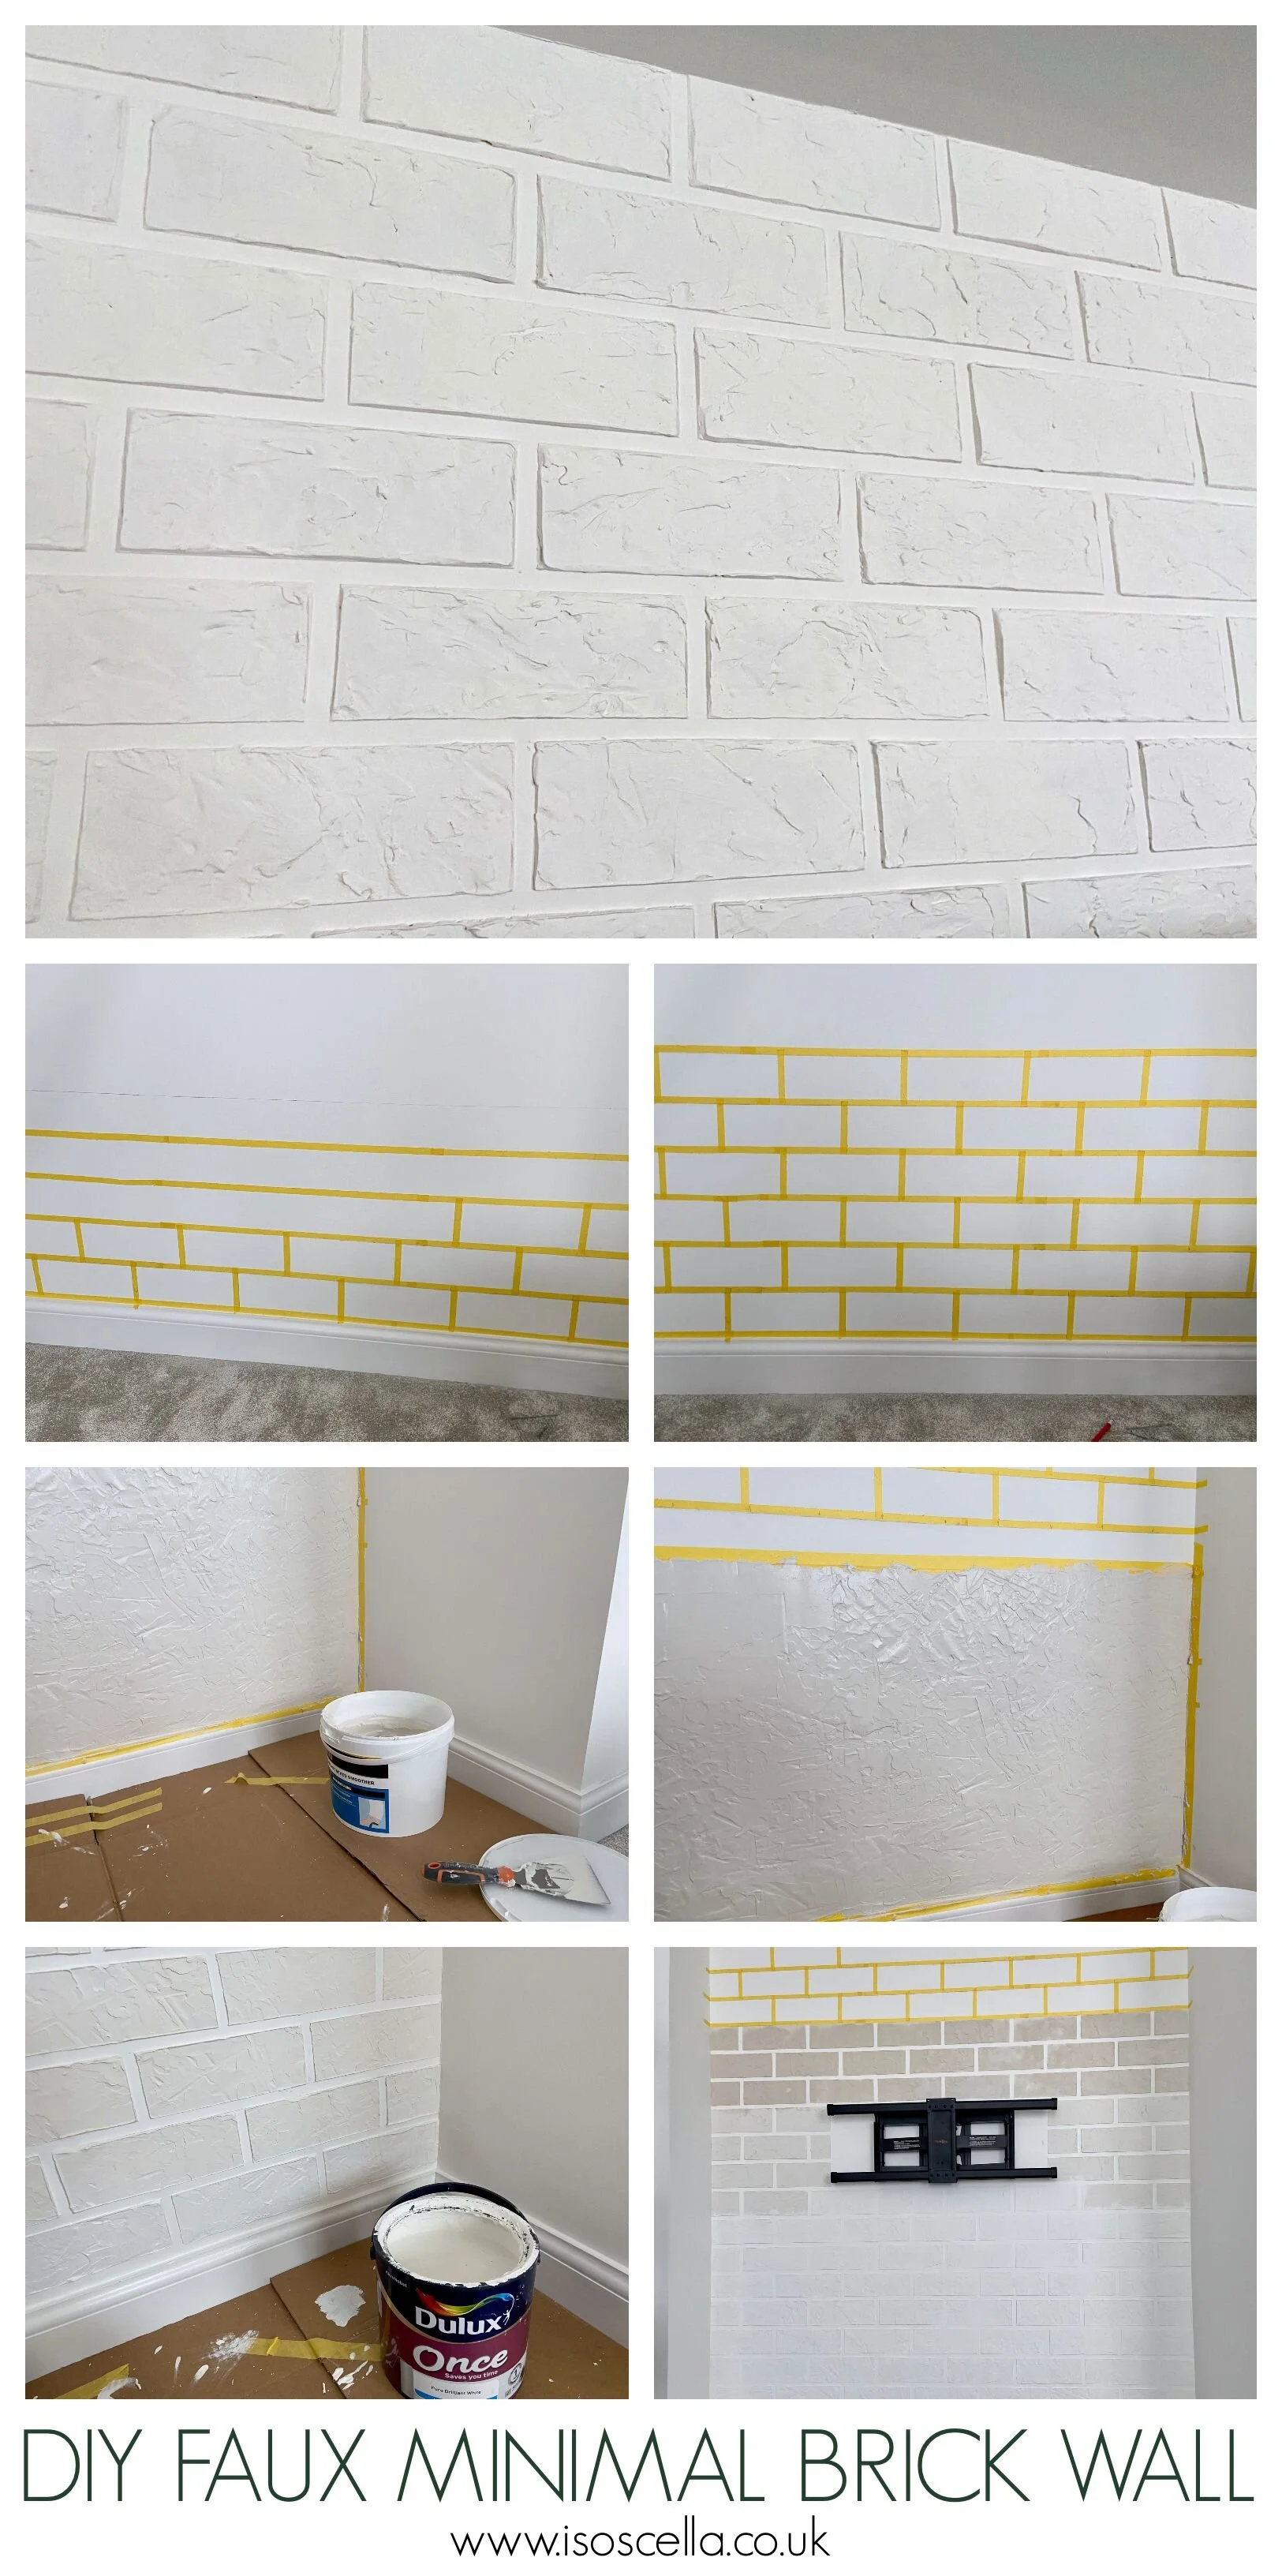
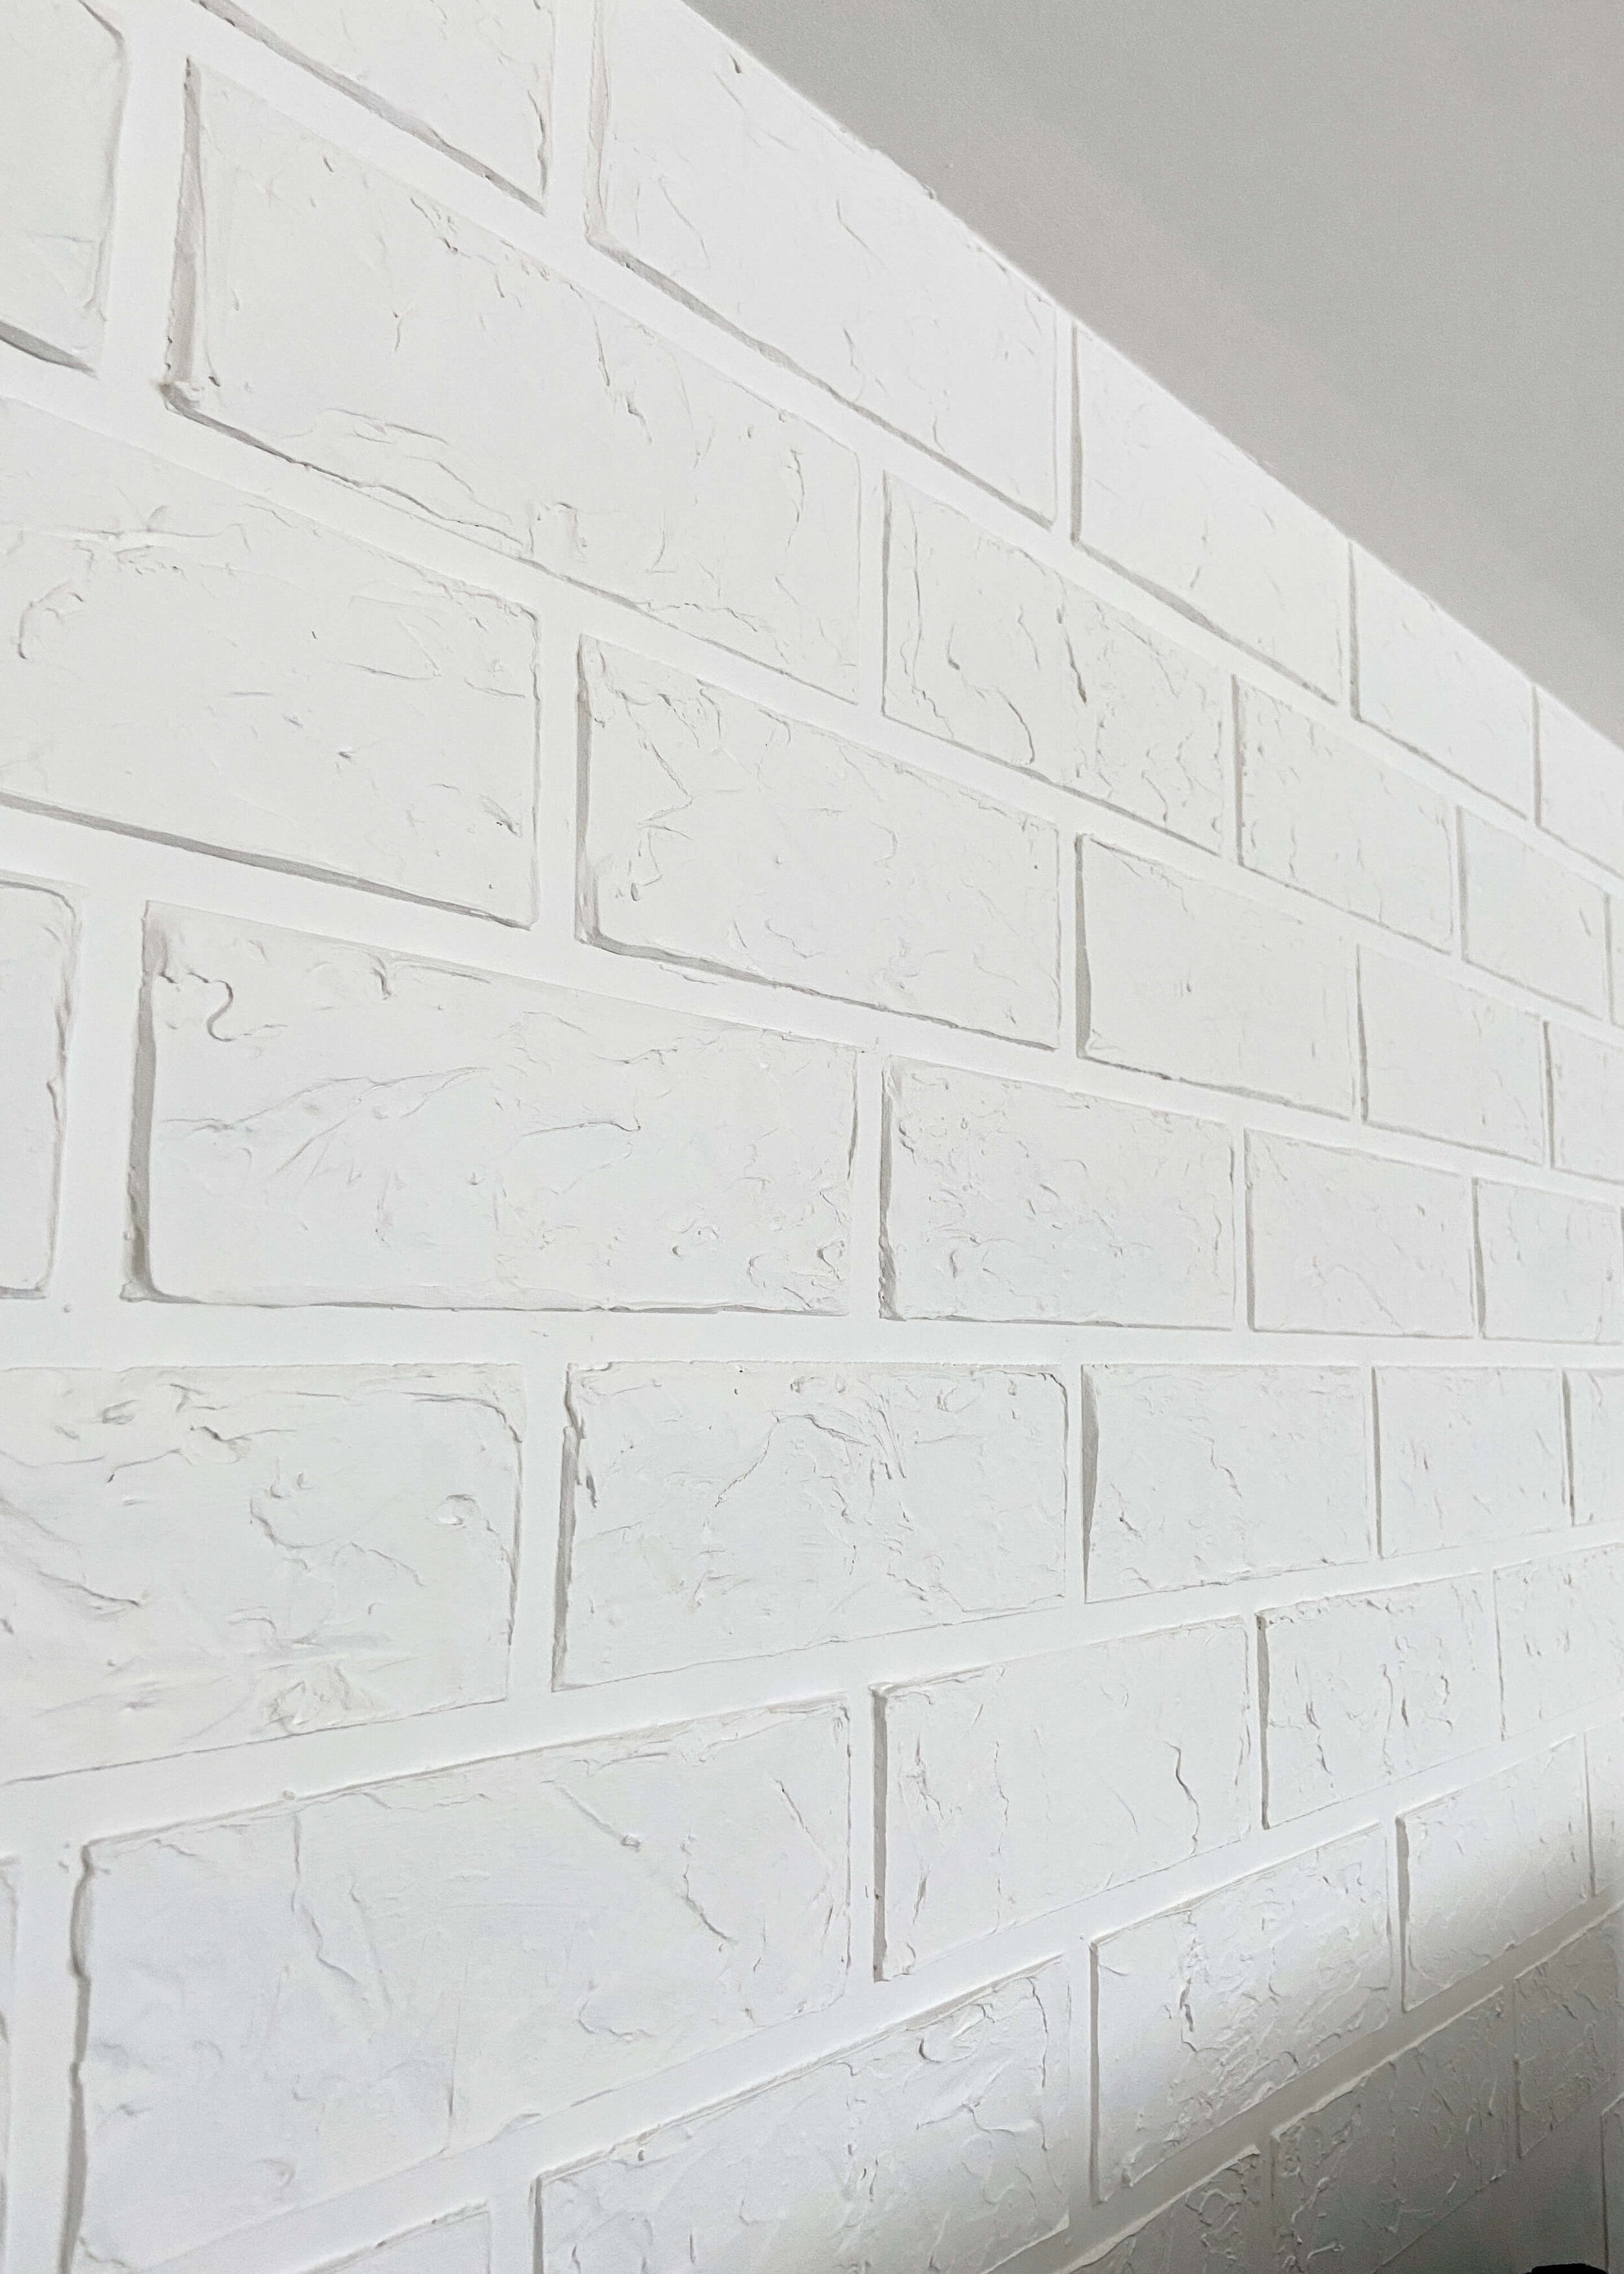
Give your walls a faux minimal brick effect with just plaster and tape!
I’ve been obsessing over having a brick wall behind the television in our office/games/guest room for a while. It’s something I’ve been thinking about for ages, but all my searches kept bringing up options that were either really expensive and involved, or didn’t quite hit the mark. The easiest way to get the appearance of brick seemed to be wallpaper, however it was really the texture that I was after, and so i knew that wasn’t going to work. I came across brick slips, as used by Angela Rose in her living area, which gave such a nice look, but involved tiling, grouting and painting, which was a bit too much for me this time and was actually pretty expensive. Finally, I came across an idea on Pinterest and Youtube that involved creating a textured 3D brick wall effect, that just required plaster and tape. Cheap, easy and fun - I was sold! I was so scared to start, I really had no idea how it was going to look, but I’m so glad I persisted and absolutely love the texture it gives to this otherwise boring wall. Keep reading to find out how I did it….


1.
First I cut my painter’s or masking tape into strips. I used 24mm tape, but wanted the gaps between my bricks to be 12mm and so stuck lengths to an old Ikea table and then cut each length in half. If you can find thinner tape, I’d definitely recommend buying that instead of doing this!

2.
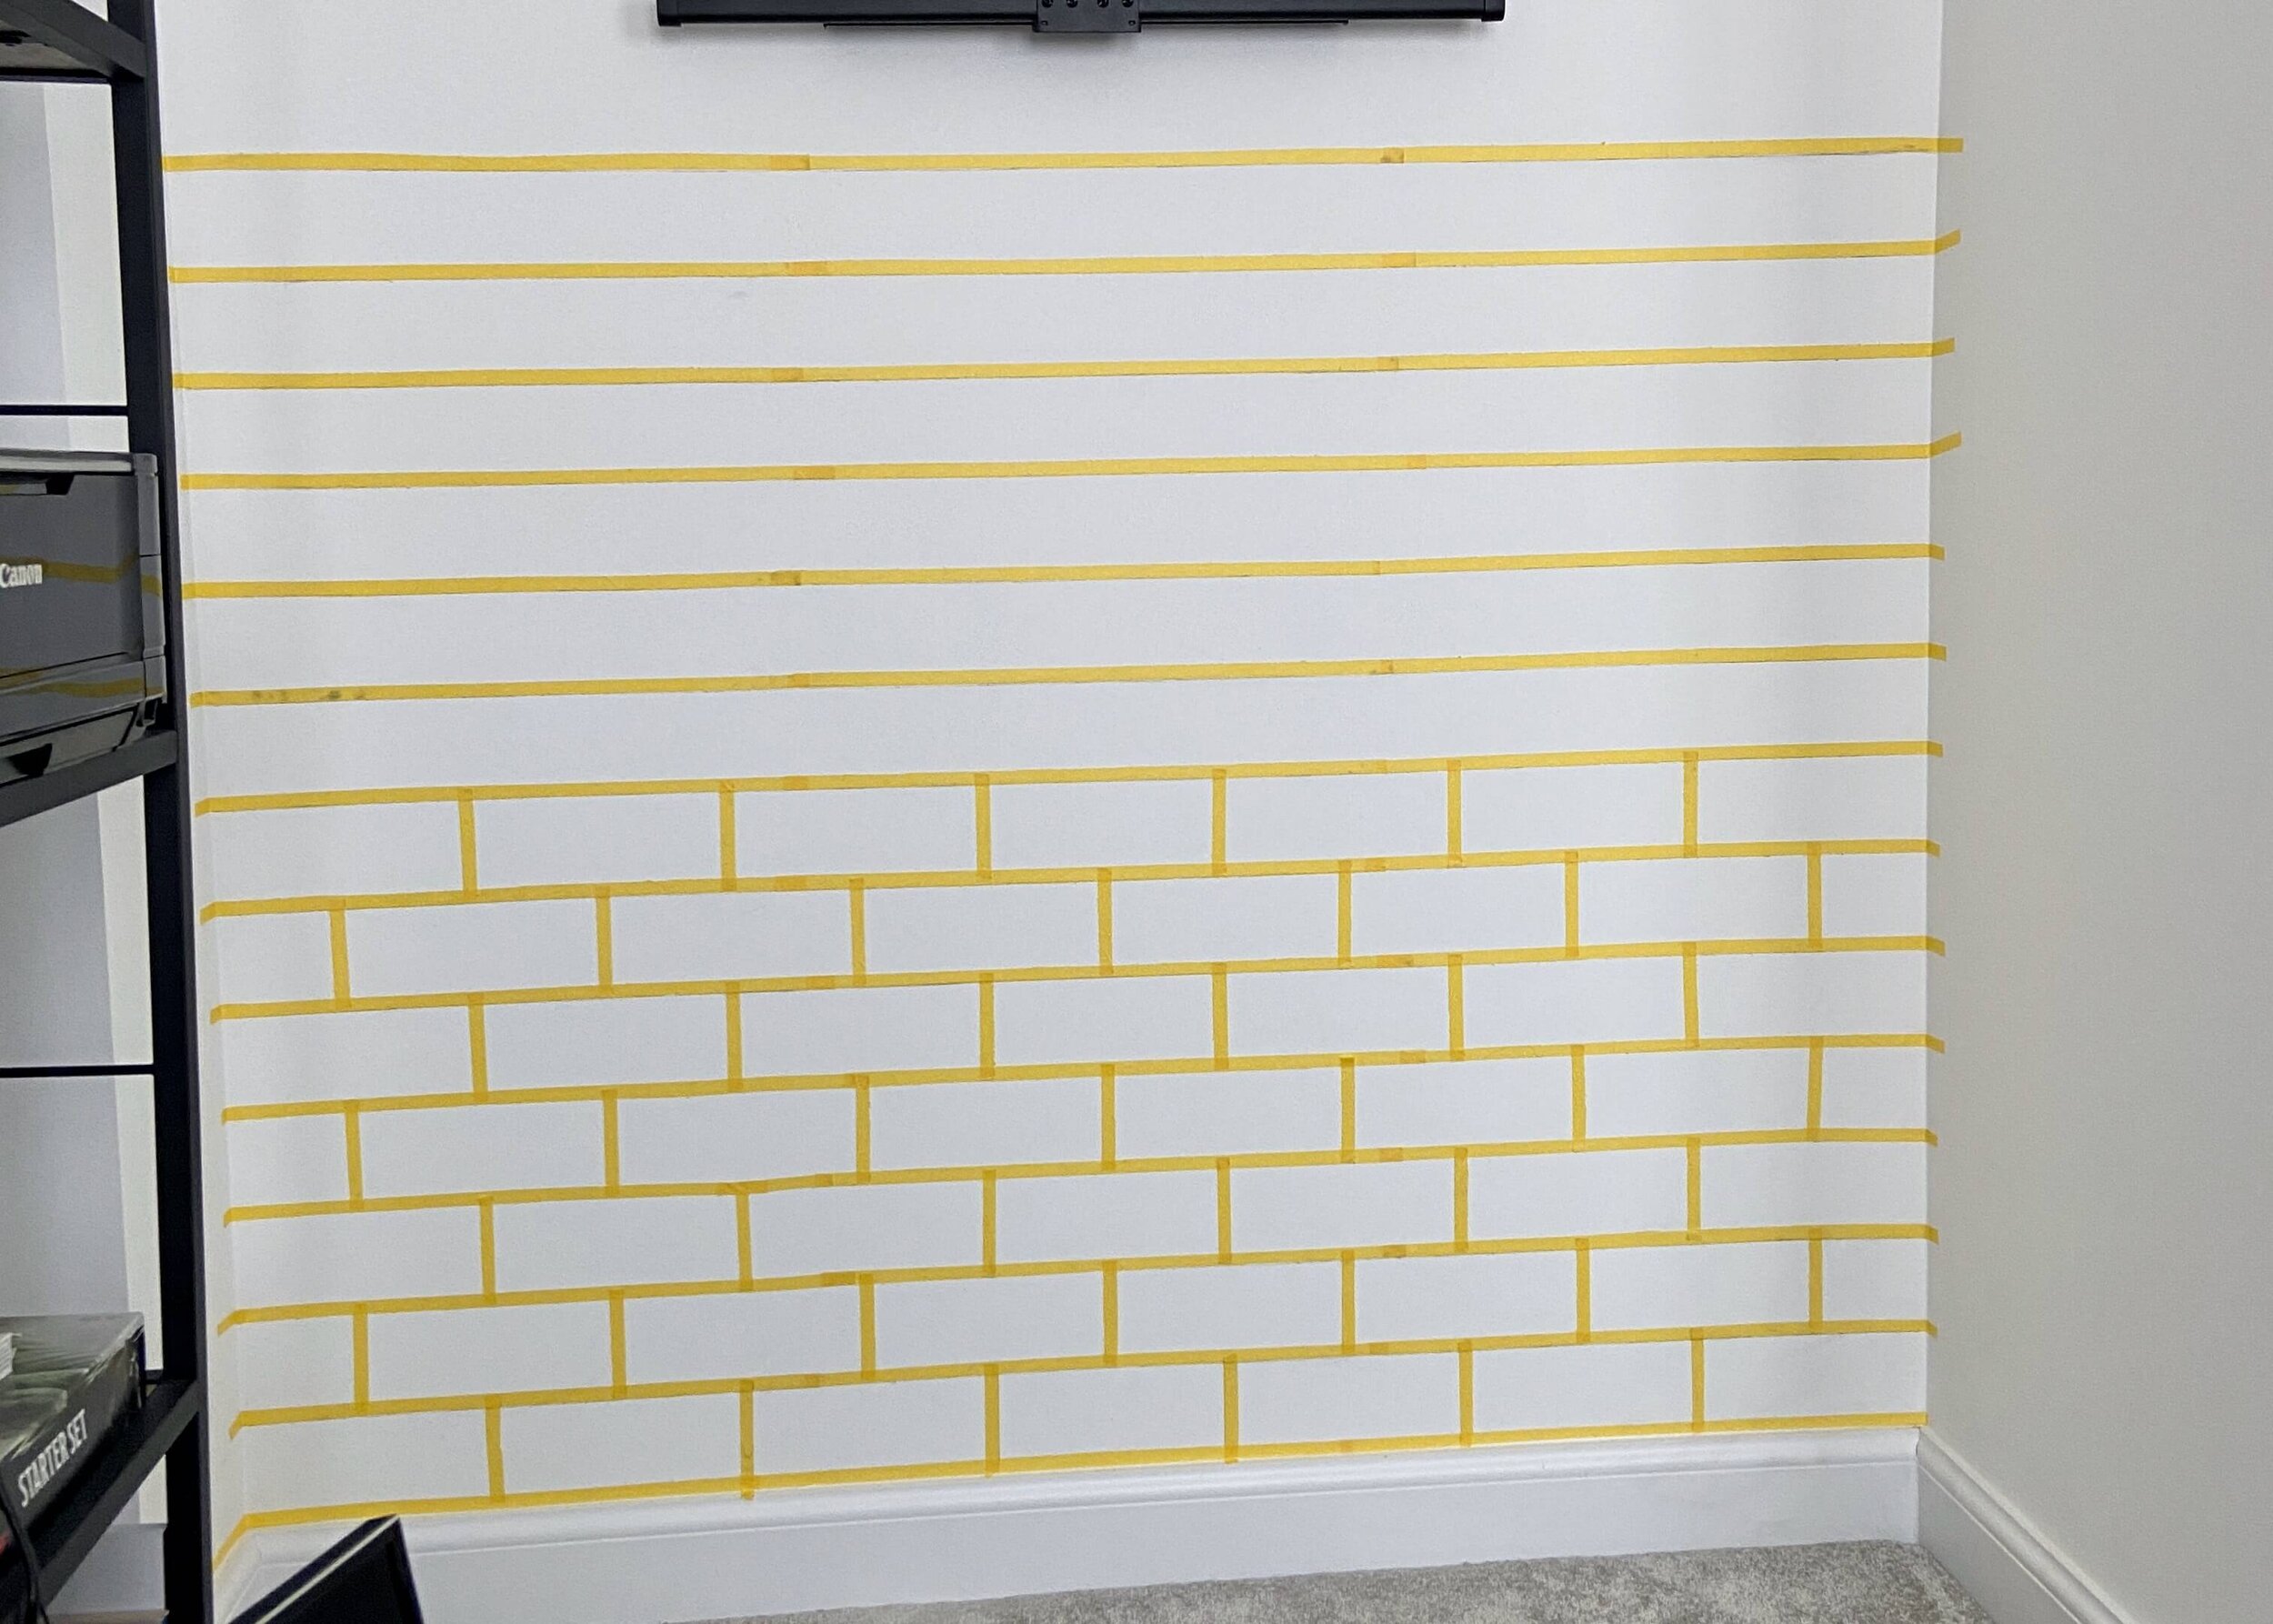
Next, I decided I wanted my bricks to be 7.5x20cm, and so from the bottom of the wall I measured 7.5cm and drew a line all the way across using a level. I then stuck tape all the way along this. I then measured 7.5cm up from the top of the tape, and again drew another line all across using a level and stuck tape along this. Repeat this until your whole wall is covered in horizontal lines of tape that are 7.5cm distance apart.

3.
Next, cut several lengths of tape that are 12mm x 10cm. Starting from the bottom, find the centre of the wall, and mark 10cm either side of this. Stick vertical sections here and ensure they are straight with a level or a square. Next, measure 20cm from these, and add another length of tape. Repeat until you’ve completed the first row. For the row above, stick the shorter lengths in the centre of the bricks below, and so on.
4.
It’s best to work in small sections when plastering and so I’d recommend only adding your vertical pieces of tape to a few rows at a time. Add tape at ends to protect the walls you aren’t plastering.

5.
Grab your pre-mixed finishing plaster and apply all over this section with a jointing knife. The thicker you apply the plaster, the heavier it’ll be, but the more 3D your bricks will look.

6.
Once your section is covered and you’re happy with it’s thickness, use your knife to go back and add texture to the plaster. I found this stuff went on so smoothly however bricks are very textured, so I patted and dragged the knife across the surface.

7.
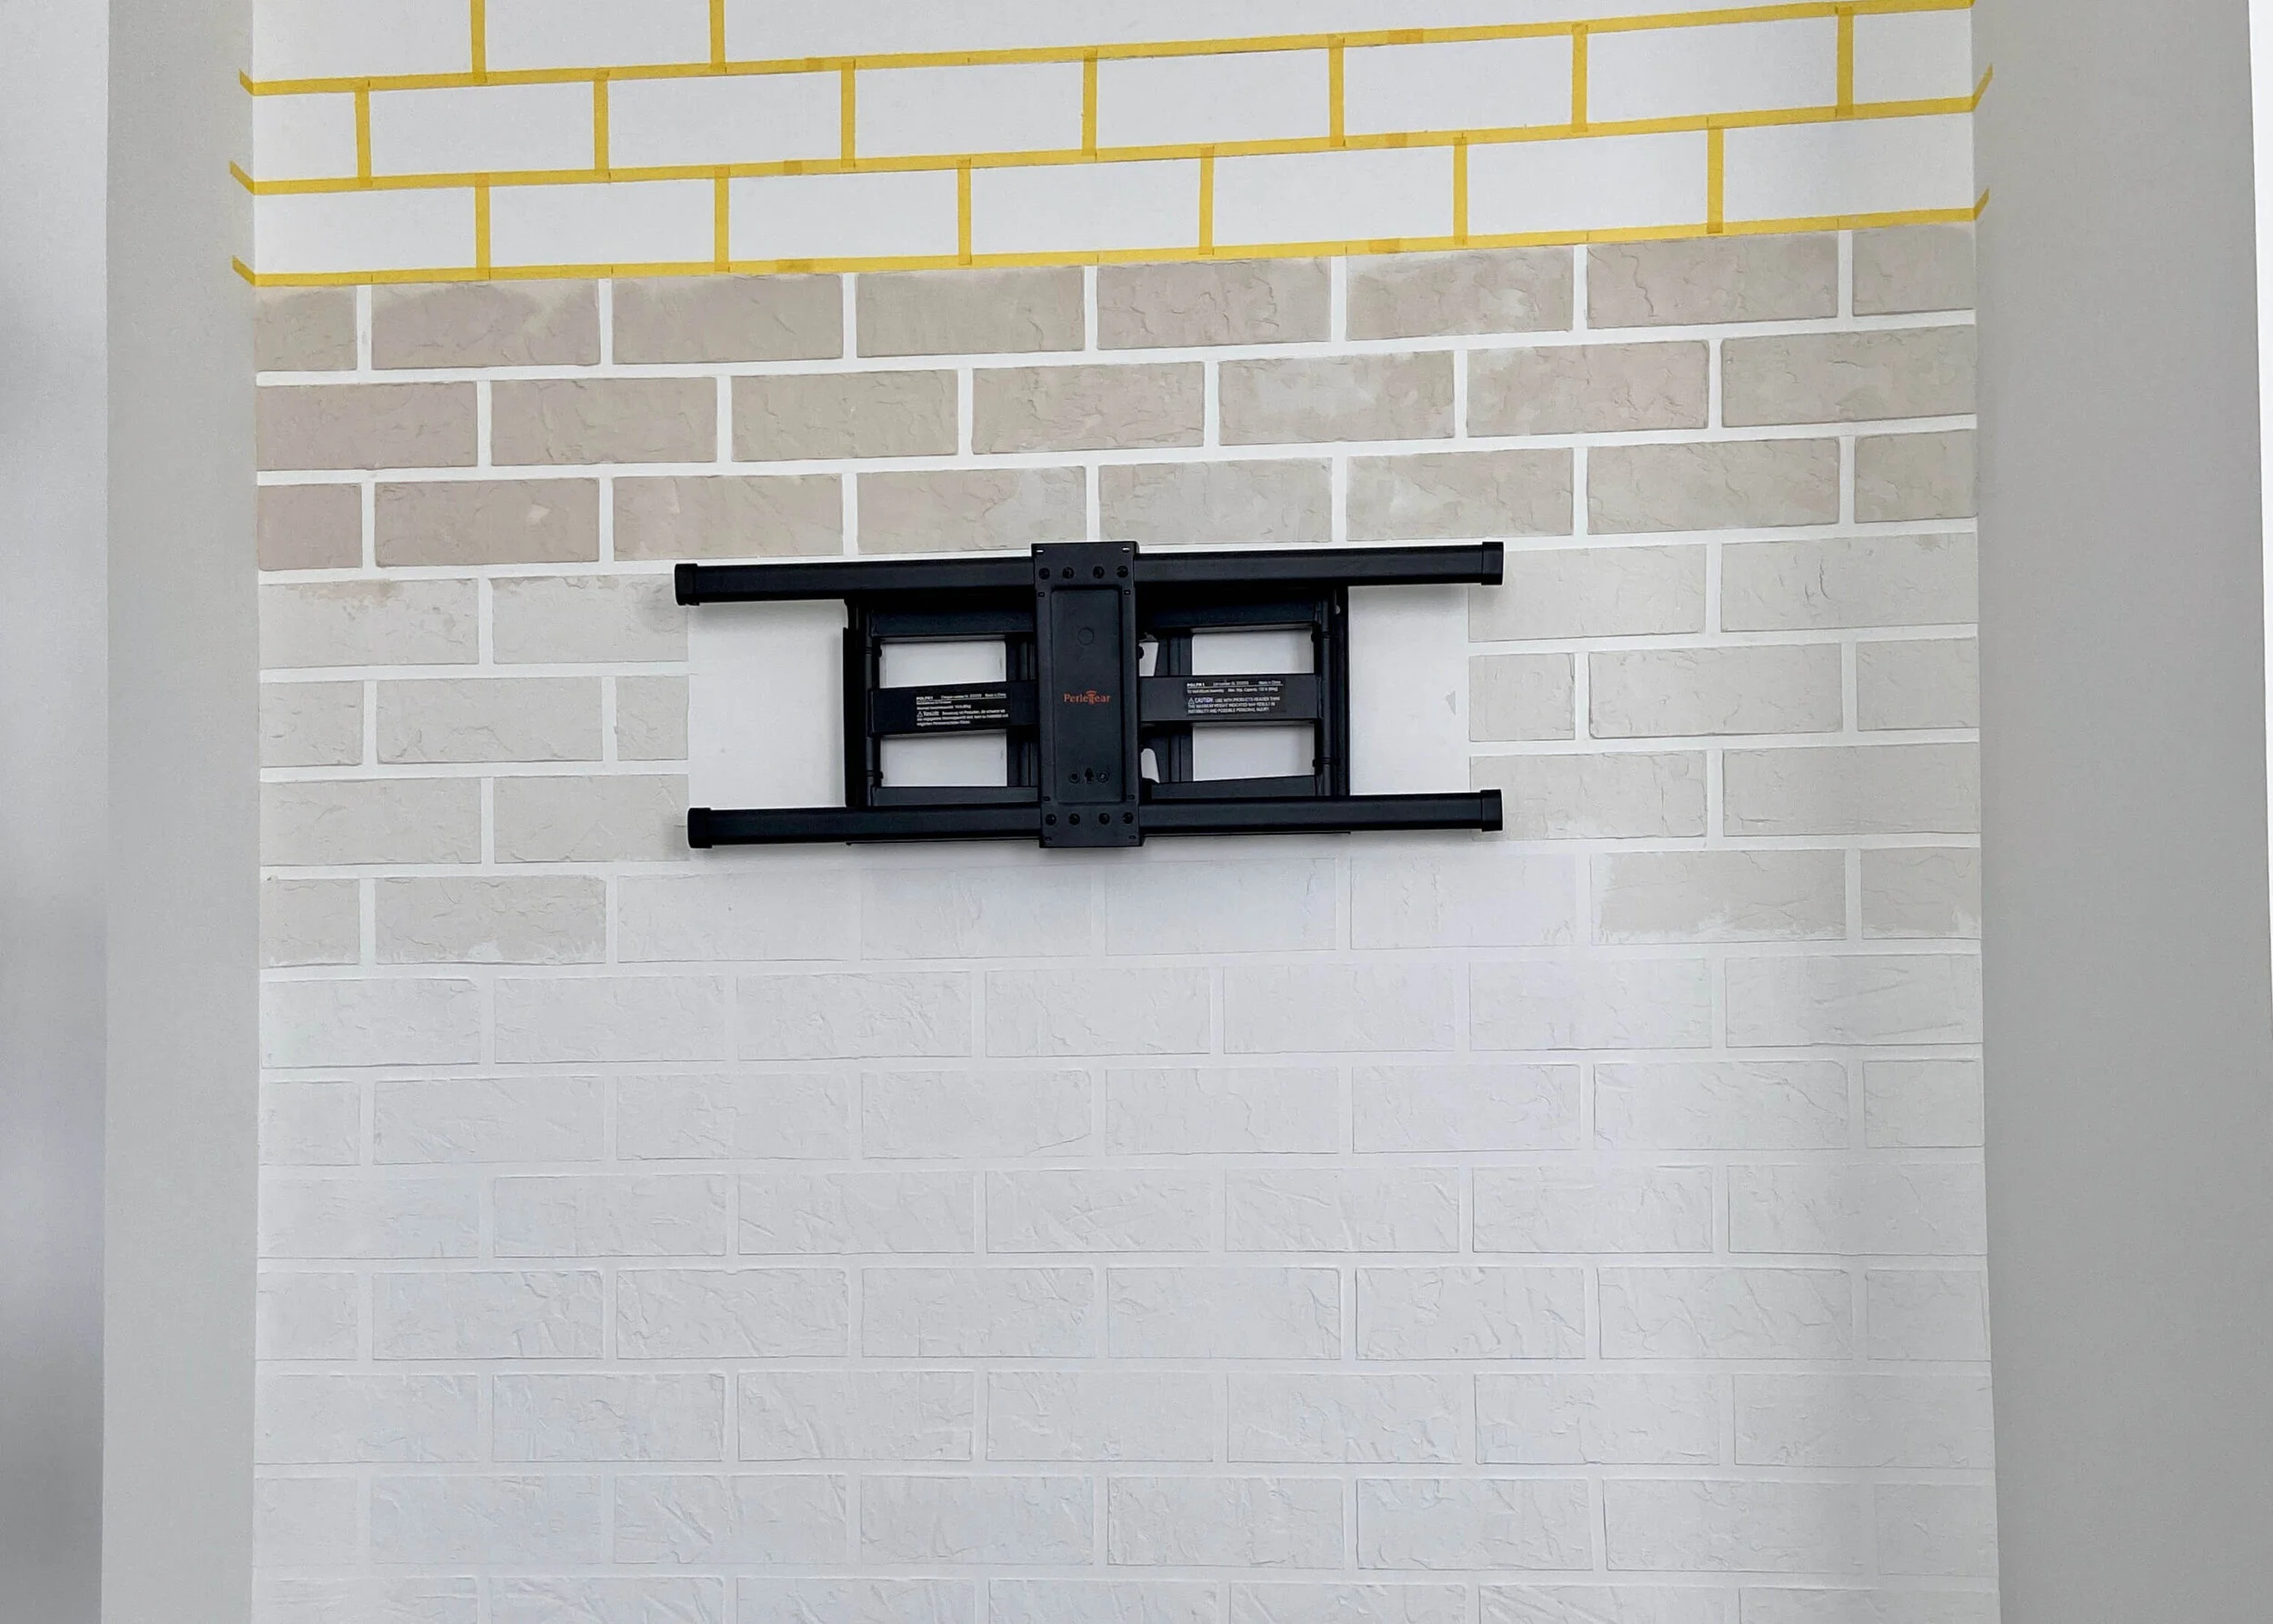
Next, remove the outer tape protecting the other walls, before removing the first horizontal section of tape. This will pull up the smaller vertical sections as you do so, which you can pull off next. Repeat until all the tape is removed and neaten up any areas with your finger or knife. Leave to dry until the top row is dry enough for you to plaster above it.

8.
When the plaster is dry, you can repeat the taping and plastering process above the dry section, and paint the dry section with a wall paint.
9.
Repeat the process of taping, plastering, drying and painting all the way up the wall until it is completely covered. As you can see here, I eventually worked in sections that were about 3 rows in height as I found the plaster was setting too much in the time it took me to do more, and coming off with the tape in chunks.