


I completely forgot to share this makeover, and so here it finally is - the one where I gave my parent’s bathroom a budget makeover and created some custom abstract art!
My parents have been in their house for over 20 years now. It’s the place I call ‘home home’ and full of my childhood memories. When my partner and I found ourselves without a home after selling our previous property and waiting for our current property to be finished, my parents kindly put us up and it was lovely to have that time there, with them and also the cats, after moving out around 6 years or so ago. I get my need to be doing something, making or creating, from my mum and so over the years she has decorated and redecorated different rooms in the house in her spare time. The upstairs toilet (for some reason its separate from the family bathroom) was one of those places that hadn’t been decorated for a while, and as I was in need of a project with all my crafting supplies in storage, the parents let me give it a revamp.
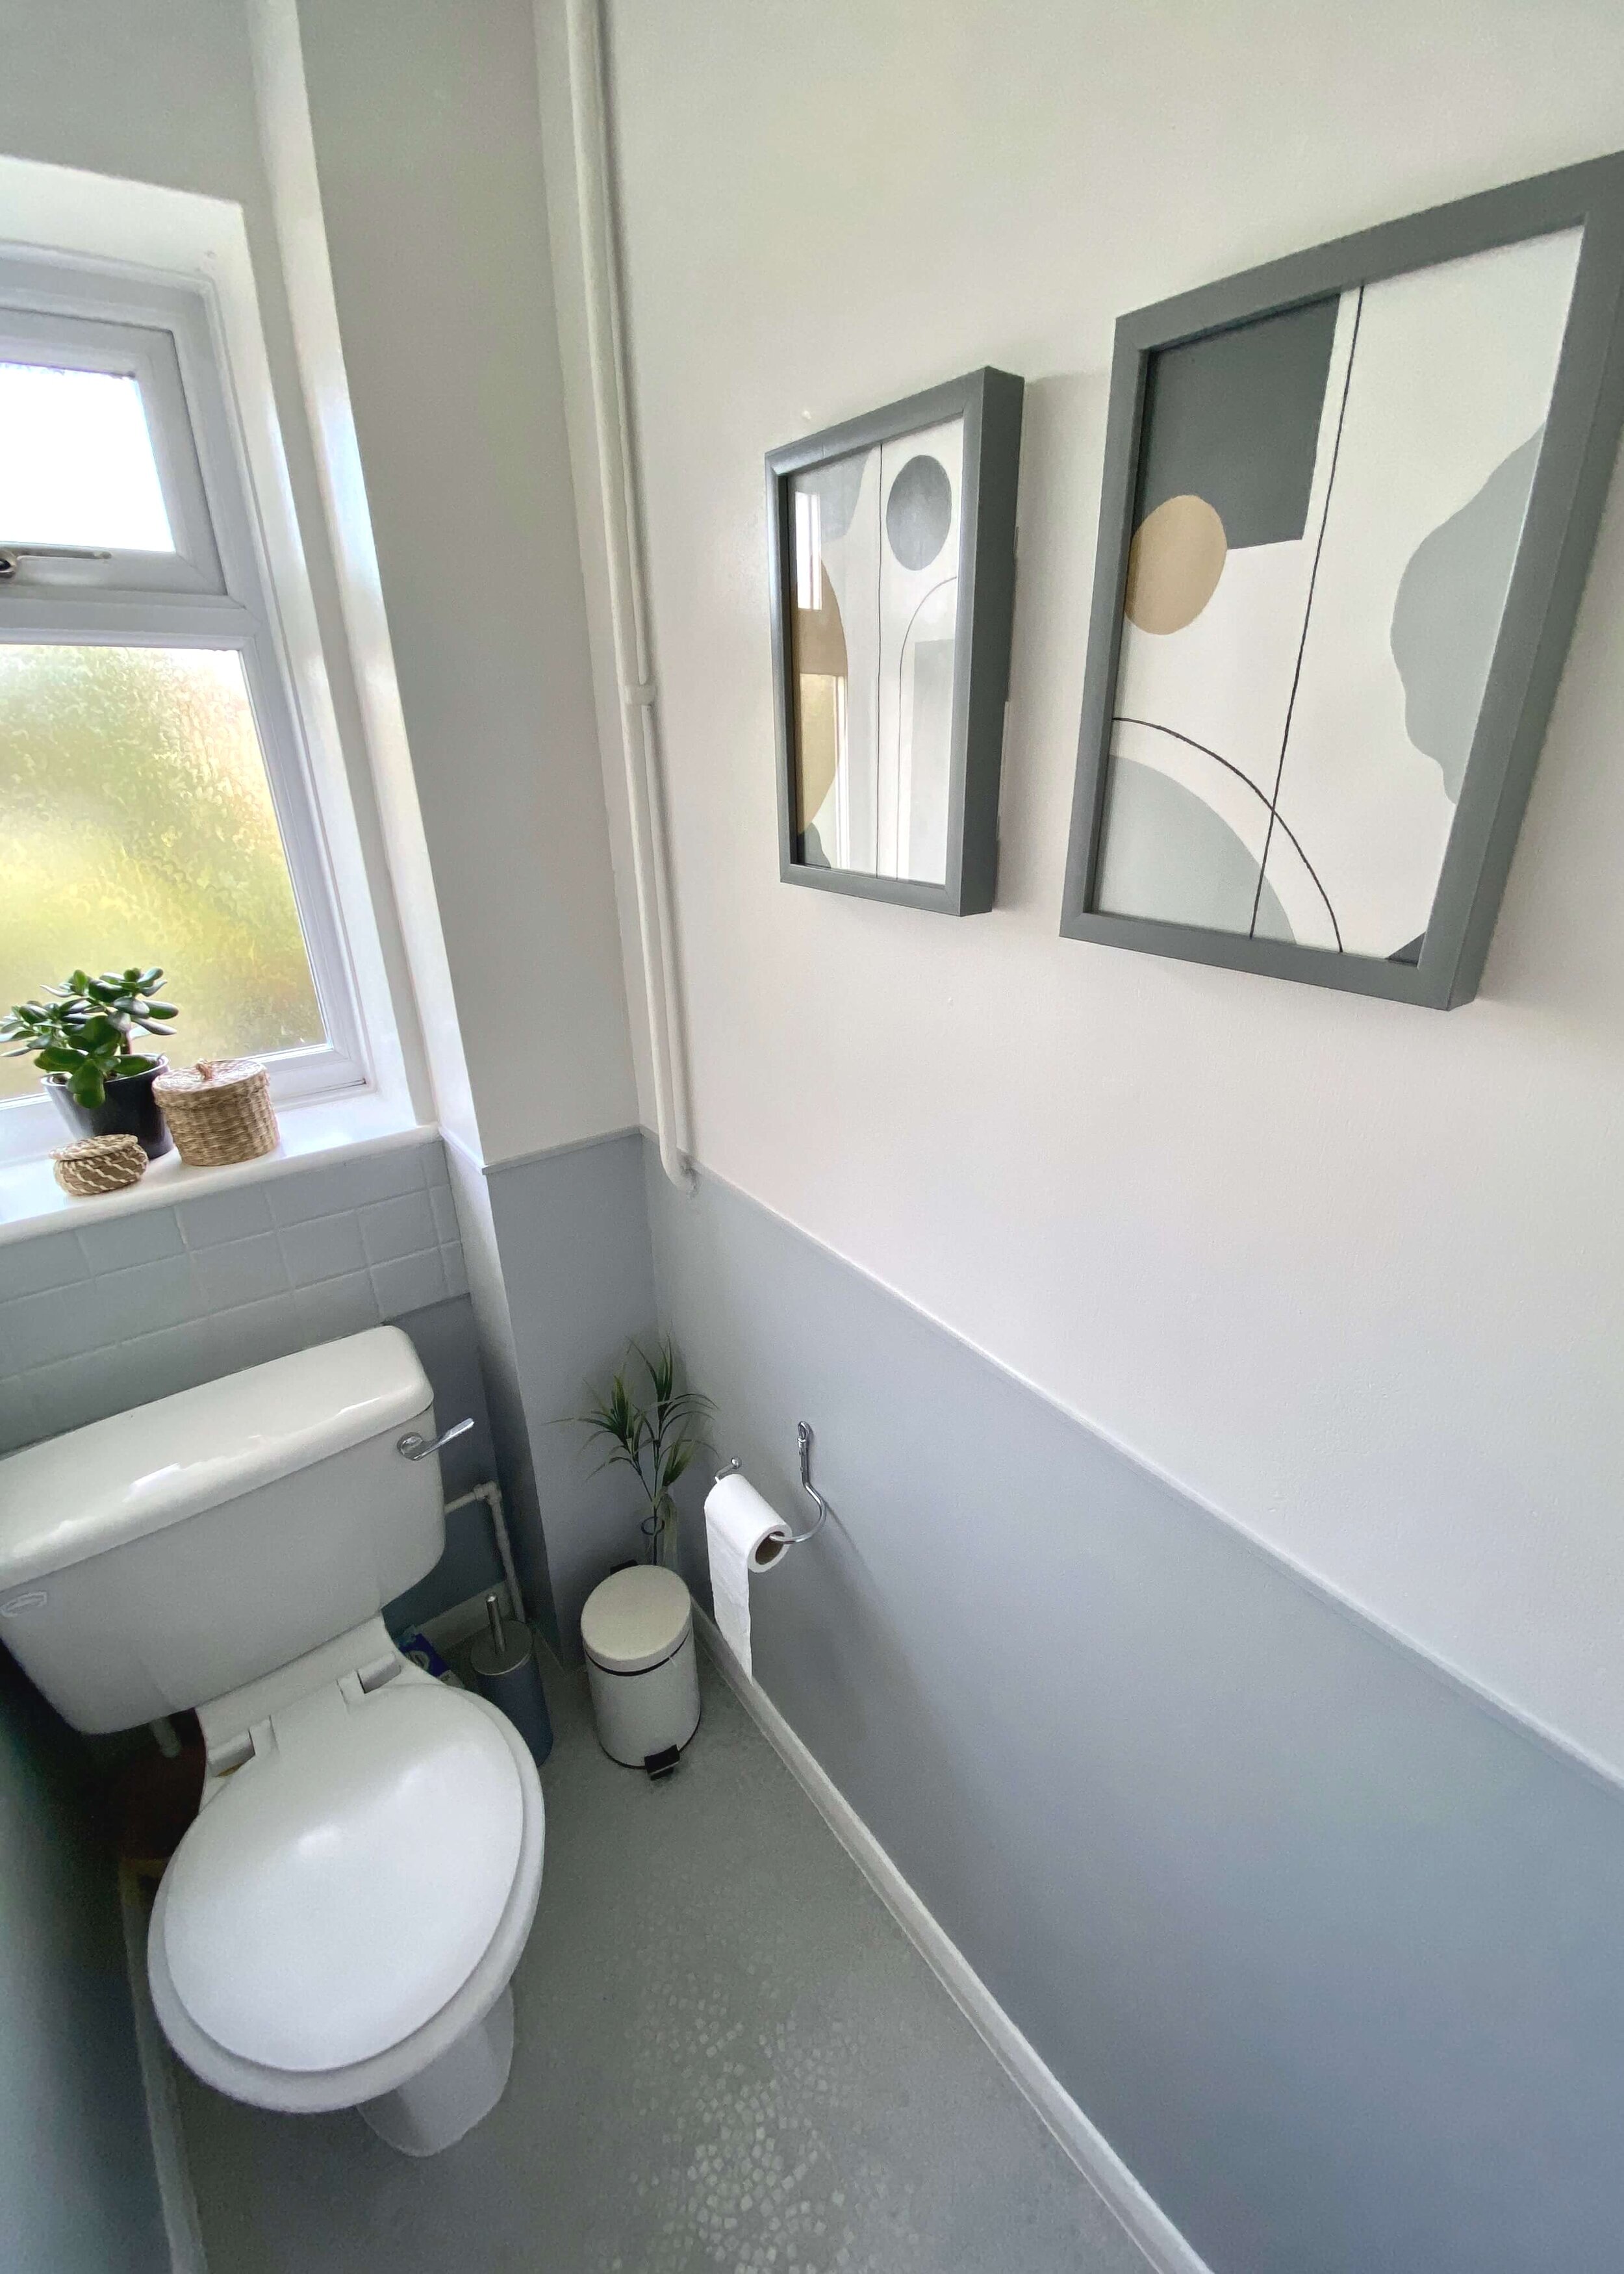
I took my time with this and really enjoyed the process. My dad joked throughout about how slow I was but without another project on the horizon I knew I had to make this last to keep me busy. I finally got there, and I was so pleased, as were the parents more importantly, with how it turned out. The parents wanted to keep their flooring, which you may or may not be able to see is a silver grey so I knew I had to work with that, and chose the wall colours to co-ordinate. One thing I was determined to do was get rid of the blue!

WHAT WE DID
Before lifting a finger, the first thing I did was plan. I spent a lot of time on Pinterest, created a bit of a mood board and asked my parents what they thought. My mum wasn’t too sure about having any wall panelling and so we agreed to really simplify it by just having a horizontal strip all around the room to help break up the walls a bit. They were happy with the colours, white and grey, and keen to brighten it up with lots of white. My mum had recently painted the family bathroom next door as well so we knew we had plenty of white paint for the walls and ceiling. In fact, my parents garage had pretty much everything we needed for this project, which was really very handy in the midst of the lockdown and pandemic, and the only things I knew I was going to have to buy were some accessories, a new blind and the grey paint.
After a quick mosey in B&Q, I stumbled across a Rustoleum grey paint (shade ‘Dove Grey’), actually a furniture paint (this was before they brought out their wall paint!) that matched the floor and had the combination of warmth and depth that I was looking for. The parents liked it too, and so I started thinking about where would be best to have it. Behind the toilet are some tiles, and above that a windowsill, and so it made sense to me to have the grey in line with this, with the wooden beading a continuation of the windowsill. The wood work was also in need of a refresh, as was the door, and there were patches of the wall that needed some filling and sanding.


With all my supplies ready, I first took everything out of the room and prepped the walls and woodwork. First of all, I removed any old rawl plugs from the wall using pliers and filled any holes or uneven parts of the wall with filler. It was a bit of a back and forth process between filling and sanding until I got to a relatively smooth surface. I also sanded all of the woodwork until it was smooth and no longer glossy, and gave the tiles a light sanding too until they were slightly rough in texture. I used an electric multi-surface sander, wore a face mask and eye protection, and ensured I kept the room well ventilated throughout. After I had finished sanding each time, I thoroughly vacuumed and wiped down the walls with a damp cloth.


Now that the base was all smooth and ready, I caulked all around the woodwork, including the skirting boards, windowsill and door frame, as well as the tiles, filling in any cracks and gaps as I went. It’s important to use something like decorators caulk here, not the silicone sort that you would use in a bathroom, as you want to be able to paint over it.
Next, I drew a line around the entire wall from the top of the windowsill to mark where my two different paint colours would transition into each other. I then began painting along this line with a paint brush, as well as the edges around the skirting boards and any corners, with the grey paint that I was using on the bottom half of the room.
It was at this point that I realised that there was an annoying gap between the windowsill and the wall. I have no idea why the people who installed the windowsill thought it made sense to leave a gap, but once I noticed it I couldn’t un-see it and so I had to do something about it. Using wood and filler, I carefully built out the right hand side of the window sill until it reached the wall and left it to dry before sanding it so that it was smooth and matched the shape of the windowsill perfectly.

After that unexpected detour, I finished painting the lower half of the wall in grey with a roller and began painting the top half in a white Dulux satin finish emulsion. The Rustoleum furniture paint went on like a dream, and had such a good coverage despite not being for walls. The white paint on the hand was a different story. It had been sitting in my parents garage for some time, so I don’t want to blame the paint too much as it probably wasn’t at it’s peak, but wow did it take a lot to cover the blue. I painted the ceiling with a couple of coats but to be honest I lost count of how many coats I had to do - I think I pretty much kept going until the paint ran out! To paint the tiles behind the toilet, I first primed using the Dulux Difficult Surfaces Primer and then painted a couple of coats of the grey furniture paint over the top. This has lasted so well, without any cracks or scratches, and so I would really recommend this primer.


Finally, I painted the skirting boards, windowsill, doorframe and door with the Dulux Satinwood in Bright White, before cutting my wooden trim to the correct lengths for each part of the wall. I used a hand saw for this, and measured each part as I went. I first painted the trim in the grey furniture paint and once dry, I adhered it to the wall with No More Nails. I held them in place until they were secure and then caulked above and below them to give them a more professional finish. At the corners I used wood filler to hide the gaps, and when the caulking and filler was all dry, I went around with a small brush touching up the paint wherever it needed to be.
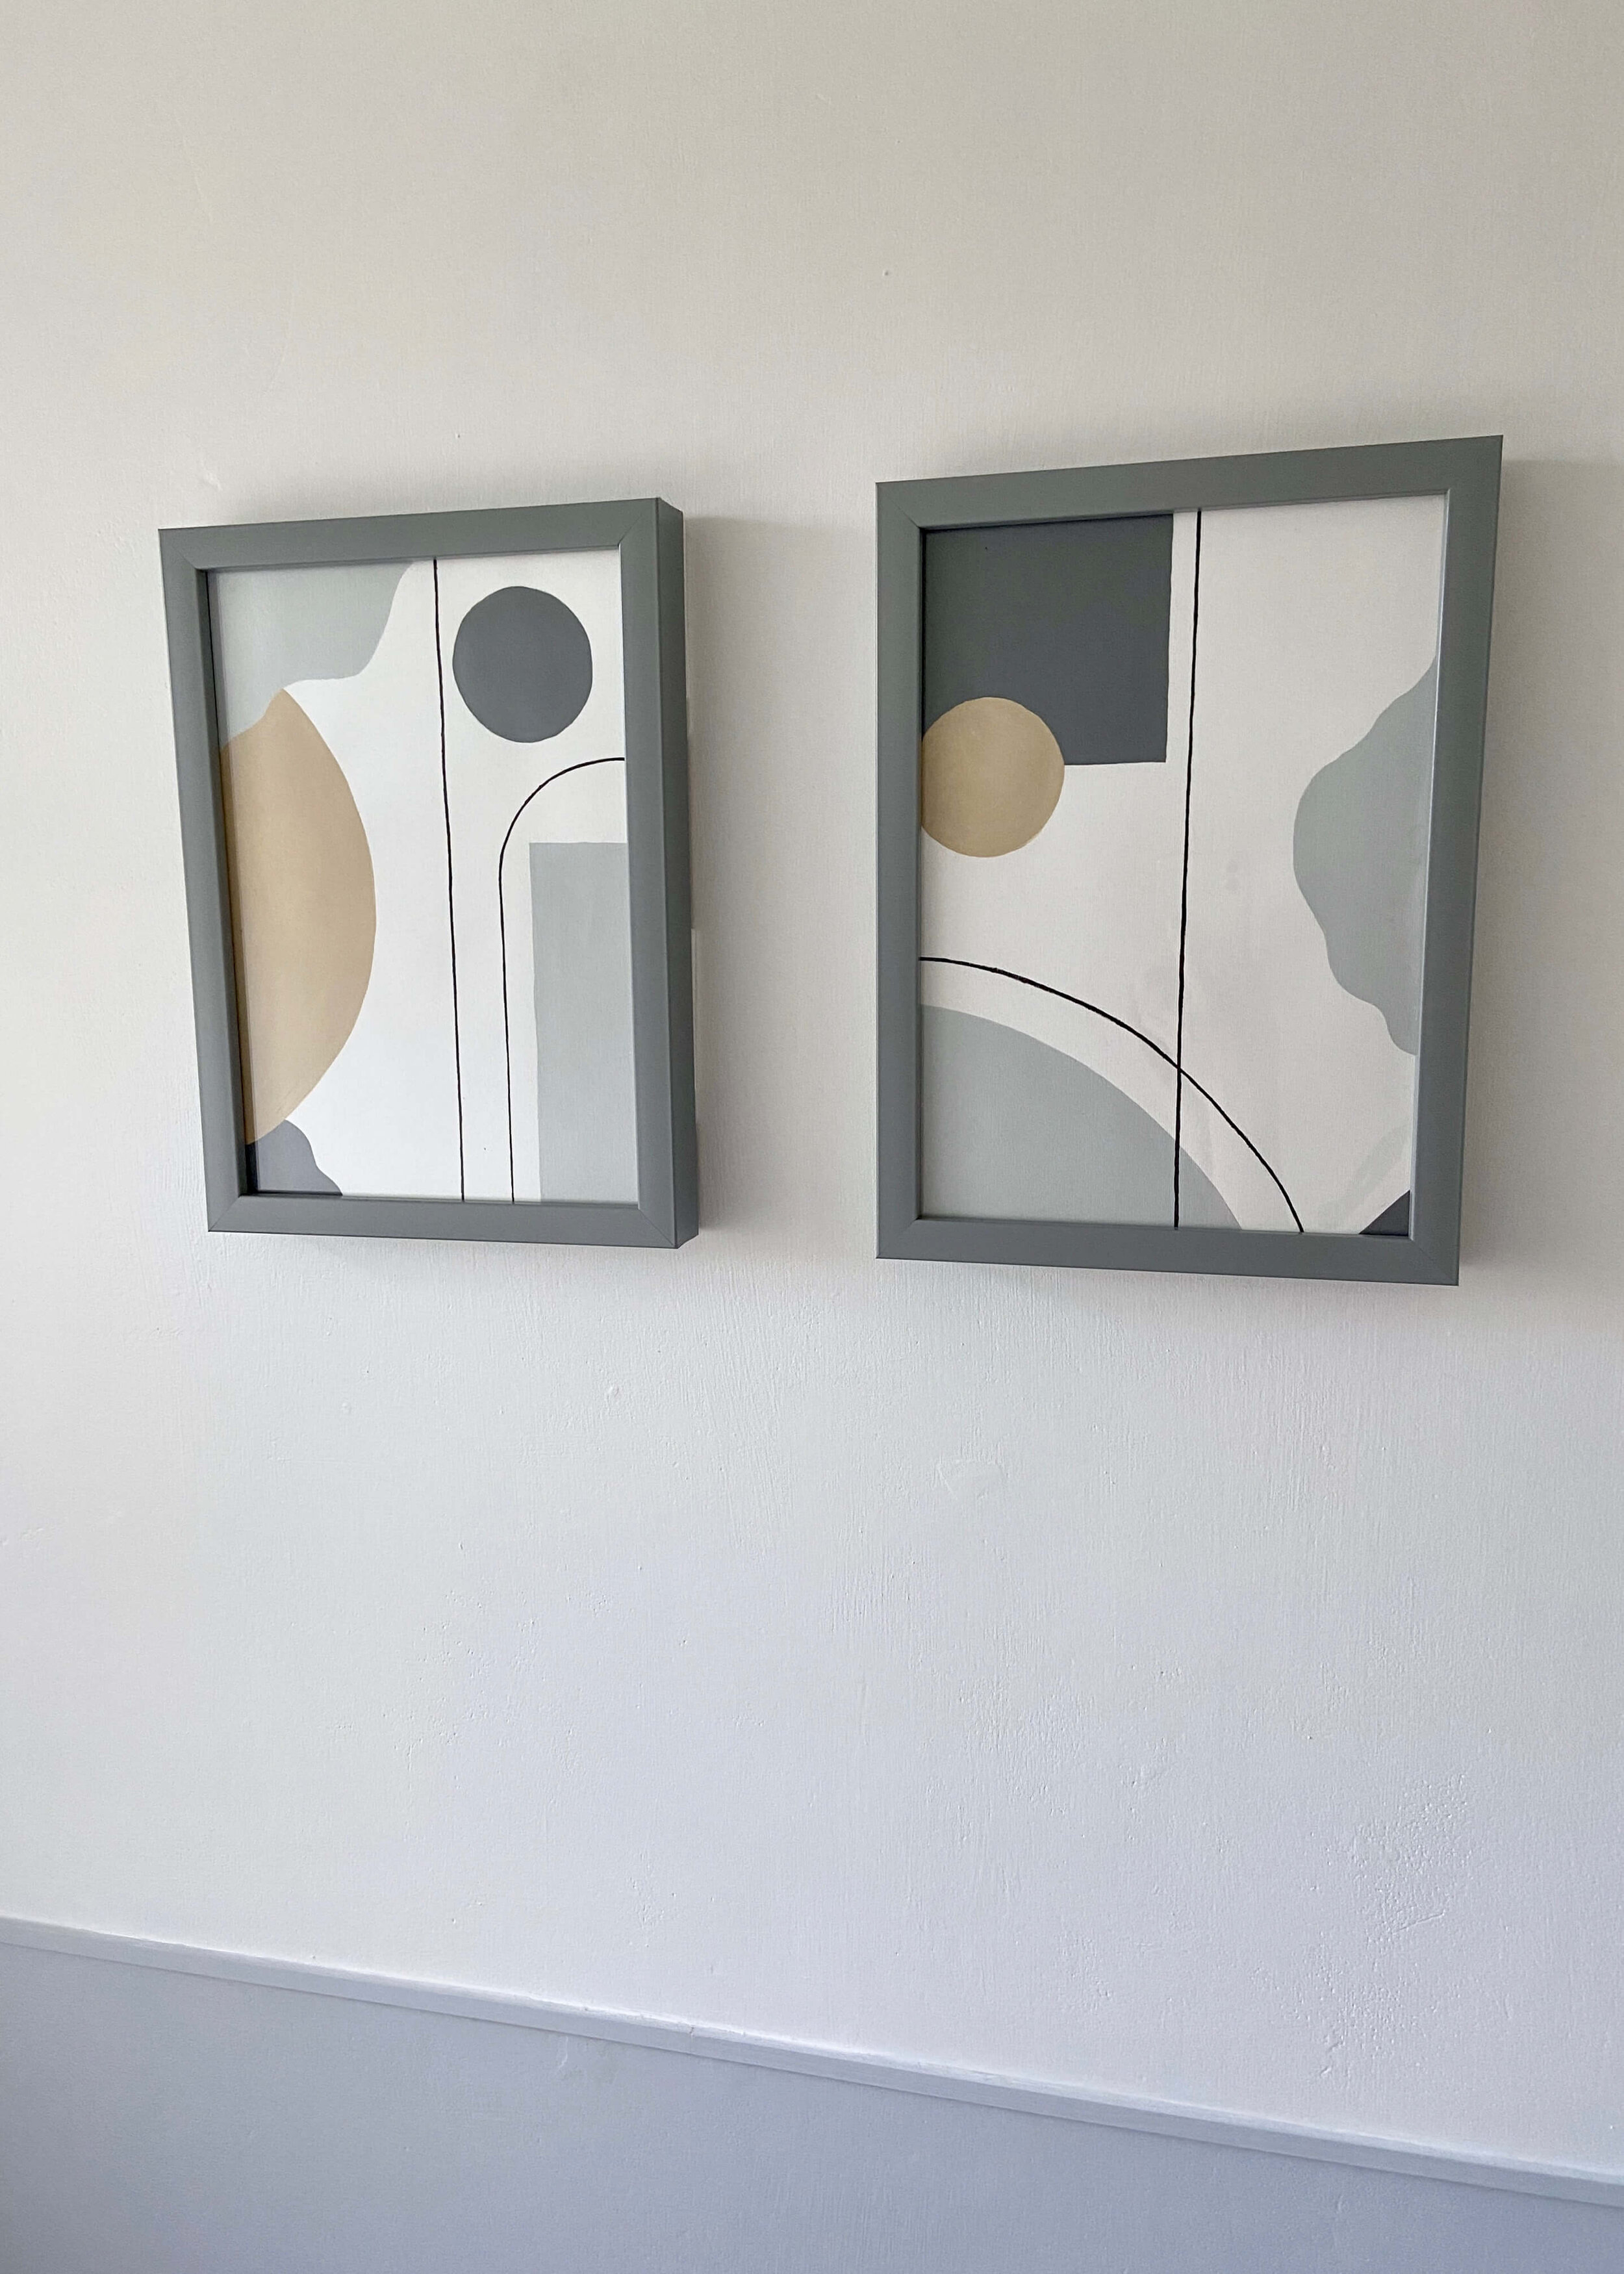
It was then time for the final touches! For this I bought a new white blind (although it came after I took this photos!), added some baskets and plants and painted some abstract art using some of the key colours in the room. If you like these prints, head over to my Society6 store to grab your own copy!
AFTER
before

And that’s it! The photos aren’t the best quality, I think because it was winter and I was doing most of this in the evenings after work, but hopefully you still get the idea. I love this room now, I genuinely enjoyed every step, and I have to say it helped me physically and emotionally get through lockdown and what felt like such a long wait until our house was ready. What do you think? Let me know below!


