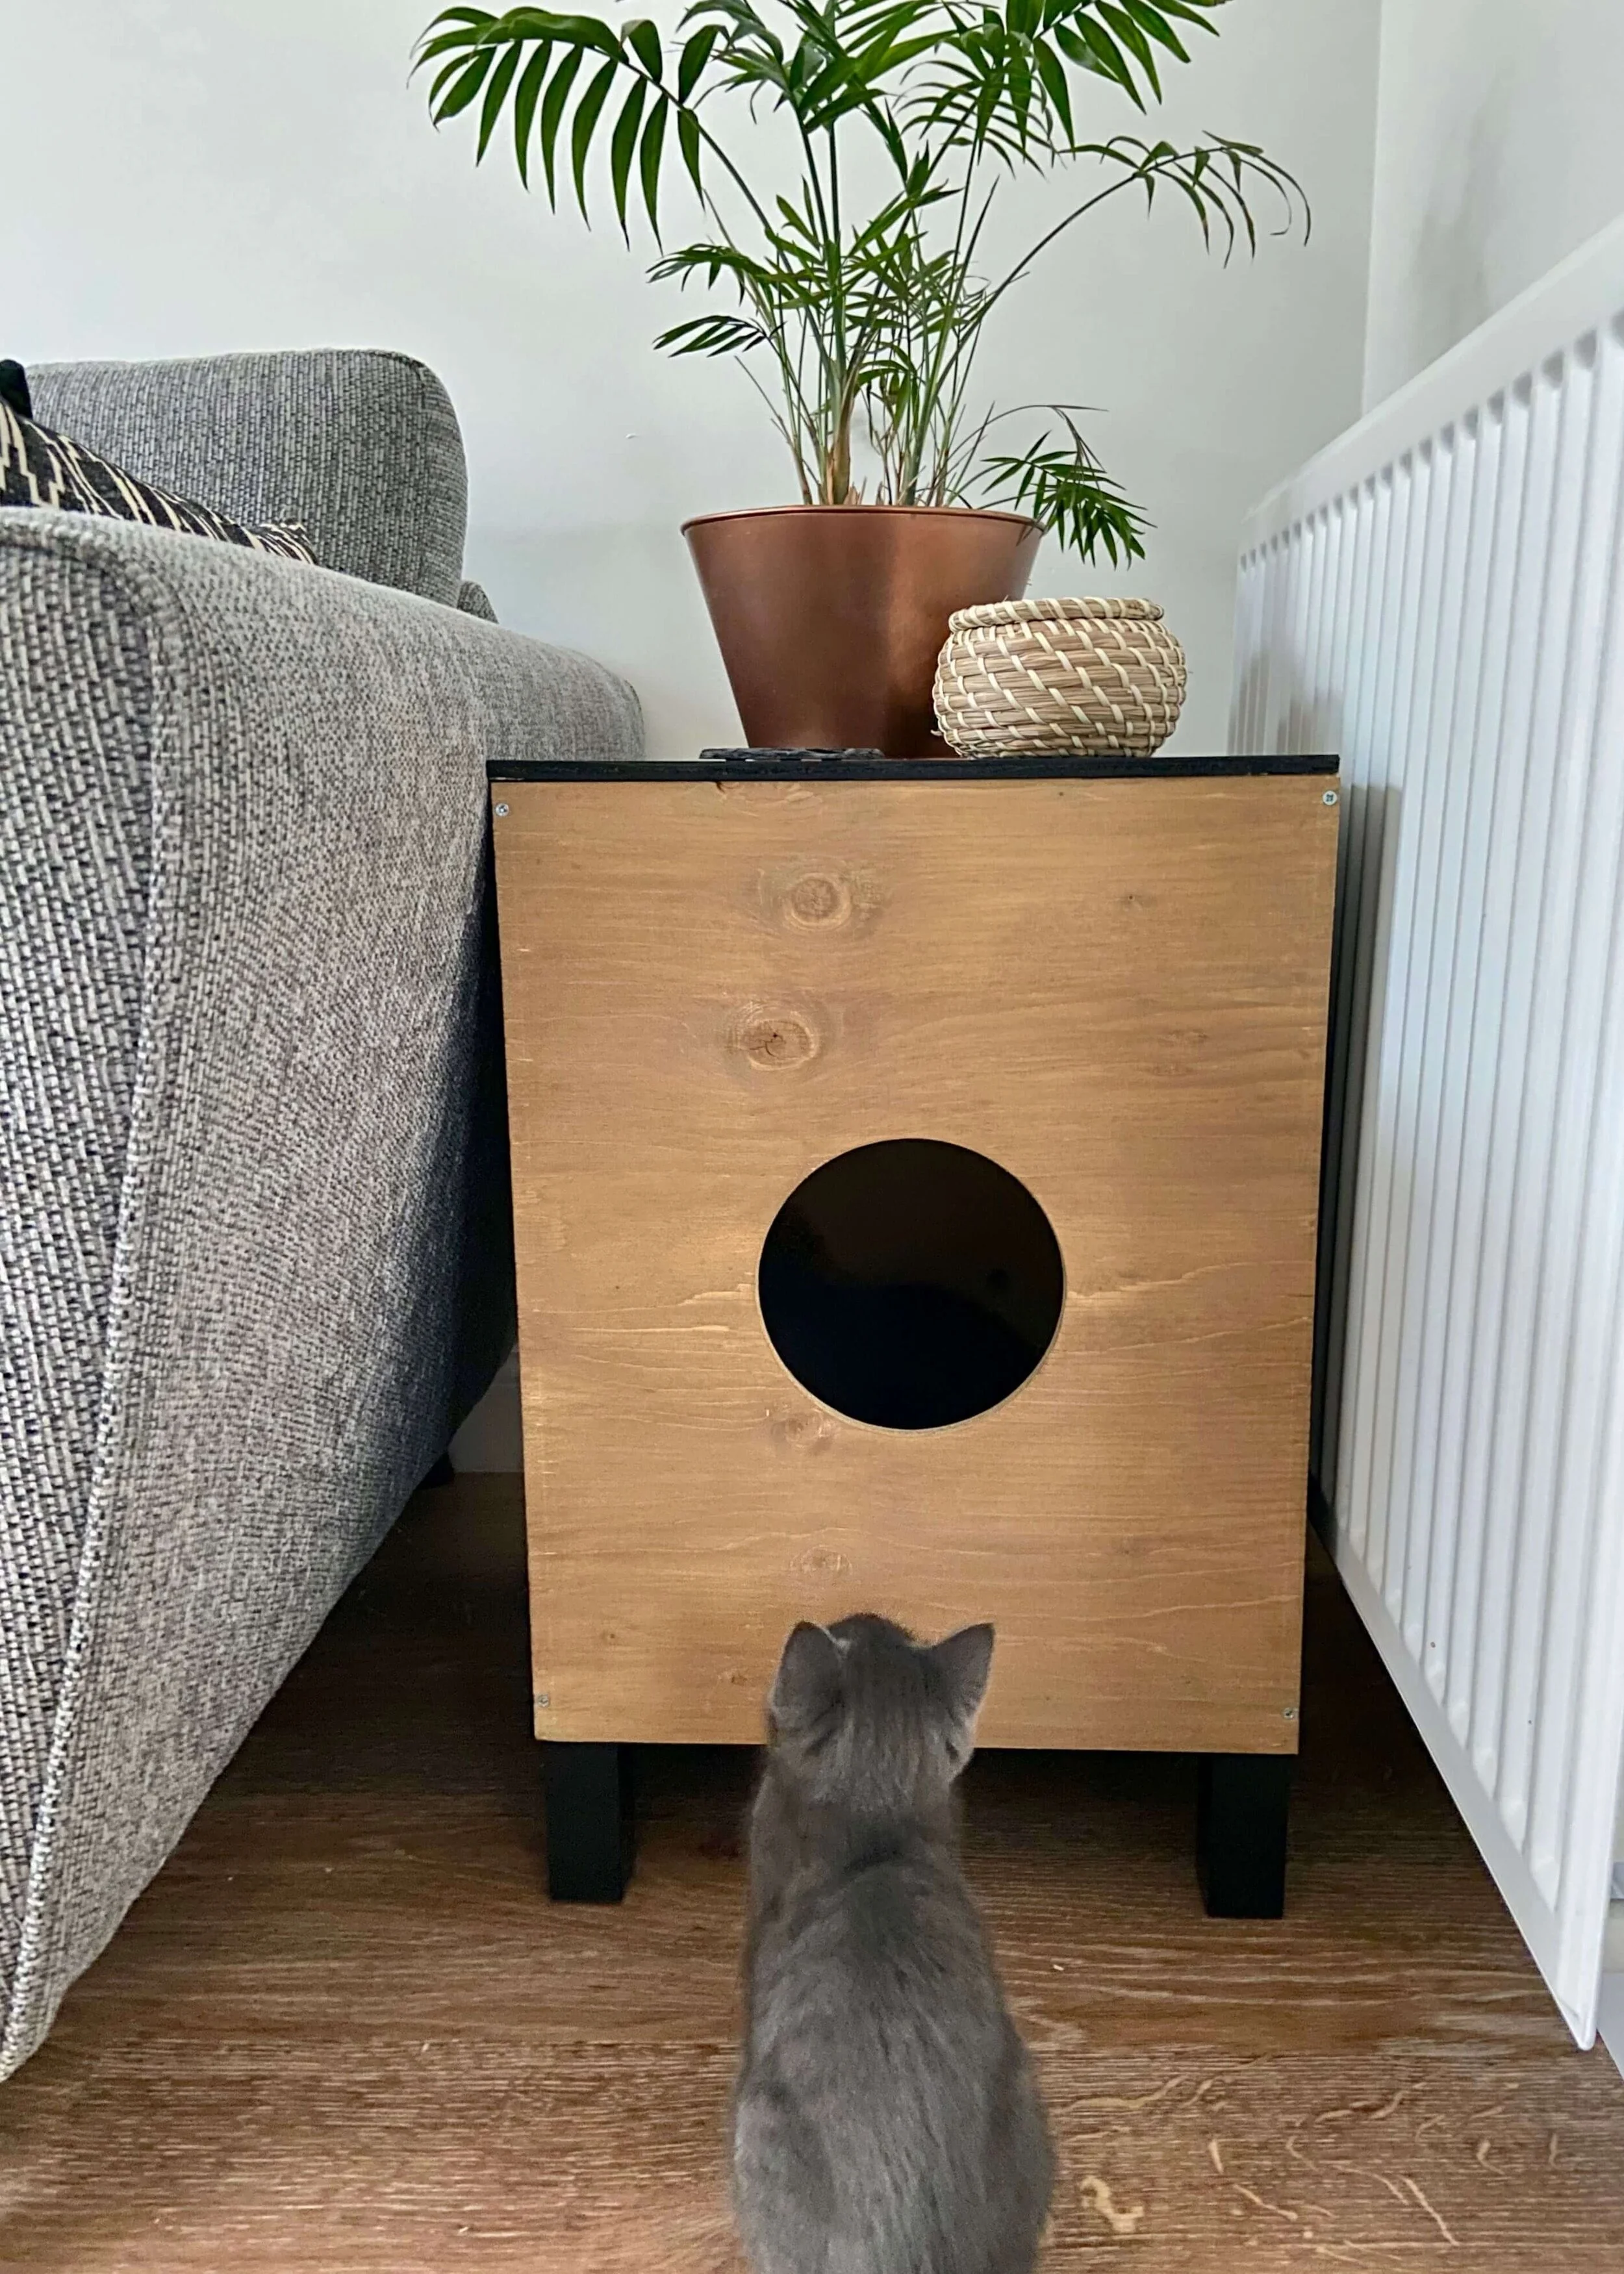
Create an industrial-style cat bed that also acts as a handy side table!
You may have seen on my instagram that we recently got two little grey kittens; Rupert and Nova. We’d been planning to get some once we were settled into the house and had been trying to get some for a while but so has everyone else in the UK this lockdown it seems. Every time we spotted kittens being advertised nearby and by the time we called, they had all been reserved or sold. We finally got lucky though, and we are so in love with our new family members.
I had been planning this project before we got the kittens, and had ordered everything I needed way before we got them, but it just so happened that we managed to get the kittens before the bits for this even arrived. This was most definitely the most challenging project I’ve ever done. My Grandpa was a cabinet maker and so I was hoping to channel some of his many skills, but genetic it most definitely is not. It took me ages to work this out and even once I thought I had, I got it wrong.
But, I eventually got there and am so pleased with how it turned out. I wanted to create my own cat bed side table after seeing this gorgeous Next one from the Bronx range, and with some help from my other half, we managed to make our own, slightly more rustic version, for around half the price. I’ve written the steps of how I made this below, however as I said, I was working this out as I went so if you have some tips let me know in the comments below!


1.
First of all, I decided how big my sheets of plywood needed to be and I ordered them pre-cut from woodsheets.com. If you have the tools, you can of course buy and cut your own sheet of wood. I ordered 6 pieces of 0.9cm plywood, and ended up having to saw some edges off as I didn’t take the width of the wood into account in my calculations. So to learn from my mistakes, what I should have actually ordered was; Top - 1 piece of 40 x 45cm, Bottom - 1 piece of 40 x 44.1cm, Sides - 2 pieces of 44.1 x 49.1cm, Front - 1 piece of 40 x 50cm, Back - 1 piece of 38.2 x 49.1cm.

2.
Next, find the centre of the front piece and use the hole saw or if you have one, a jig saw to cut out a 6 inch hole in the middle. Be sure to sand anything that you cut so that it’s nice and smooth for your furry friends to brush against.

3.
I used a medium oak stain to stain the front and back piece. The stain I used was pretty yellow though so I ended up mixing some brown and black acrylic paint in water and brushing this over the wood to darken it a bit.

4.
Paint the top, bottom and side pieces in black wood or furniture paint. I used Rustoleum chalk paint, only painted the outward facing sides and edges, and did 2 coats on each.

5.
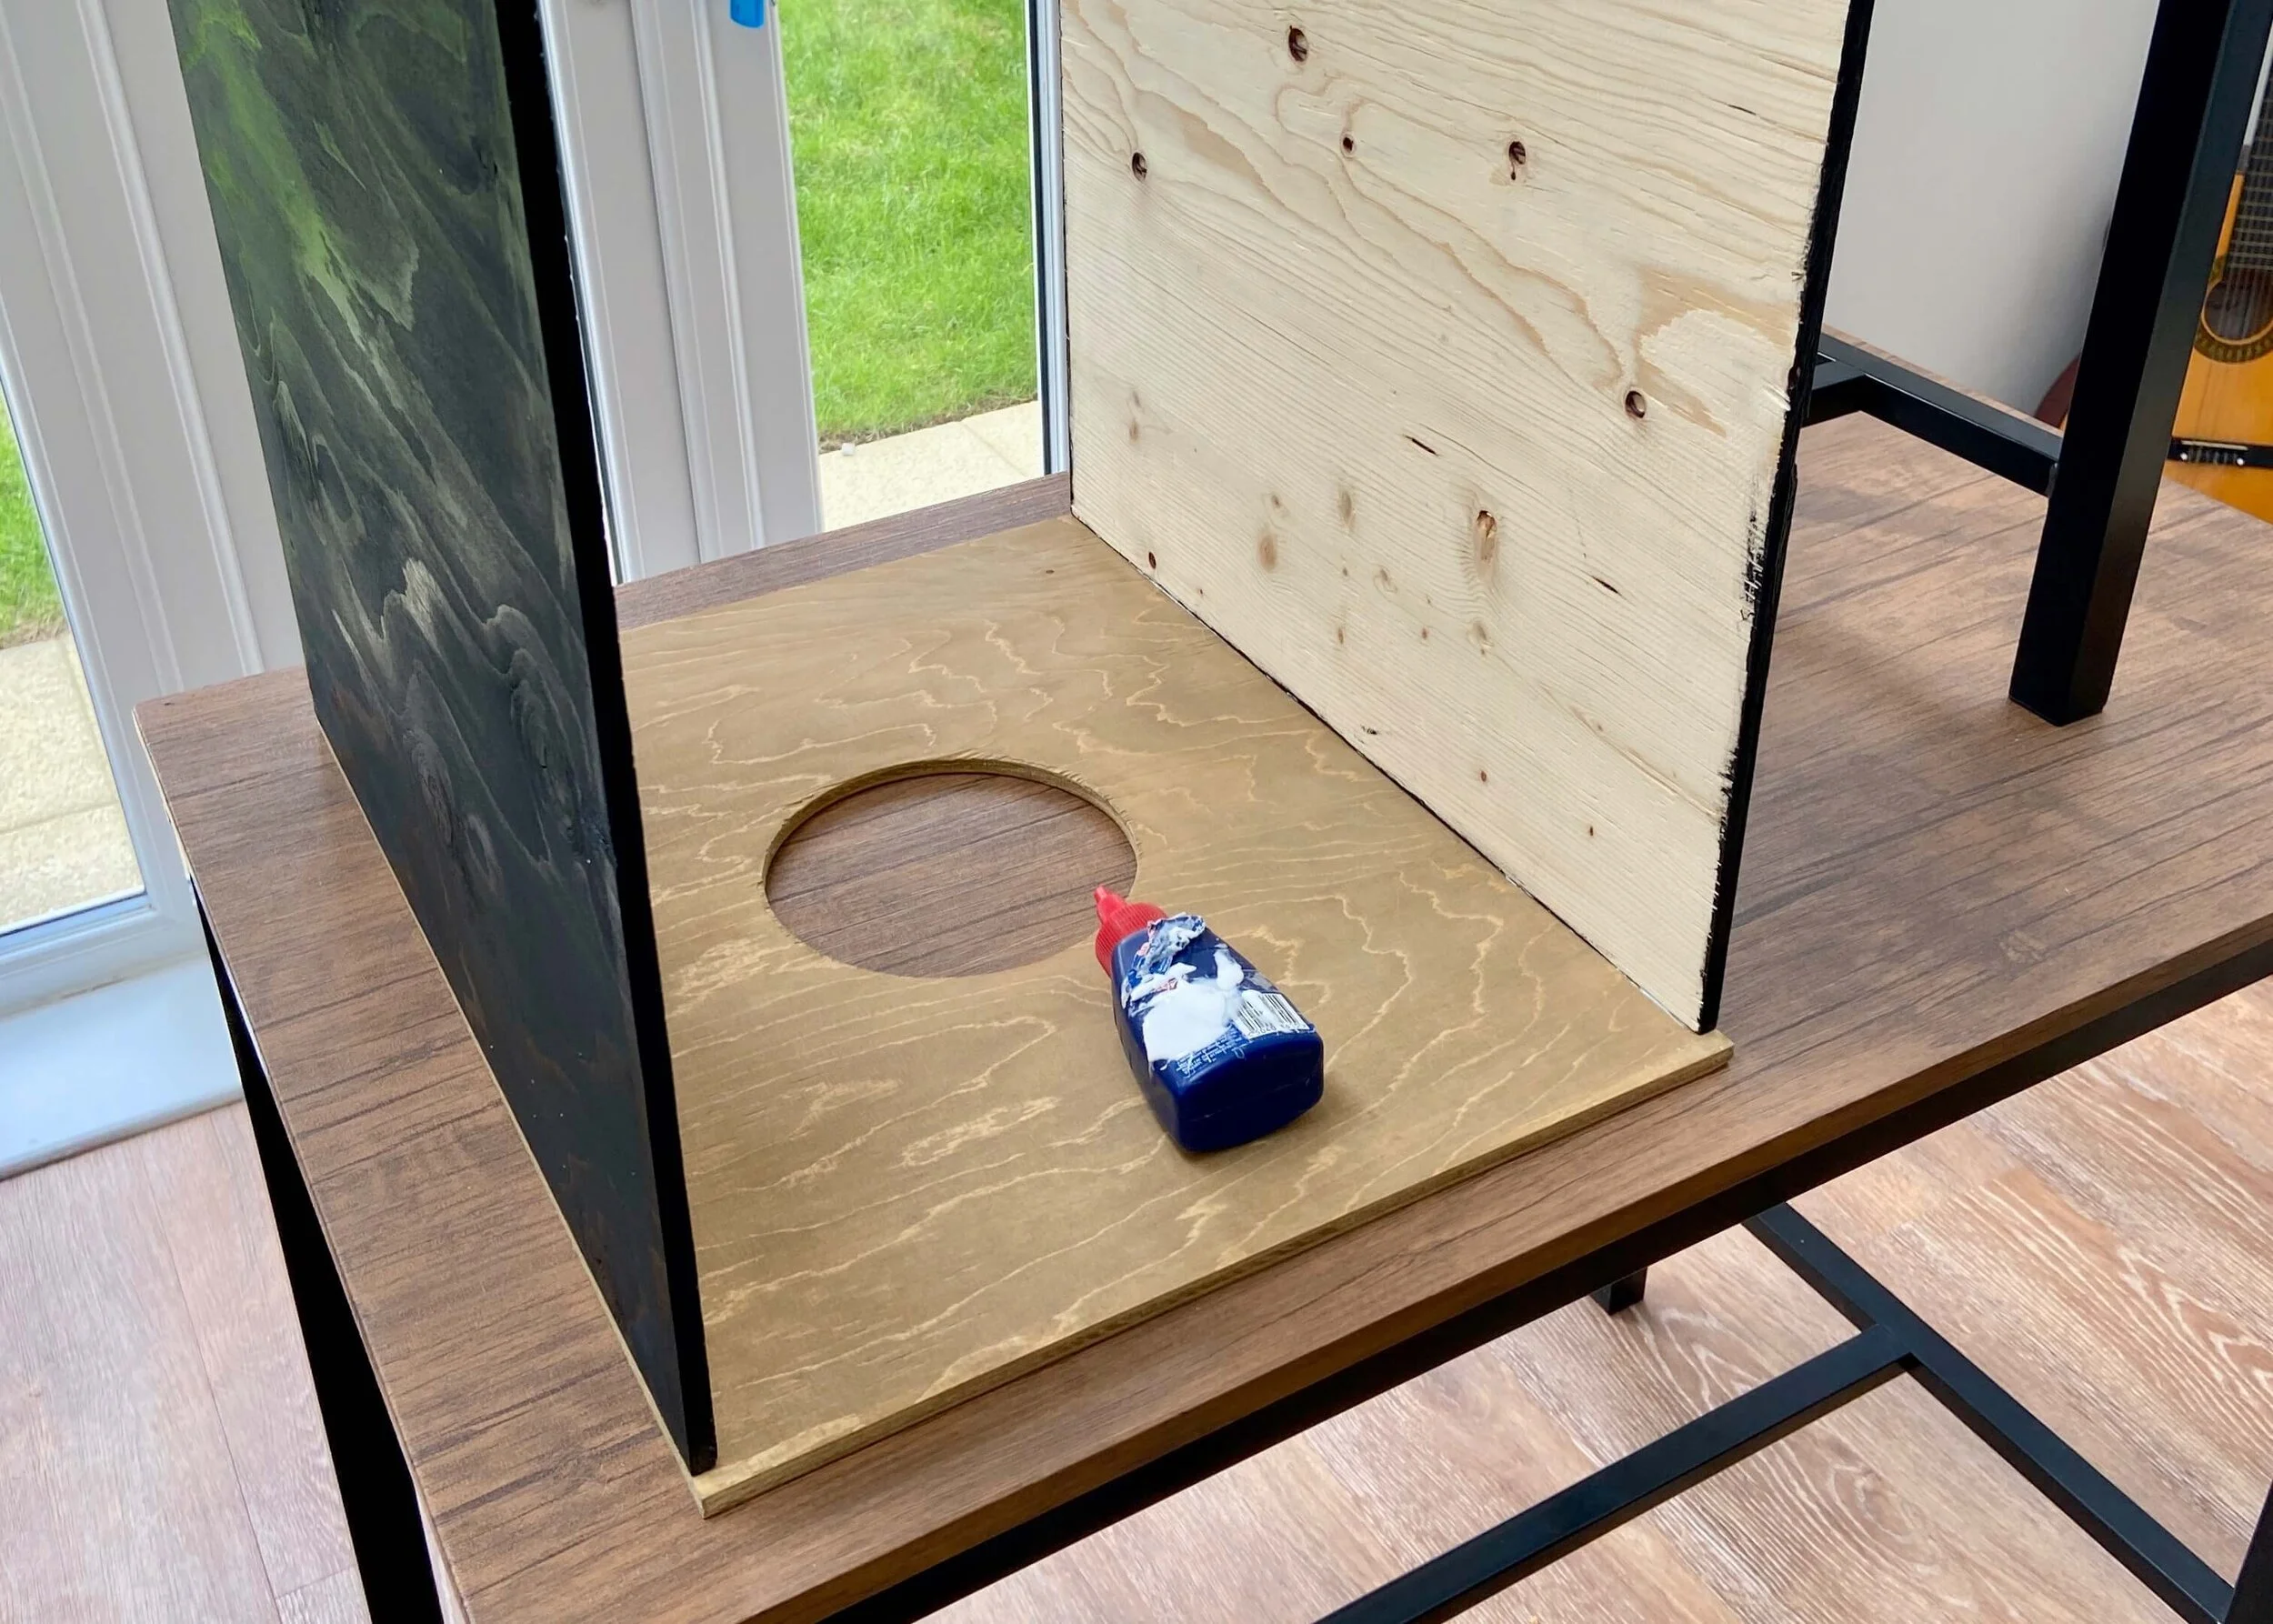
Once all of your pieces are dry, you’re ready to assemble. I didn’t want any edges showing on the front, and so used my front piece as a base. Place your front piece front facing down on the floor. Use wood glue to stick one of the sides to this front panel, ensuring that the top of the front piece and the top of the side piece are level.

6.
When this is dry, drill two pilot holes through the front piece into the side piece and use the appropriate screws to secure the two pieces of wood together.
7.
Repeat steps 5 and 6 on the other side so that you now have the front piece with two sides attached with glue and screws. Again, the top of all pieces should be level.

8.
Next, glue the bottom on - with the side pieces slightly shorter at the bottom than the front piece, this piece should glue to the two sides and the front piece. Use a drill to create pilot holes and use screws to secure the bottom to the side pieces.

9.
Cover all edges of the back piece with wood glue, and slot it into place. It should fit on top of the bottom piece and in between the side pieces. When the glue is dry, use pilot holes and screws to secure it to the bottom and side pieces.

10.
Next, place your top piece where it will go and using a pencil, draw on the under side of it through the hole at front, to mark the internal edge of the side and back pieces. Connect these edges using a ruler. This is where you want to glue some thinner wooden strips so that your lid doesn’t move around, but can still be lifted off.

11.
Finally, use some shorter screws to secure the legs into the corners of the bottom piece. Where the screws are exposed on the sides and bottom piece, use your black paint to hide them. I haven’t yet but if you want, you can finish off with a coat of varnish all over to protect your hard work.