


Decorate for the darker seasons in style with easy moon phase wall art
I love the warm Autumnal tones you see at this time of year, and as you might know if you’ve been here before, I enjoy all things celestial. We need some more wall art in the office / guest room, so I decided to bring all these ideas together in my own homemade moon phase wall art. This really was so easy but I think the end result turned out pretty well. I wasn’t too worried about being really neat and making the moon phases perfectly symmetrical, I just let my creativity run free and enjoyed the process. I don’t think I’ve shared a tutorial for art on here before, I’m not sure if this is too simple to need a tutorial, but I personally enjoy seeing these sort of posts and videos myself, so let me know if you enjoy these kinds of posts. Keep reading to find out how I made it and what I used…


Watercolour paint
Watercolour paper
Brush pen


1.
Paint a wash of a light beige watercolour paint all over your paper leaving the edges clean.

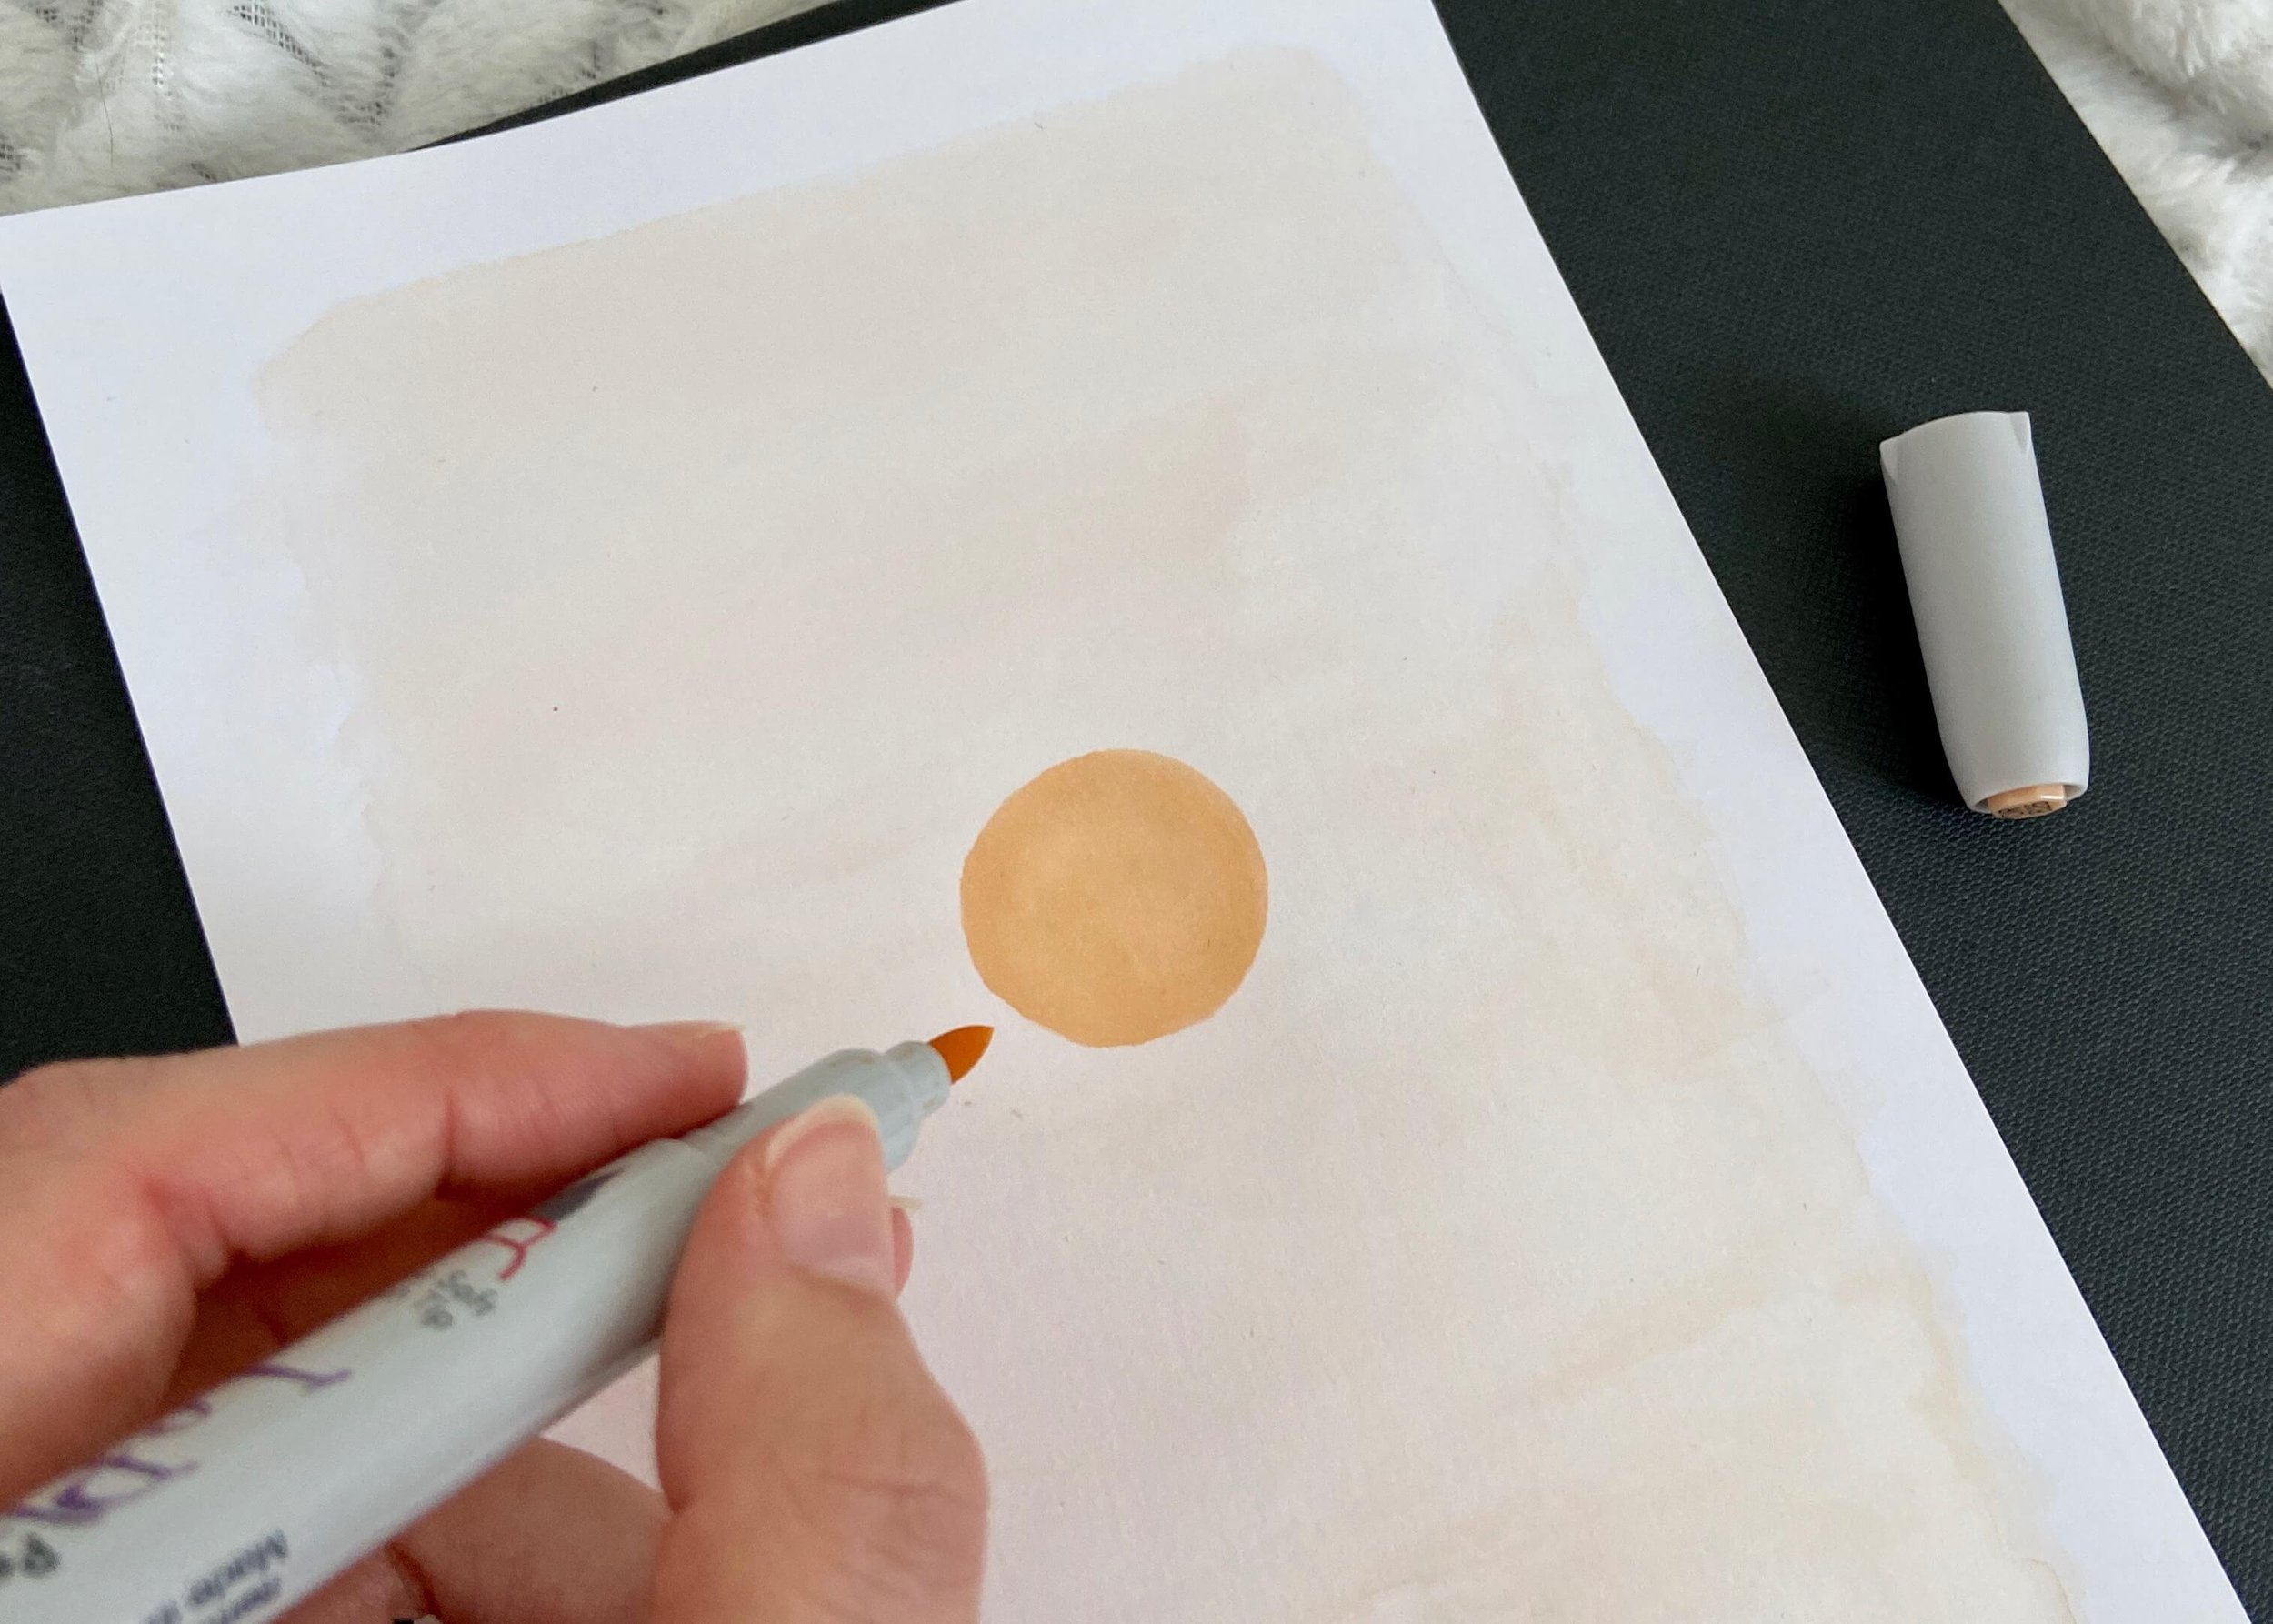
2.
Once the background is dry, use a brush pen in your chosen colour to first draw a circle in the middle of the paper and fill this in.
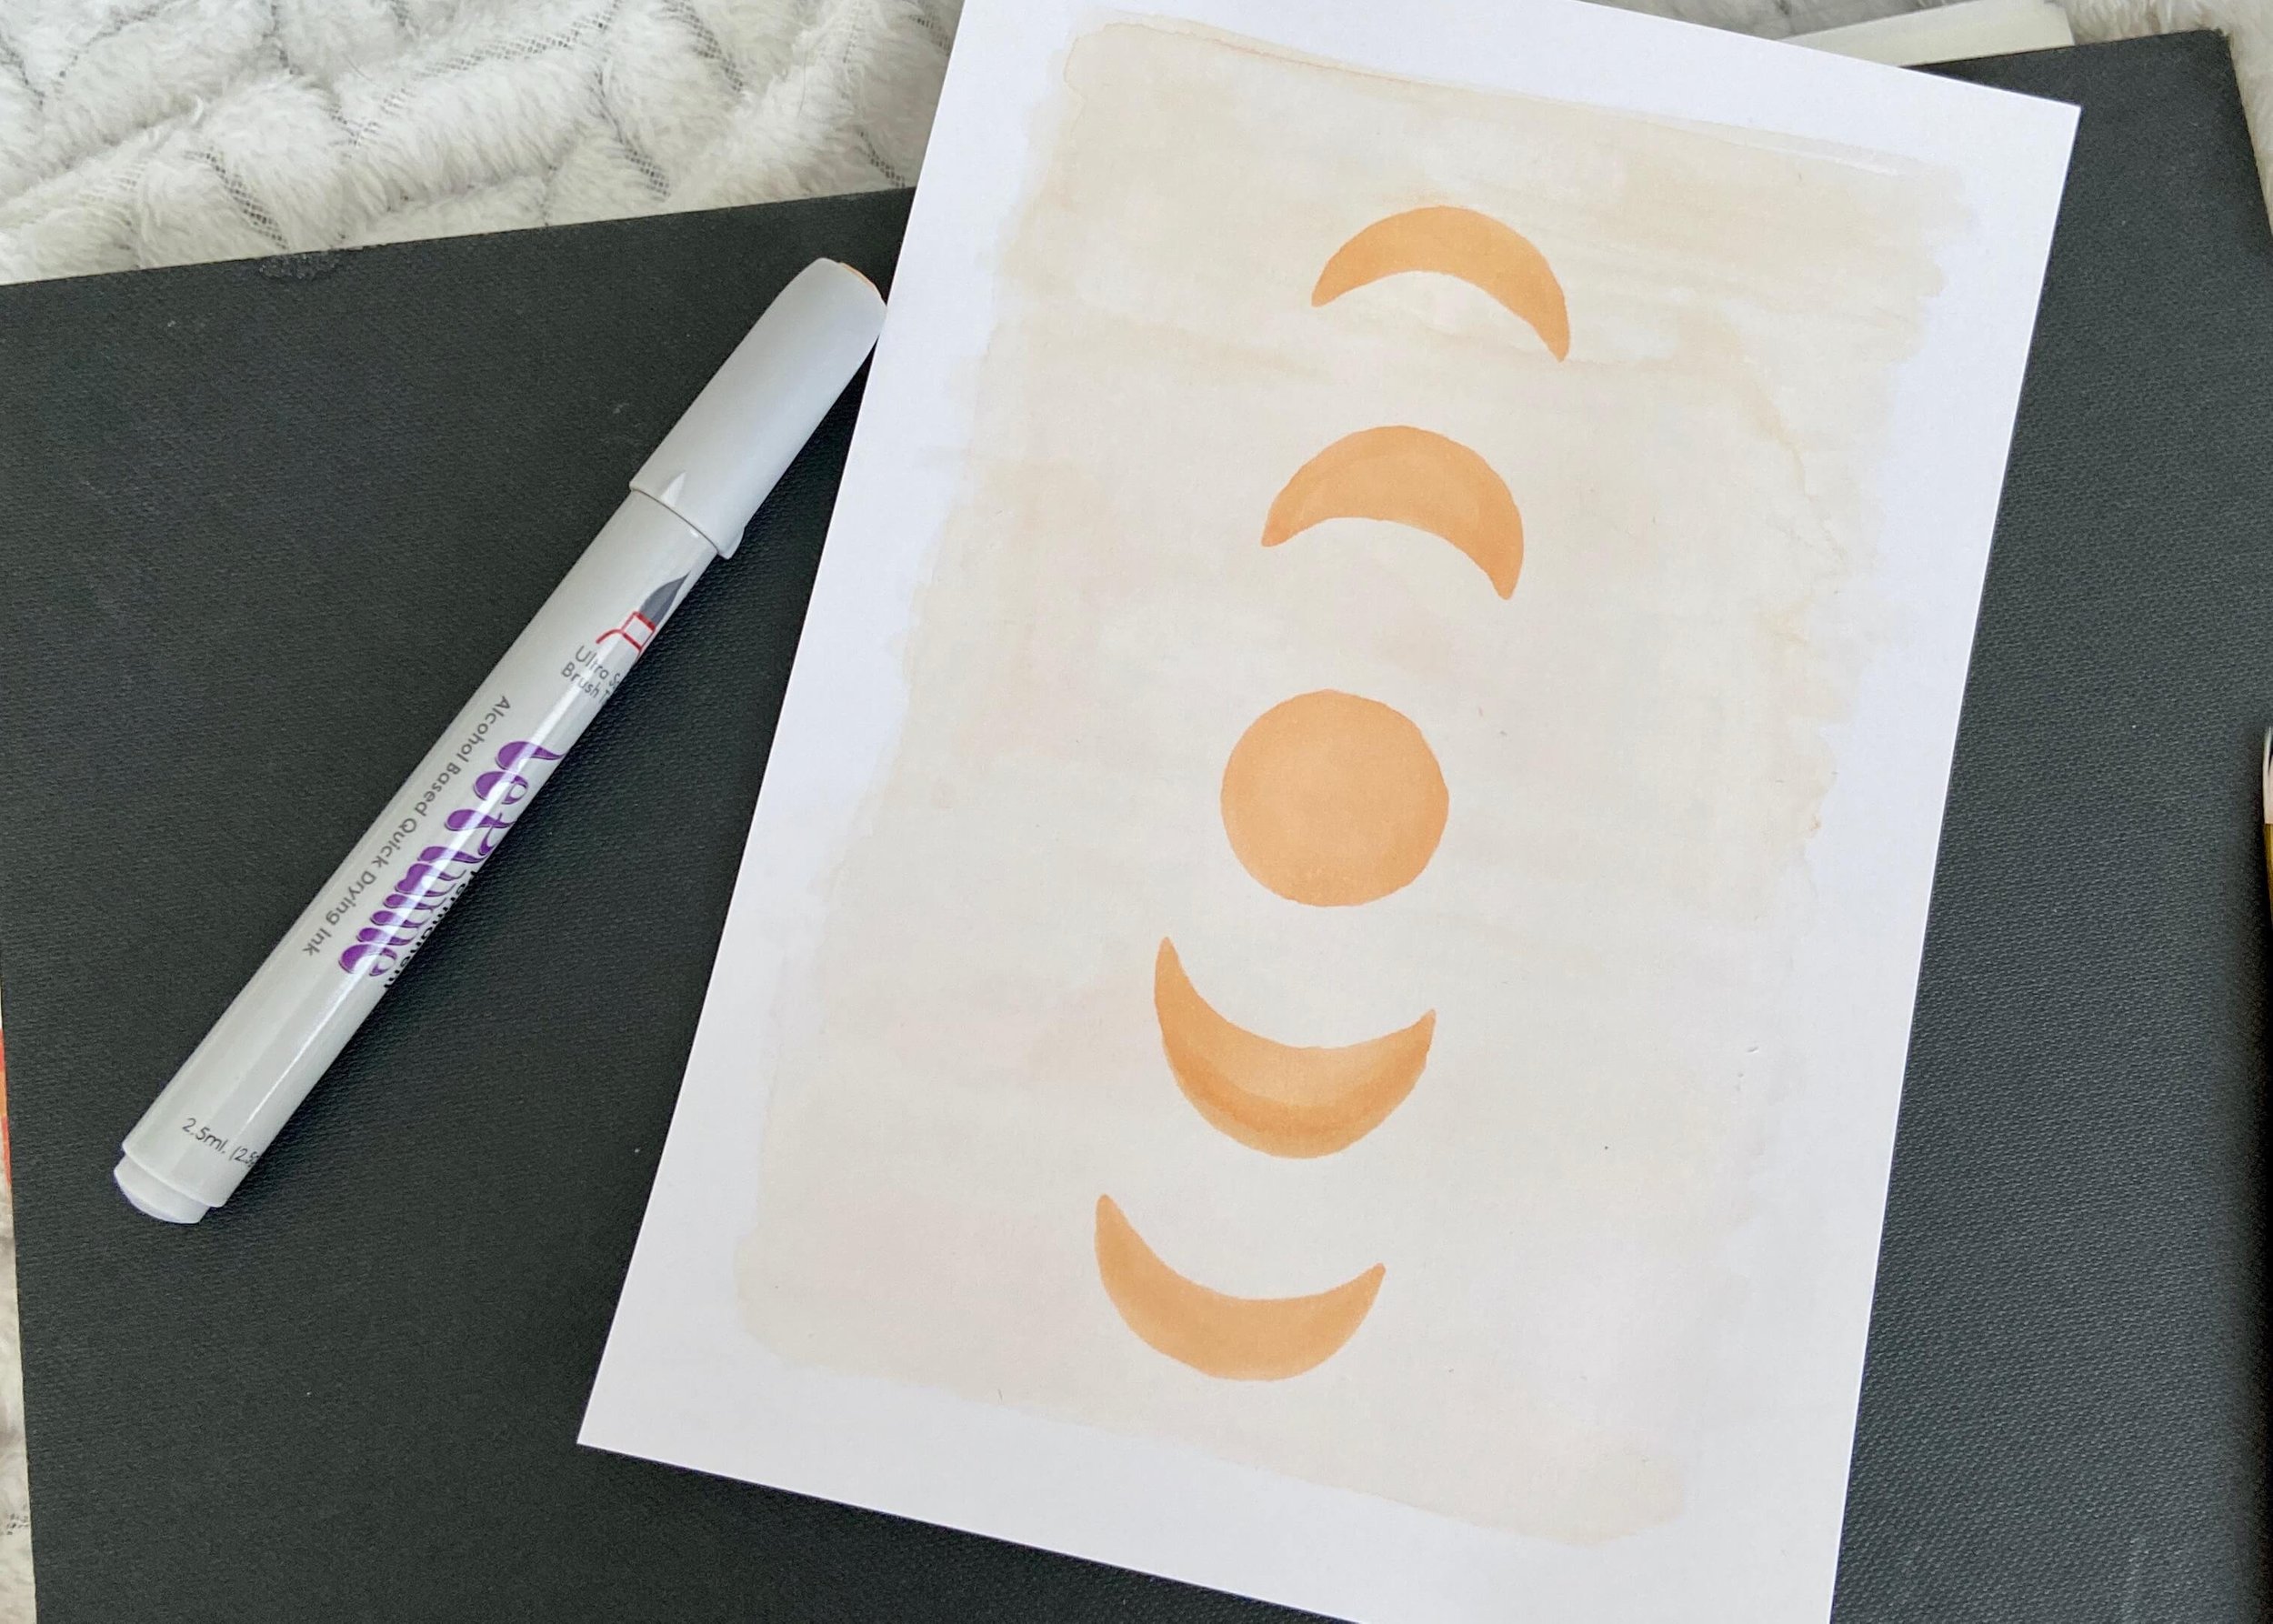
3.
Next, draw out a crescent moon shape above and below this circle. Fill these in, and then draw slightly thinner crescent moons above and below these.

4.
Using water colour paints in a slightly darker colour, stipple paint on to one side of the moon shapes. Use tissue to remove some where it becomes too heavy.

5.
Finally, using gold paint, add some circles and dots in between and around your shapes.


