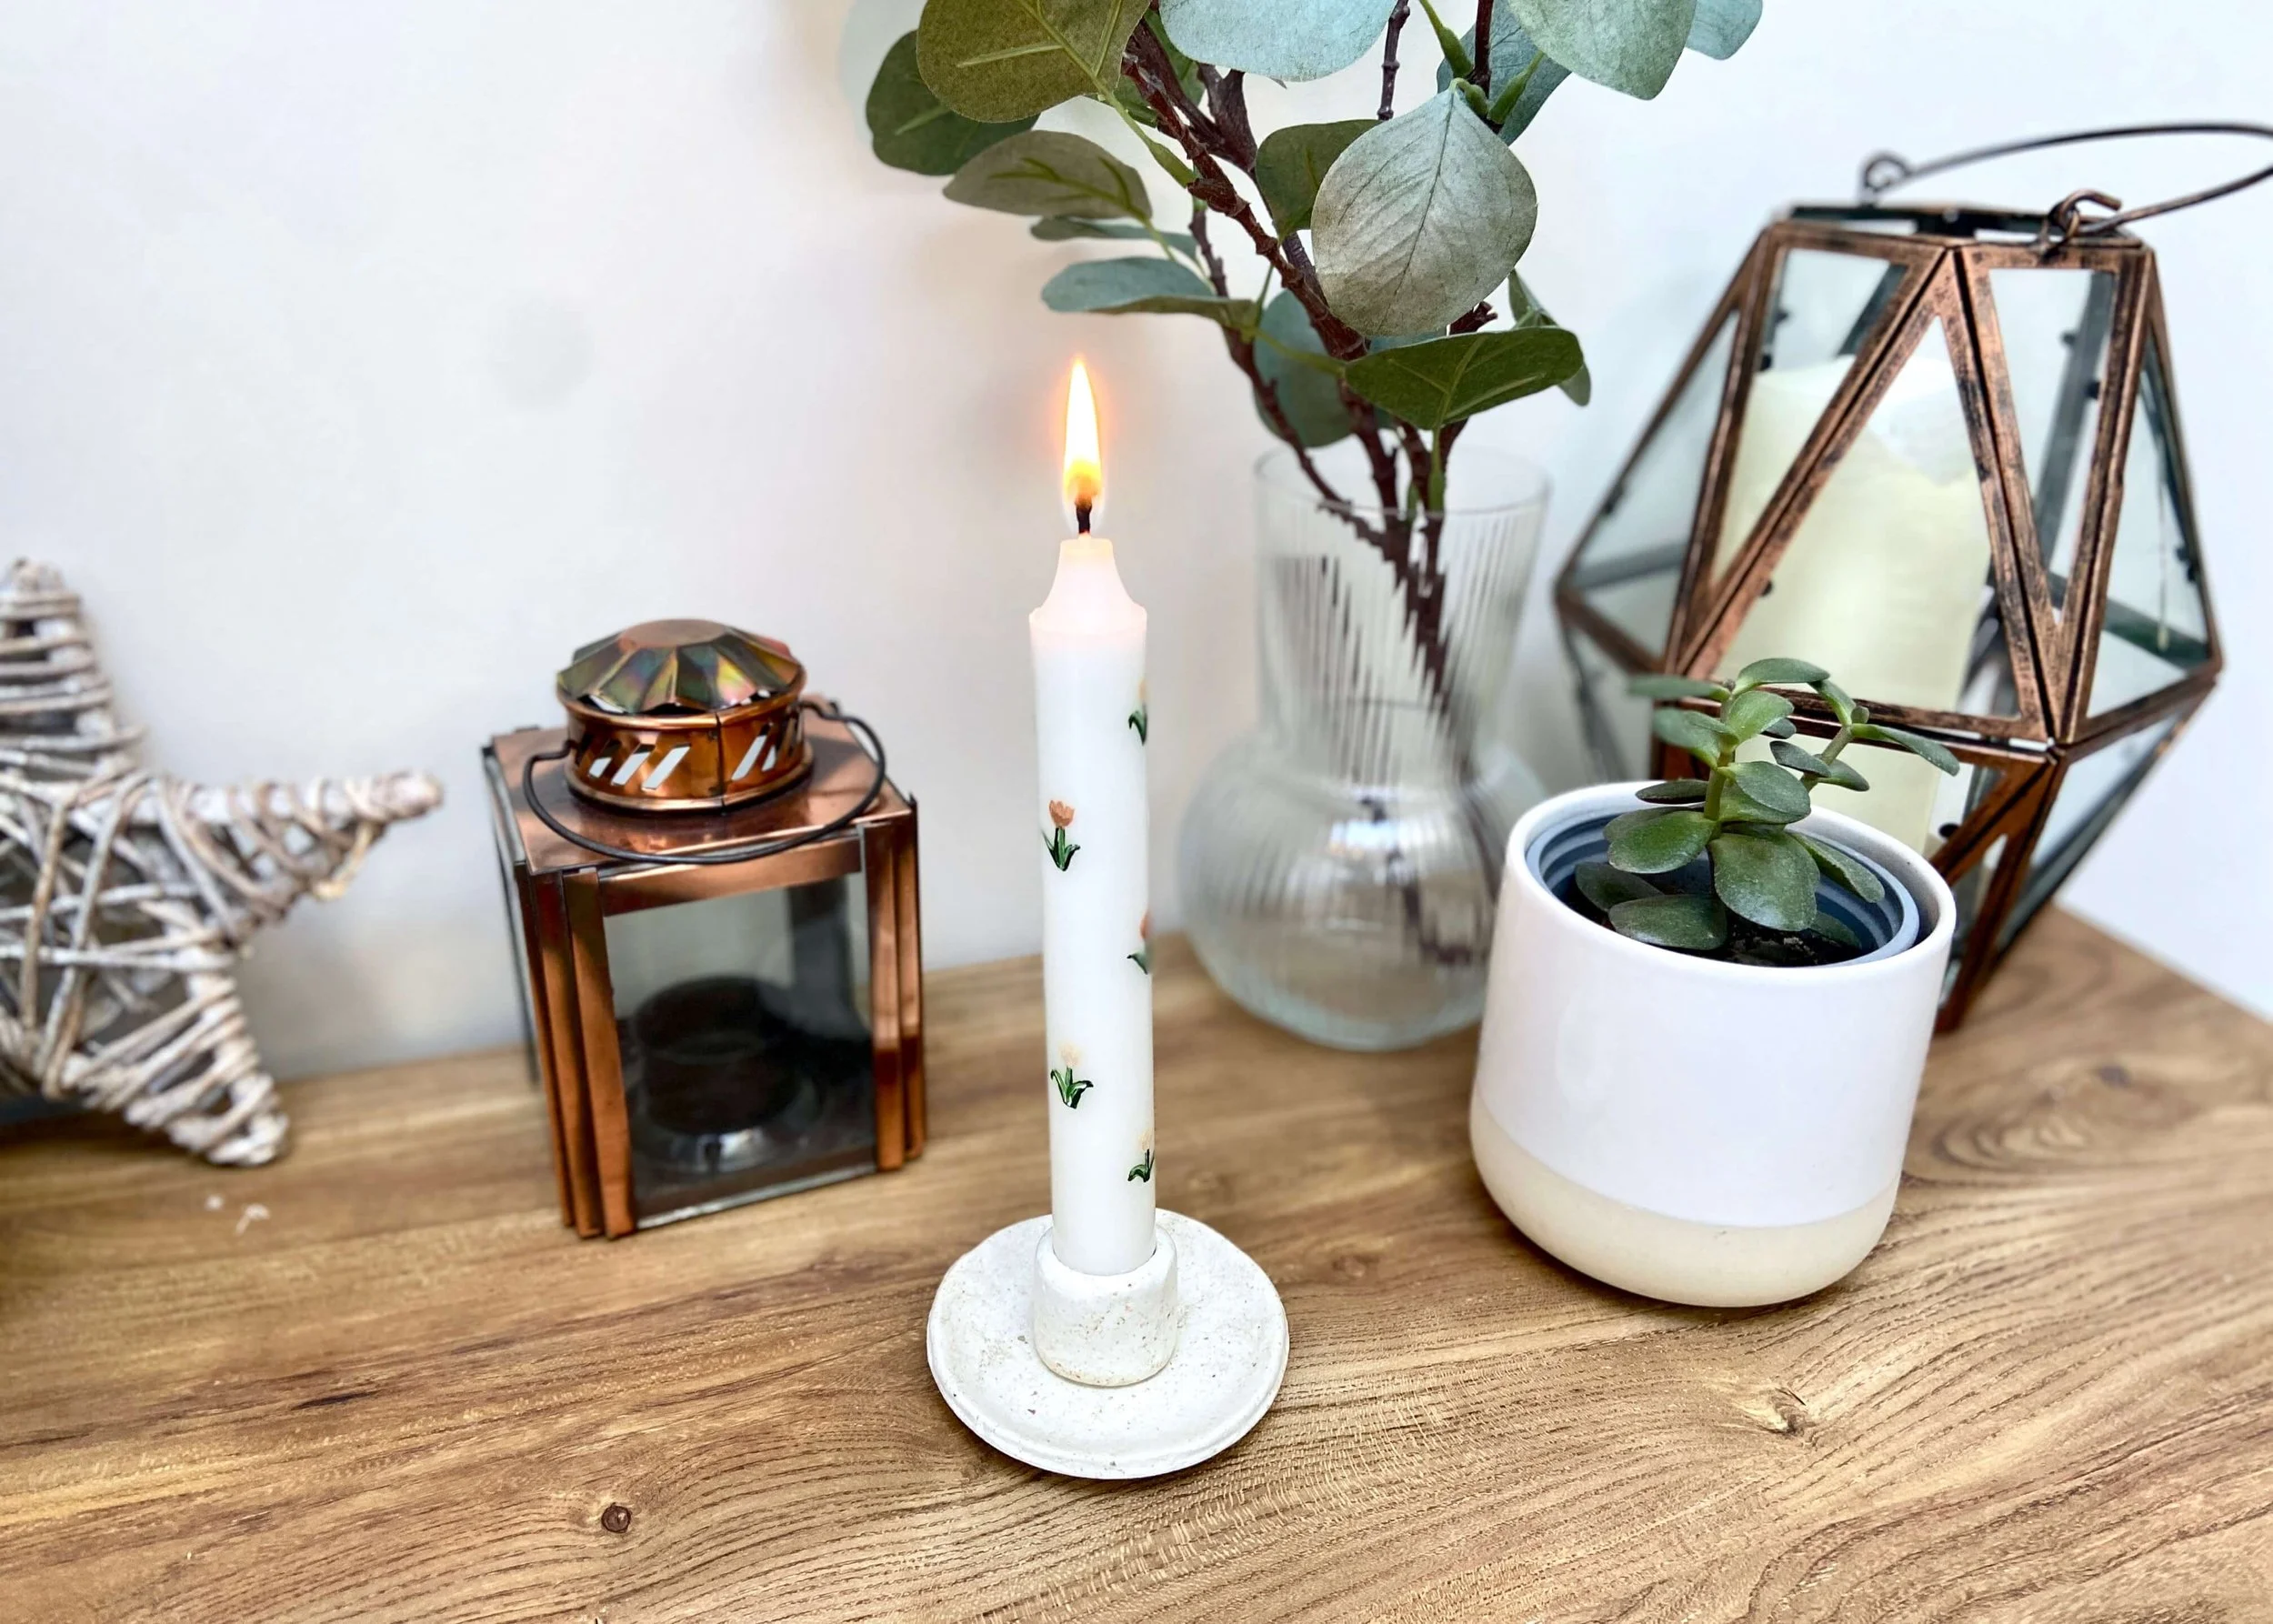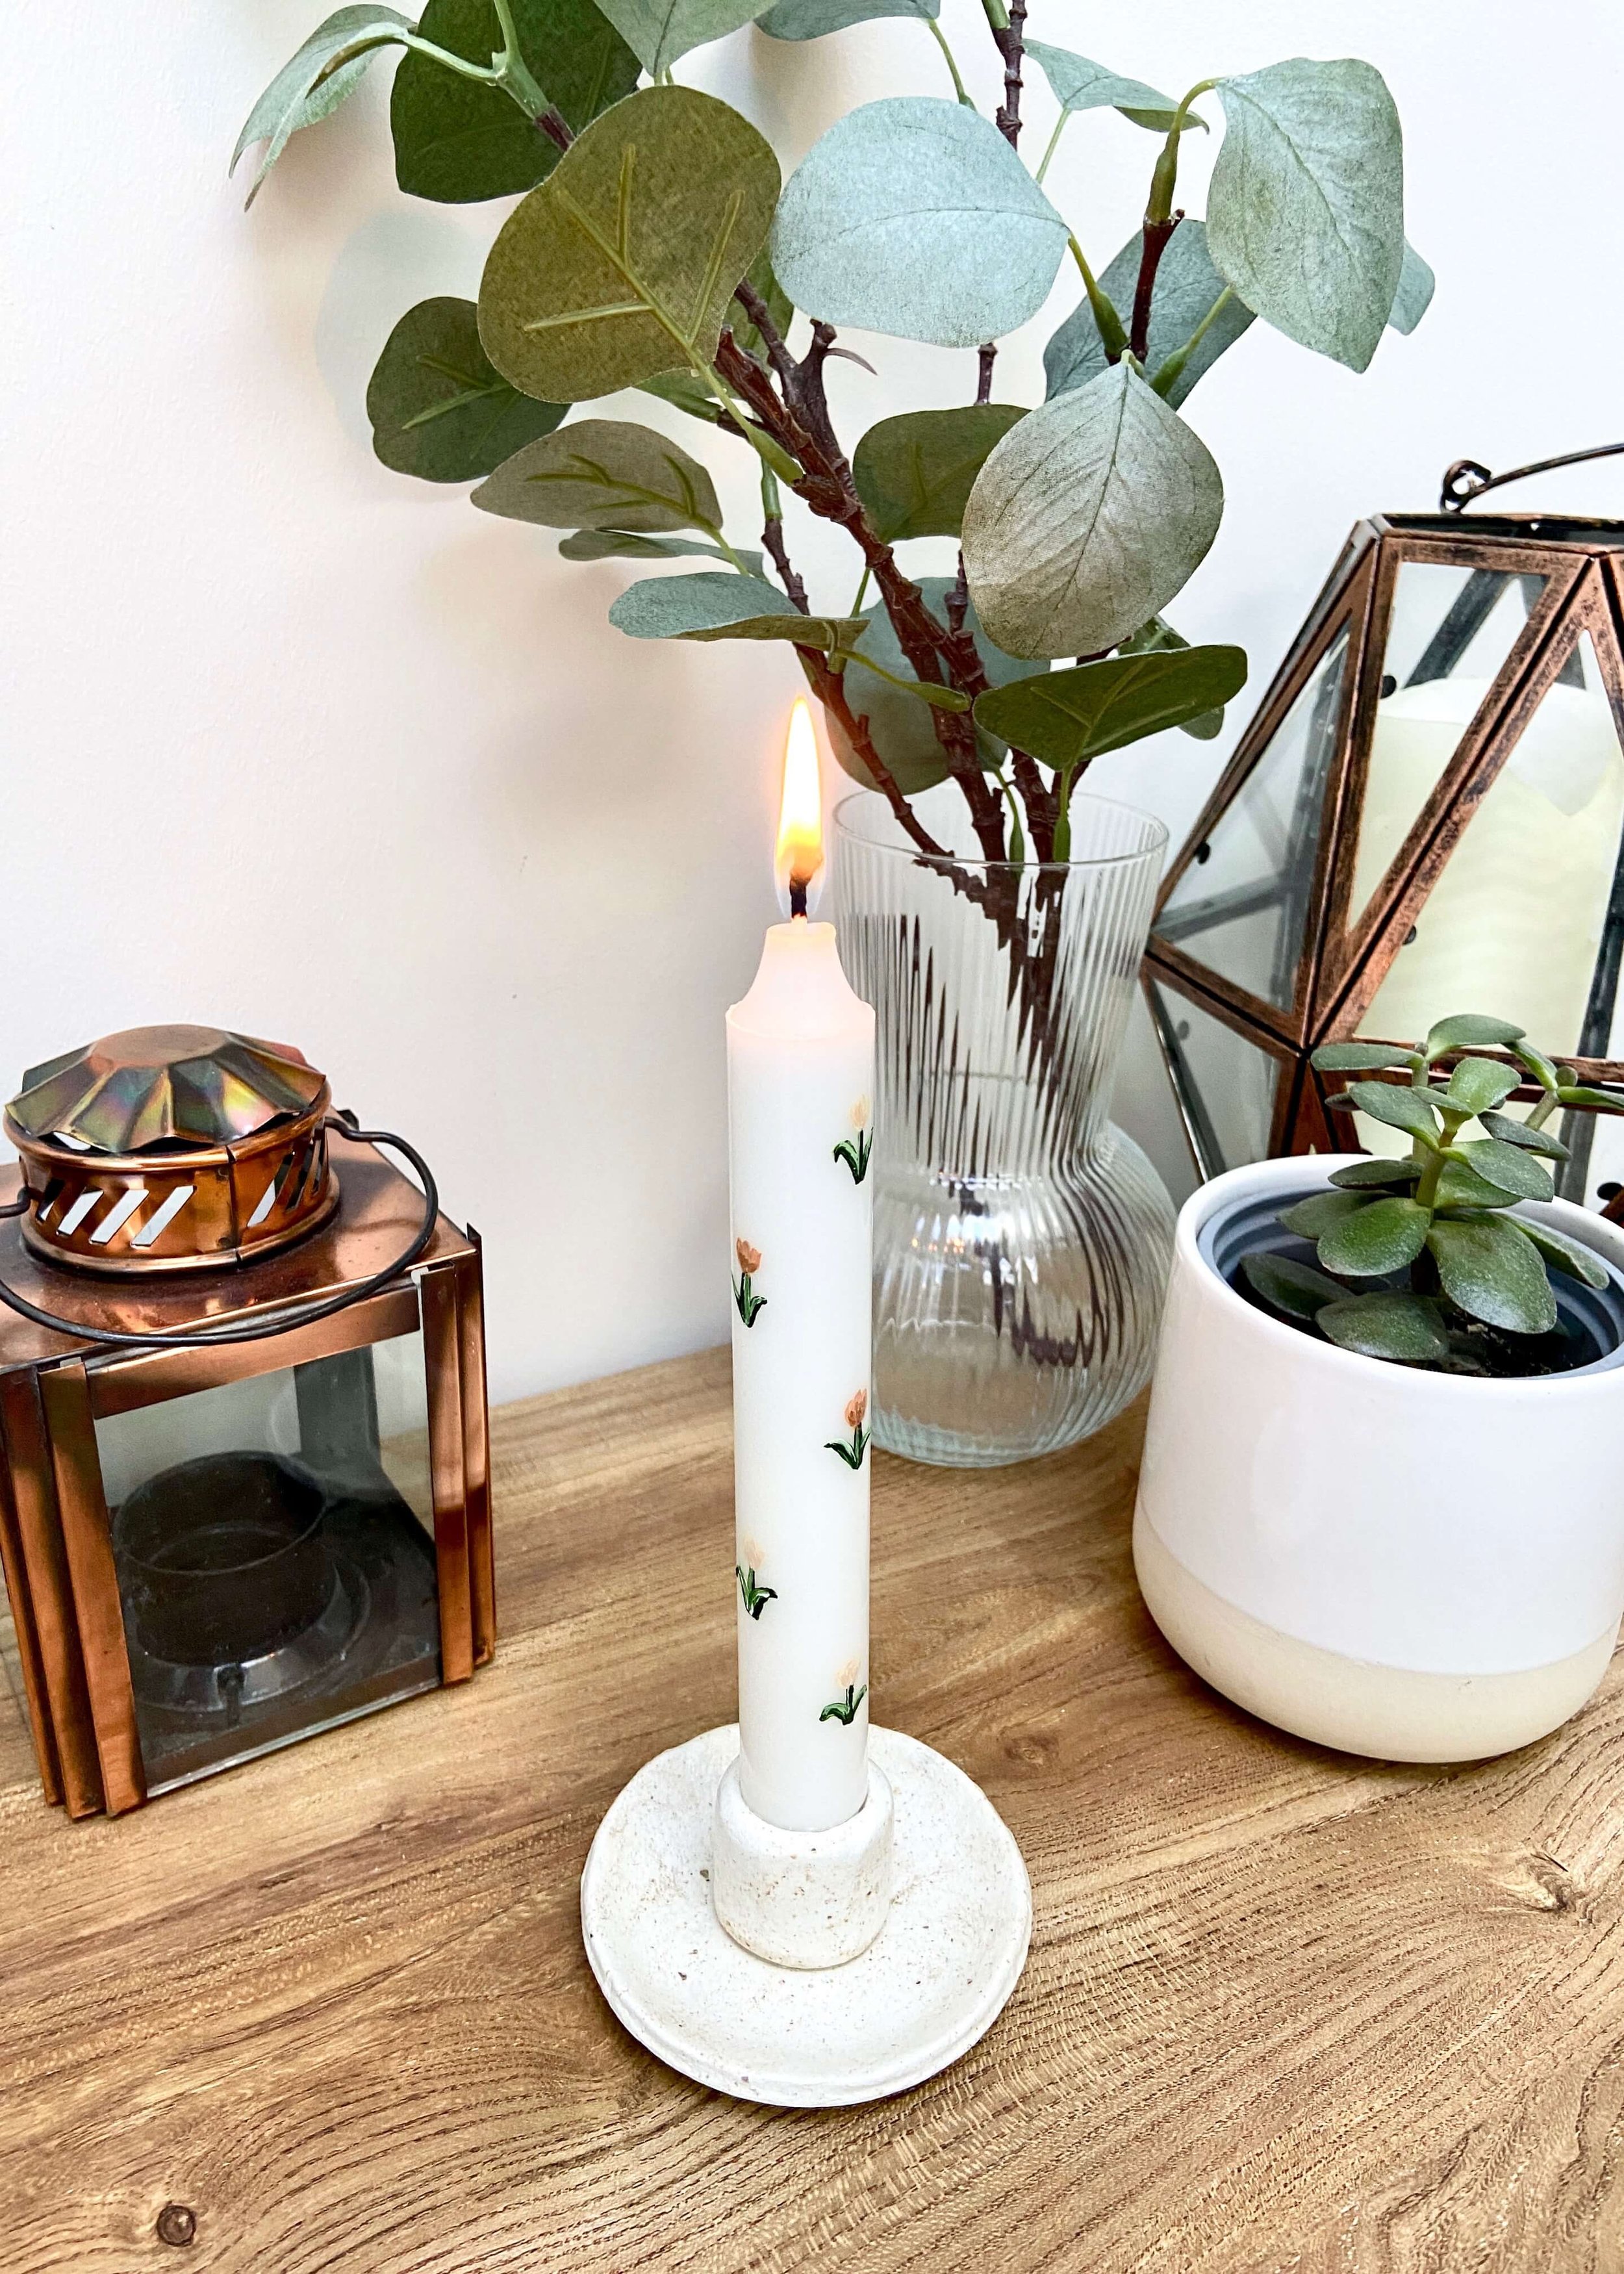

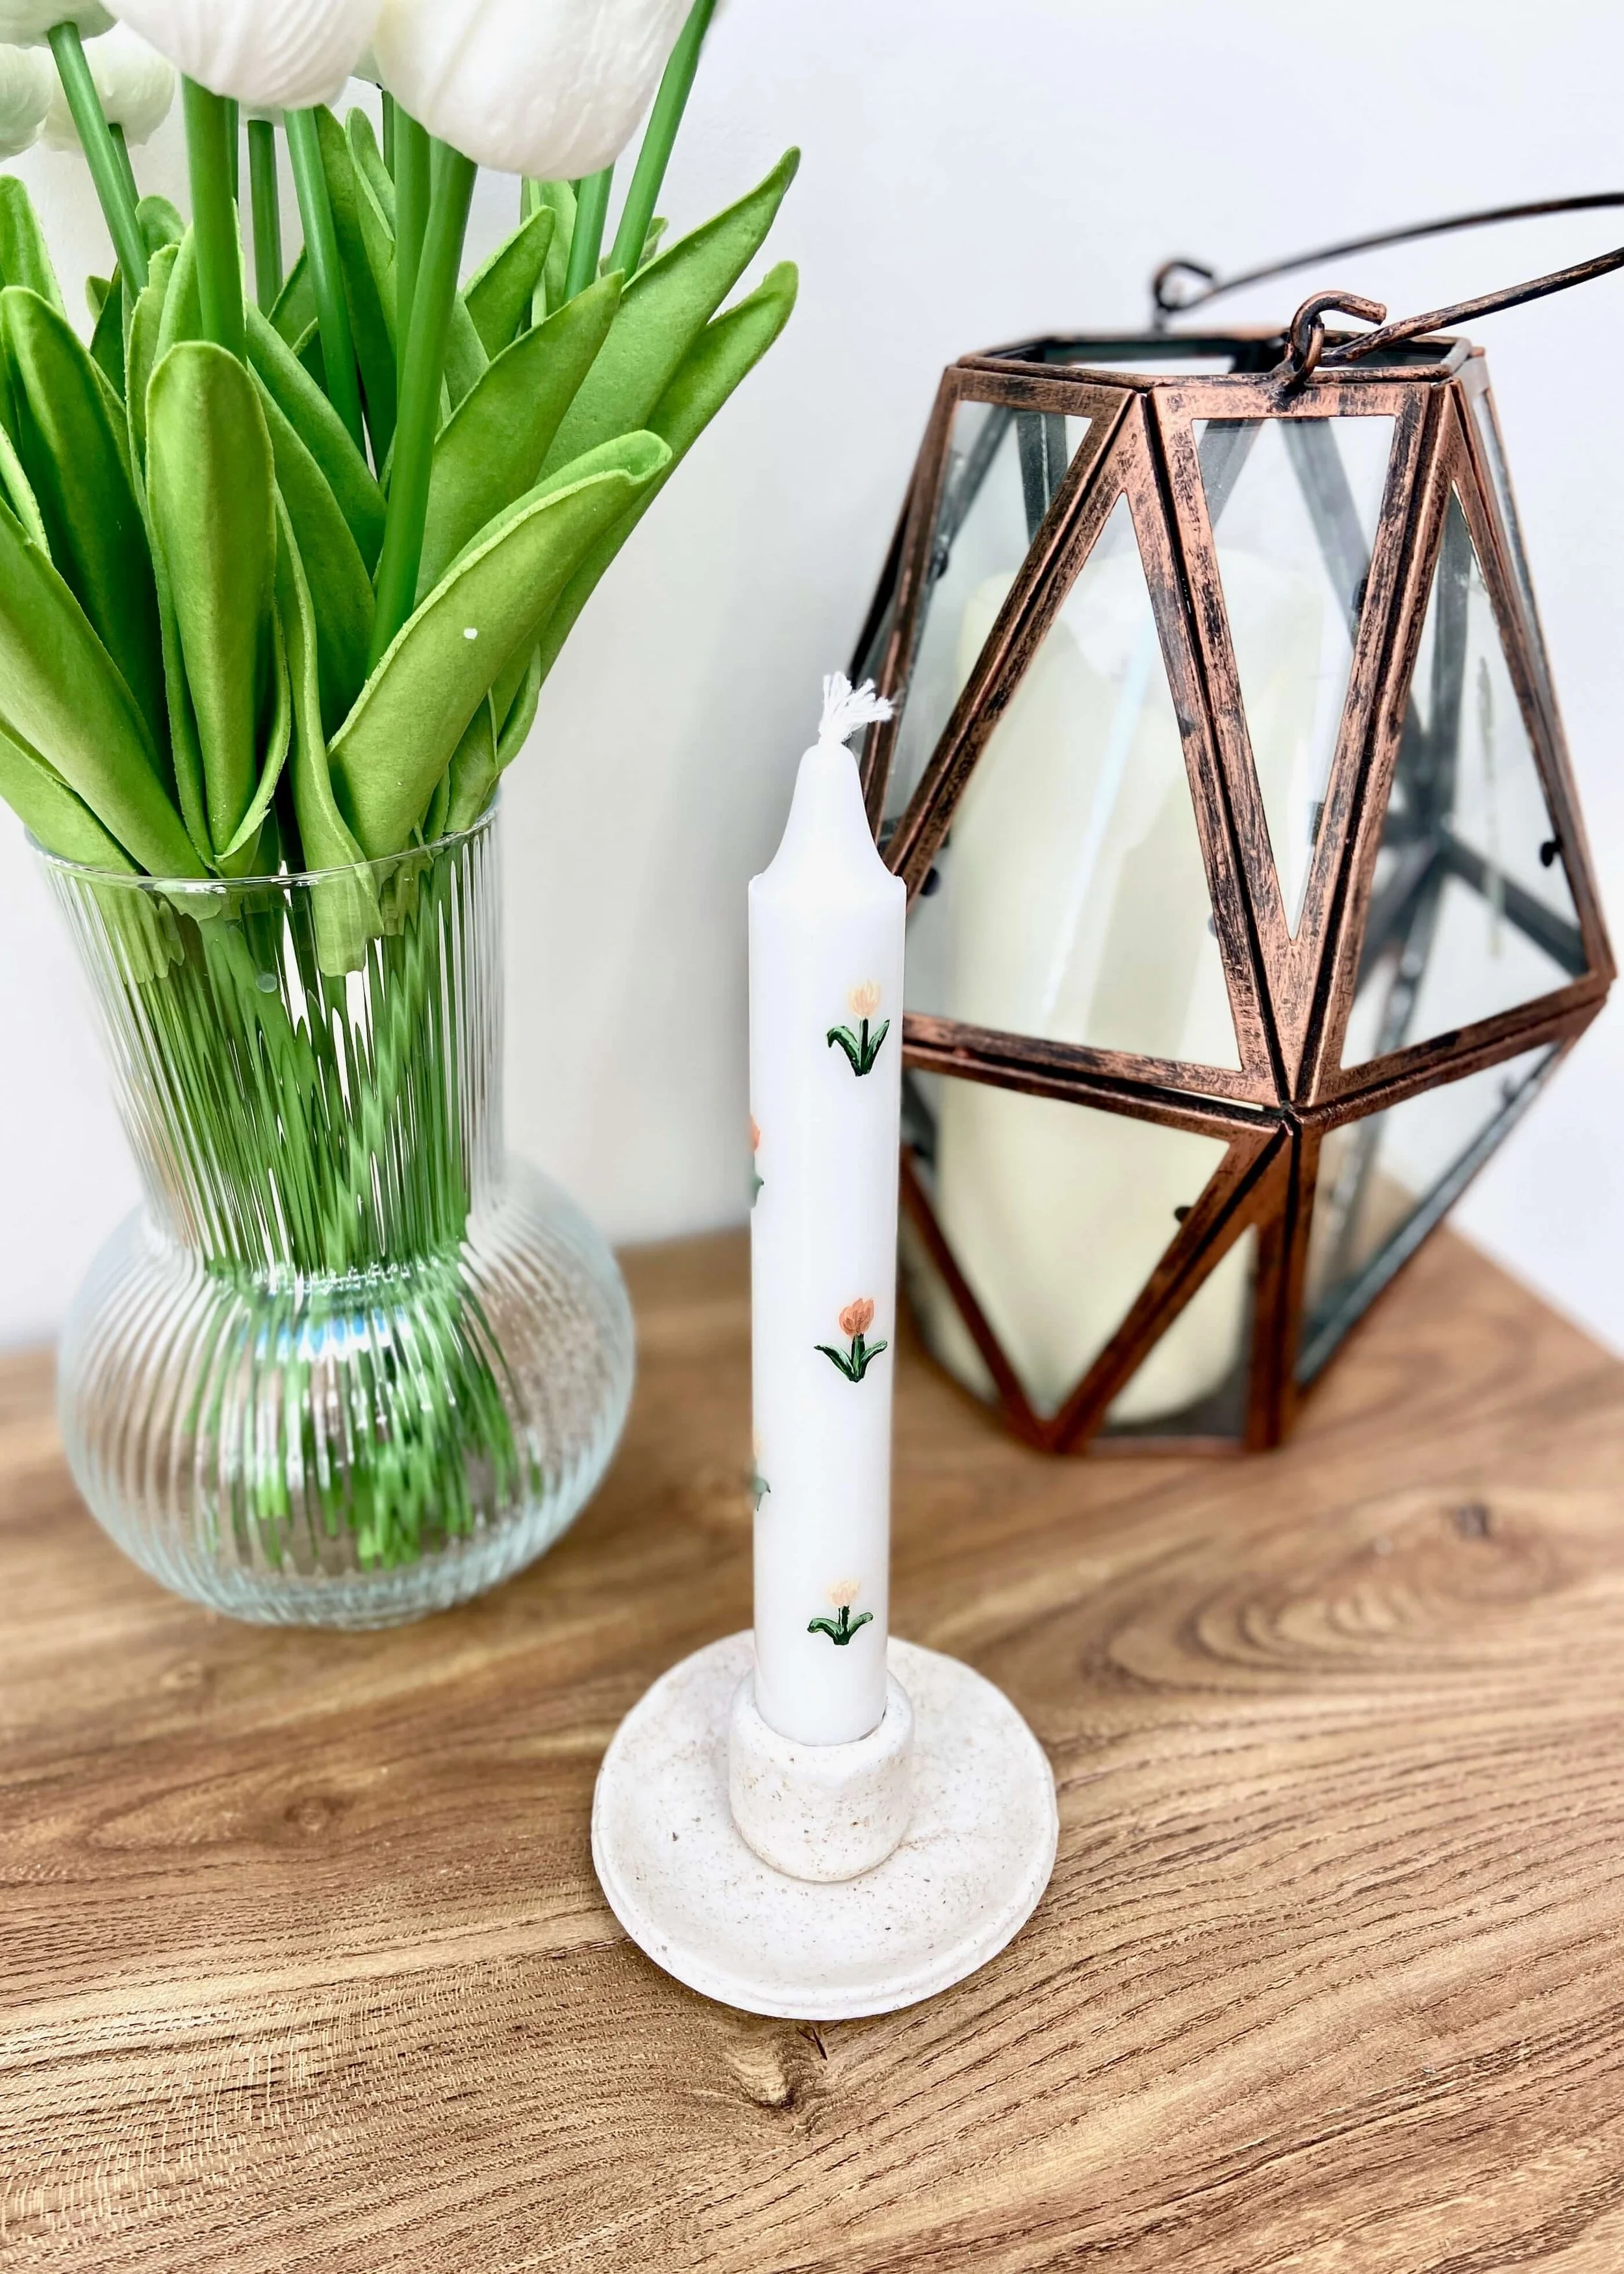
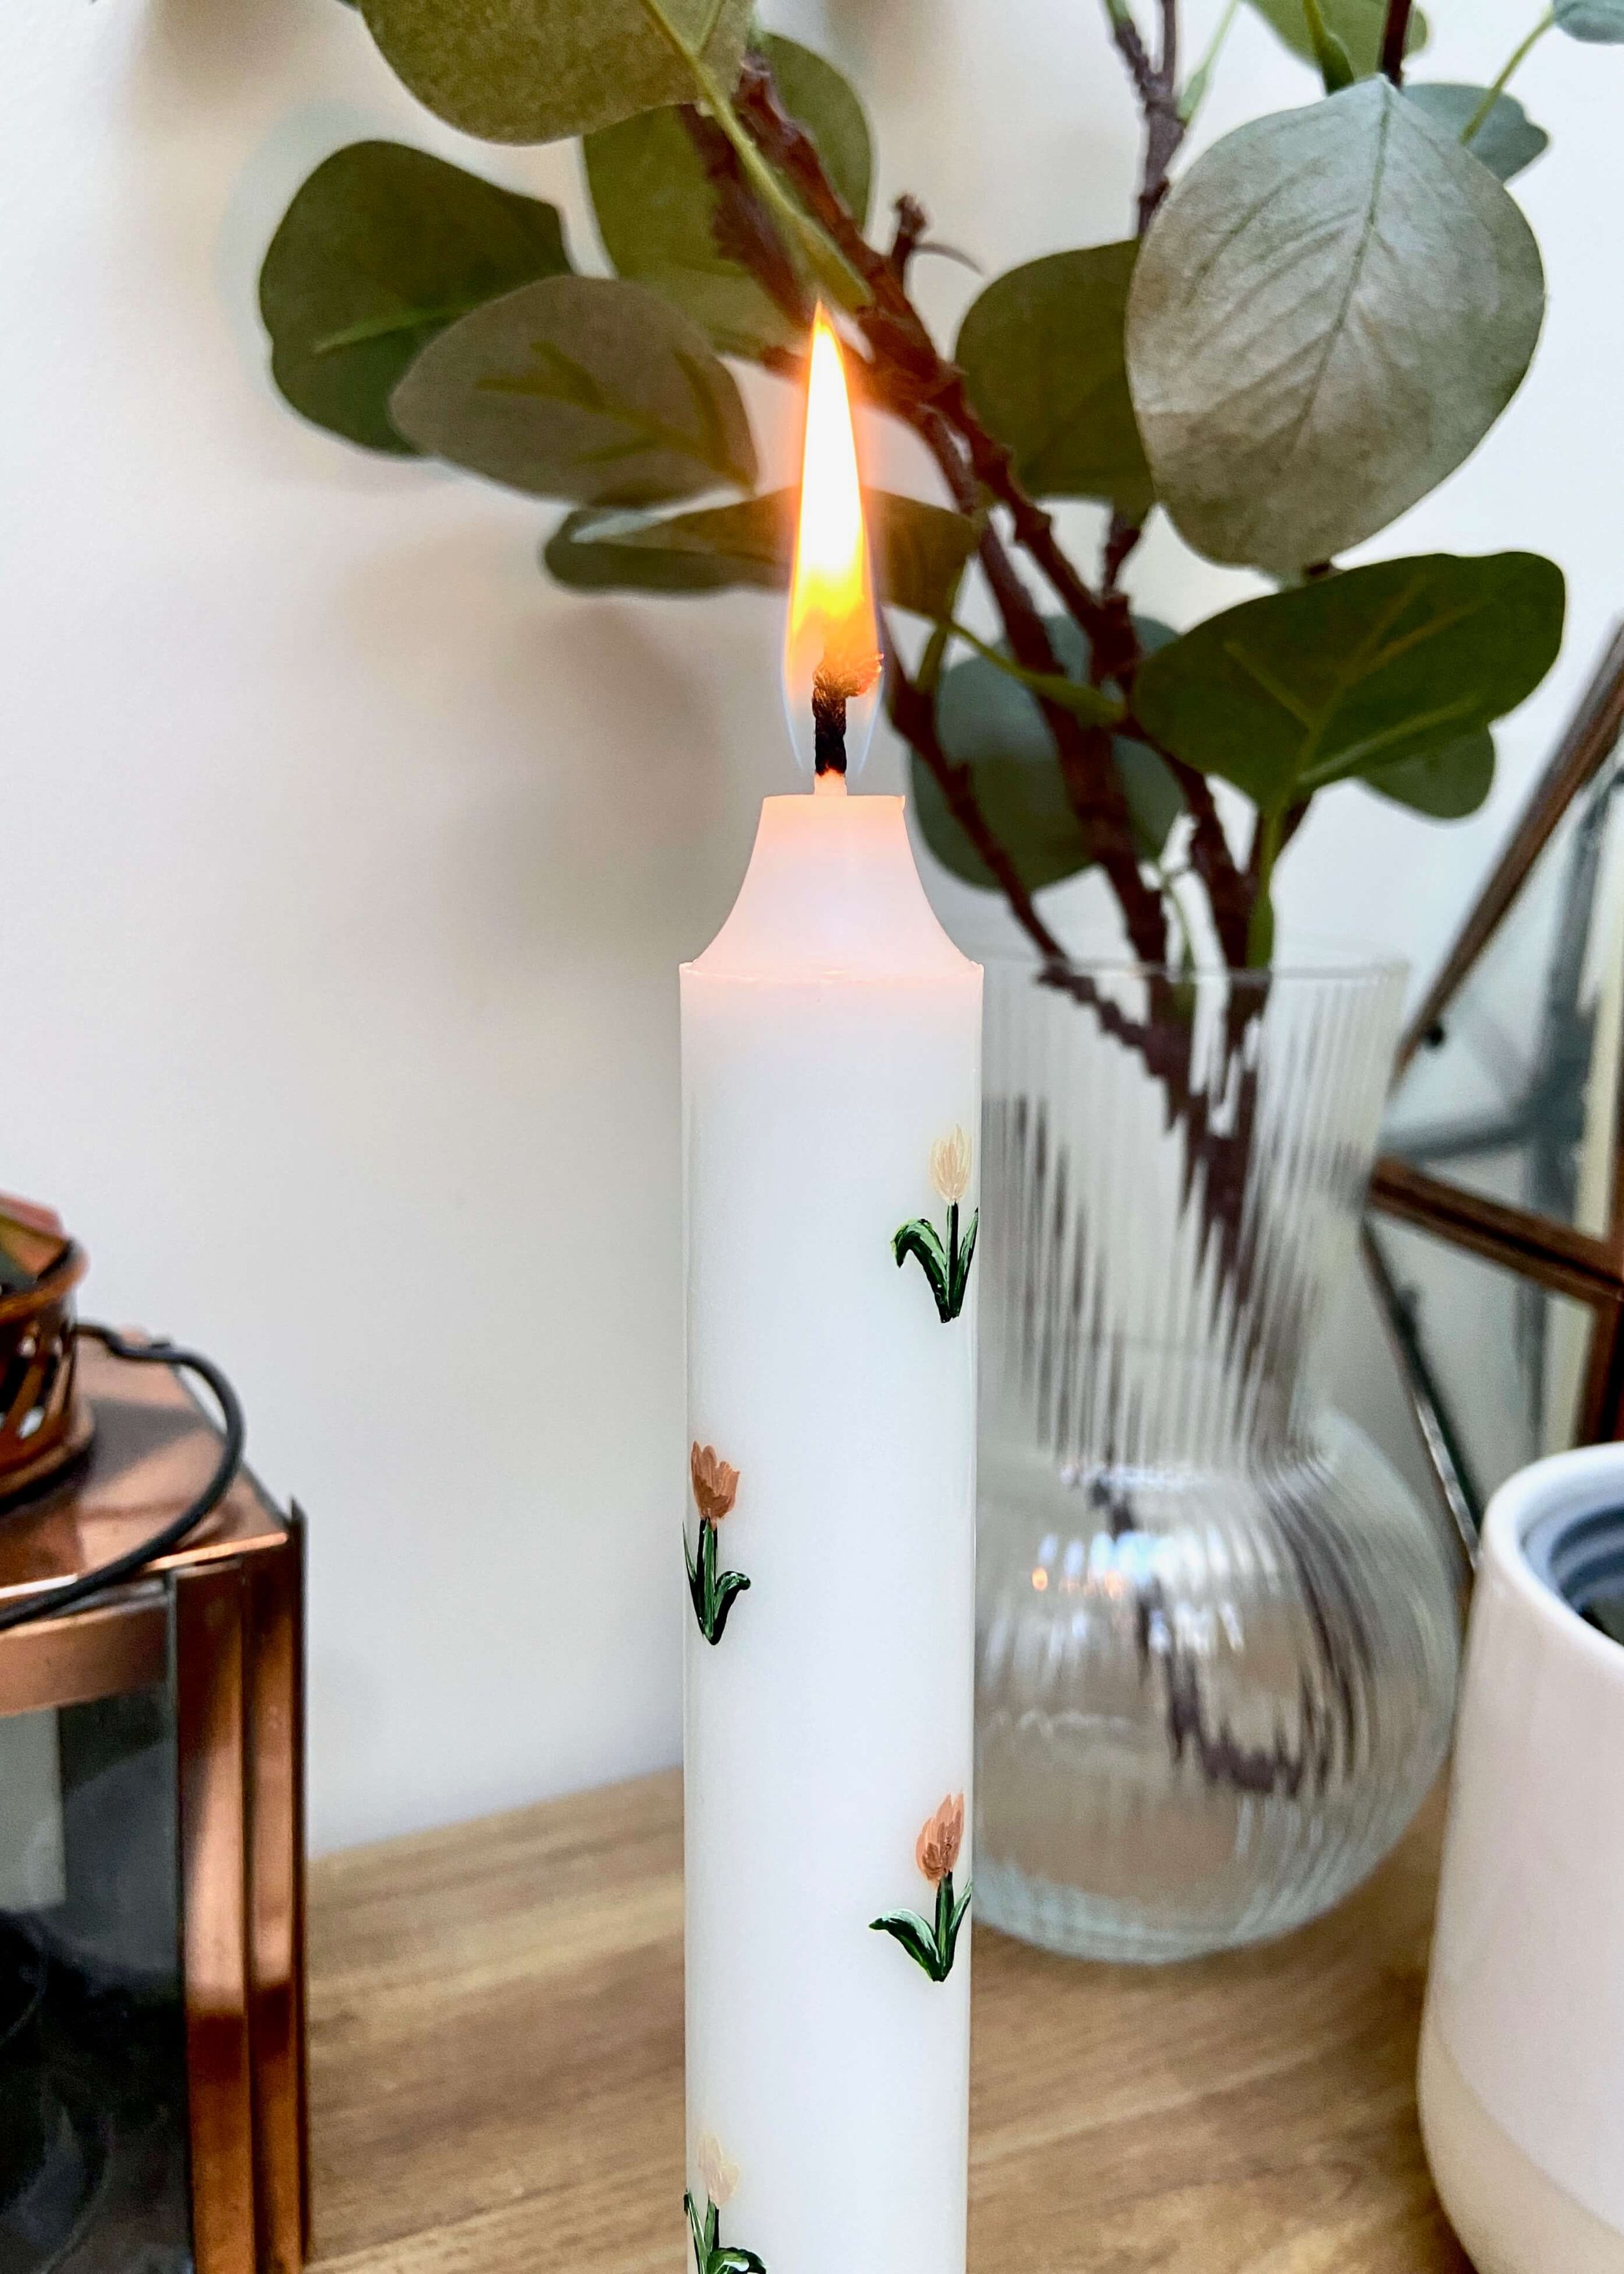
Add a hint of Spring to plain taper candles!
You may have seen a few weeks ago I discovered that you could paint candles. My first foray into candle painting was these cute and minimal heart taper candles. A few weeks later and I was keen to try it again but this time I wanted to paint something fresh and seasonally appropriate for Spring. Tulips are quintessentially Spring, as well as fun and not too tricky to paint on a surface like wax, and so thats what I went for. I’m not into the stereotypically-Spring pastel shades and chose instead to paint my tulips in colours that were still delicate but went with my existing decor. I think these are so cute, and along with my other Spring projects are really helping to bring my home into the new season. Fingers crossed the British weather catches up soon! Let me know what you think of this idea below, and don’t forget to share and subscribe :)

Plain Taper Candle
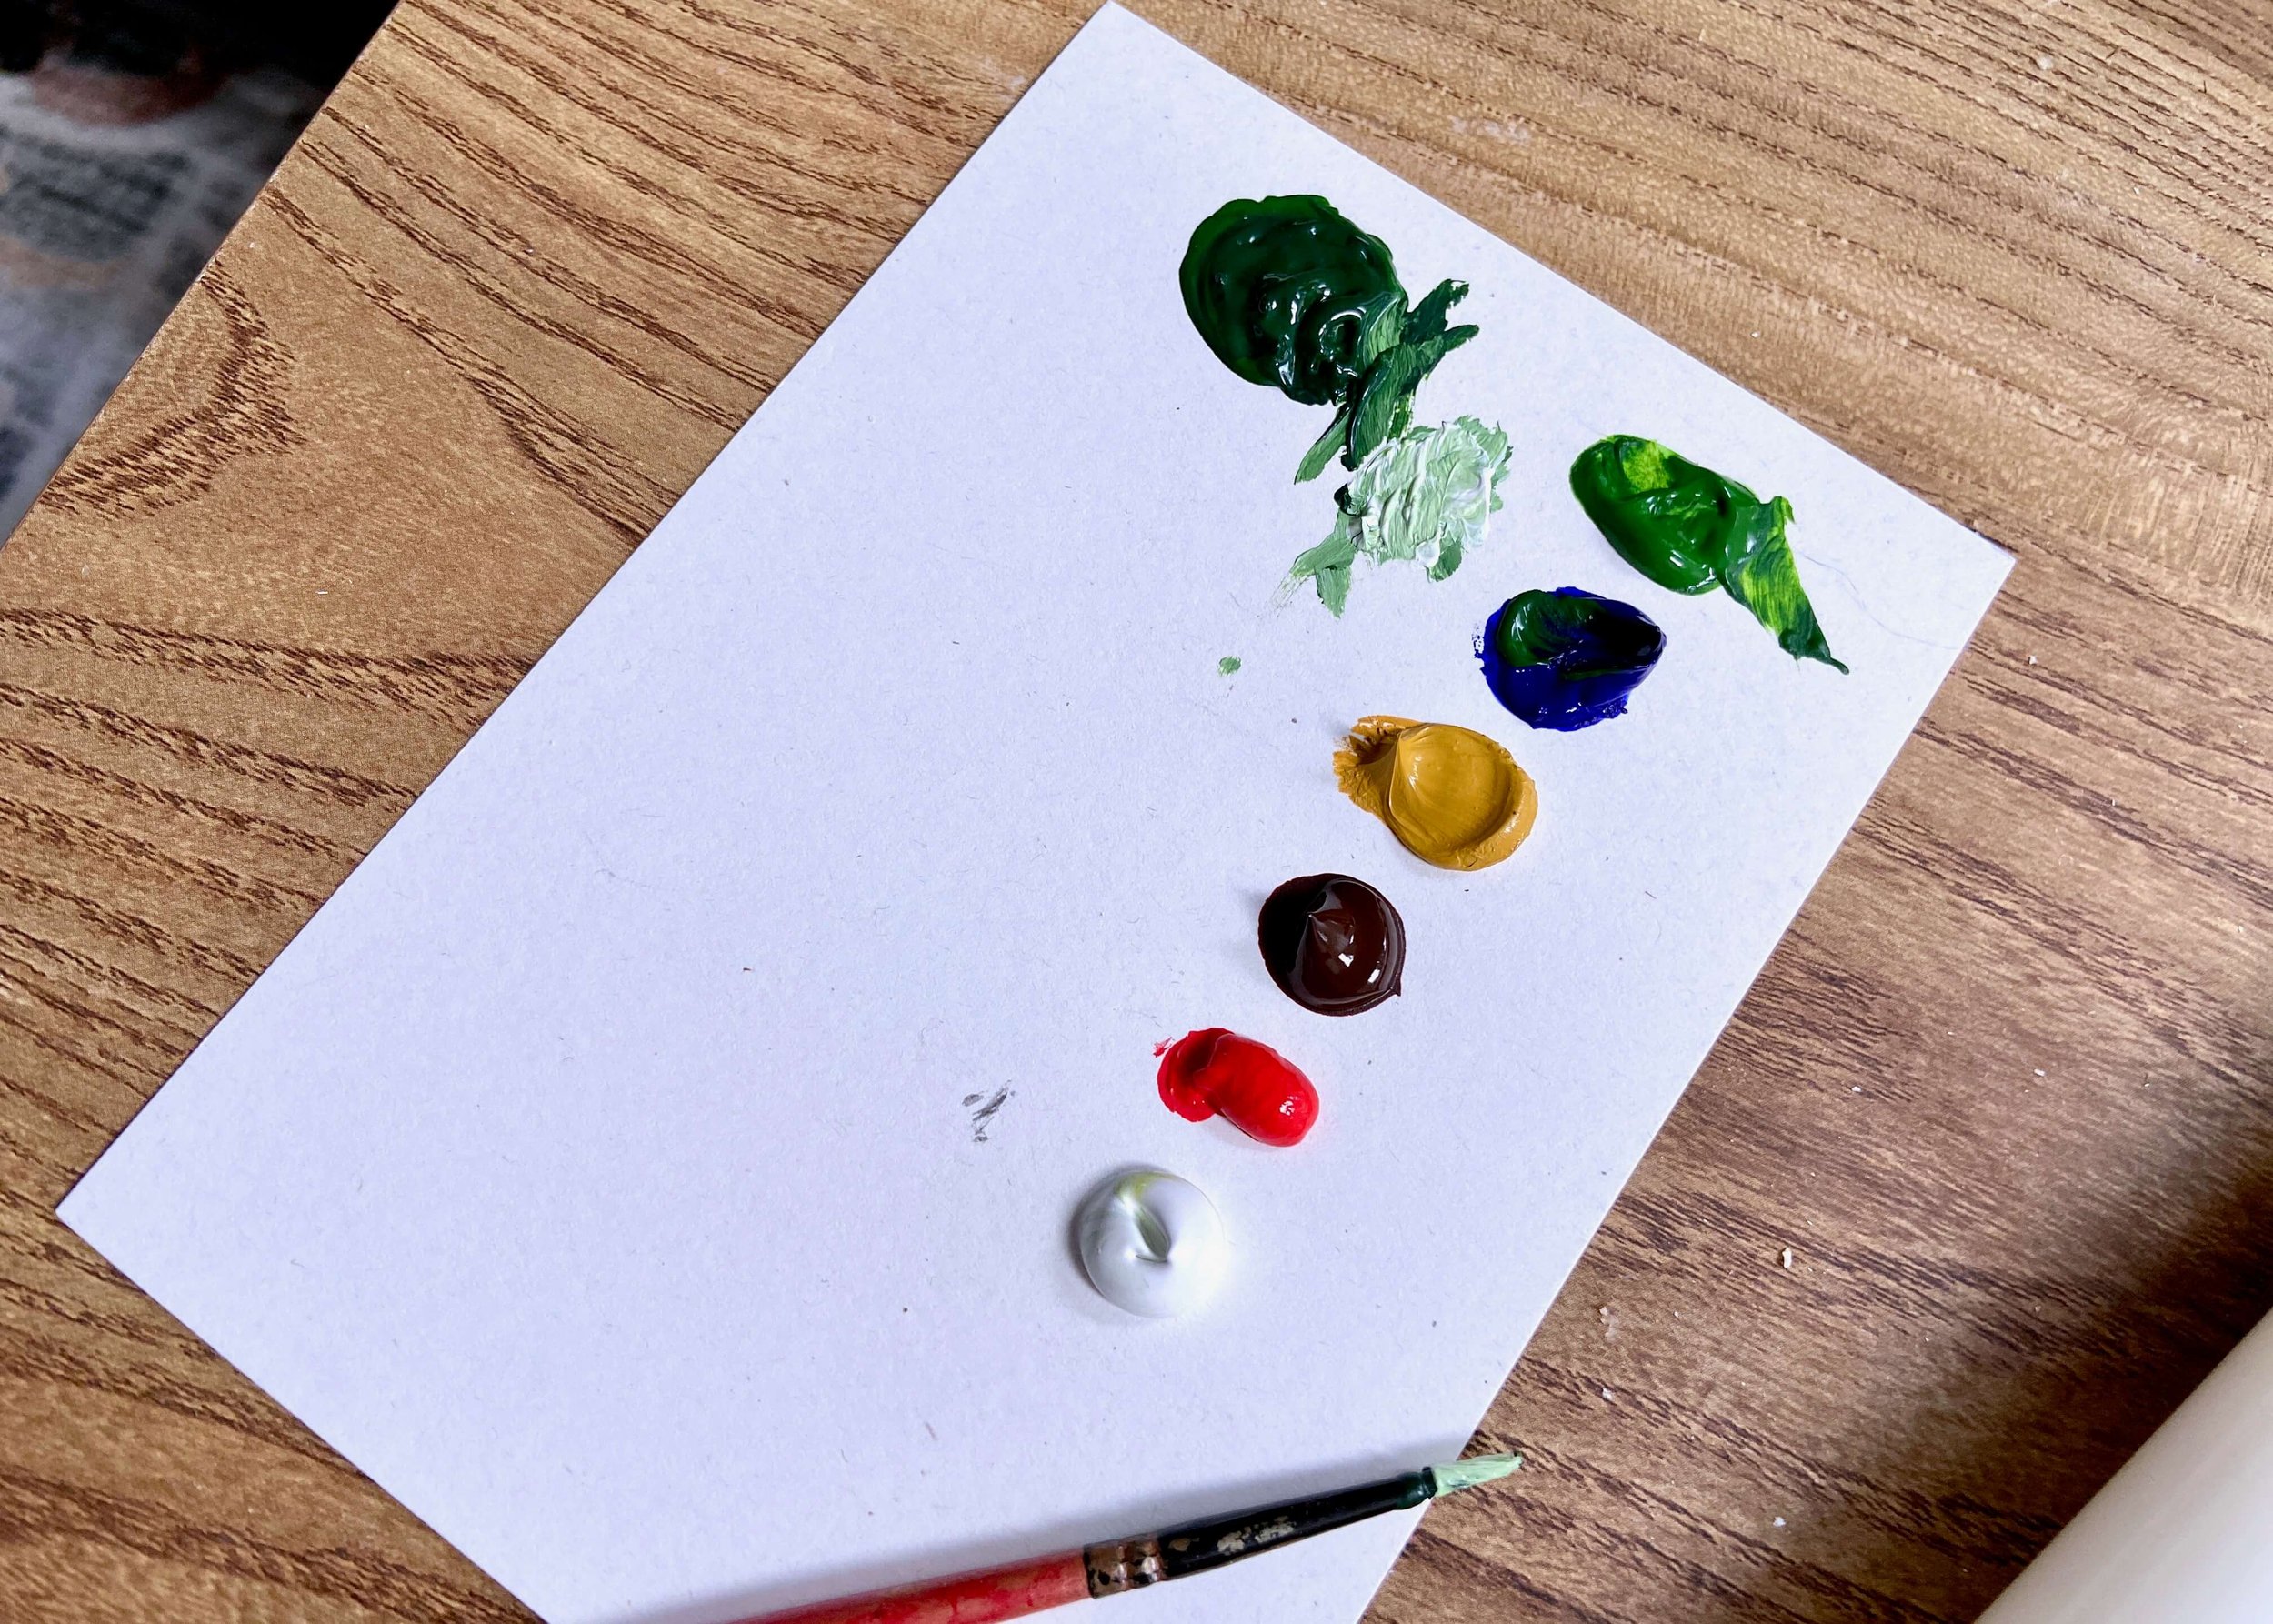
Thin Paint Brush
Acrylic Paint


1.
Grab some plain taper candles, you can choose any colour you want!
2.
Grab a palette or piece of card (like me) and squeeze out each of the paint colours you’ll need.
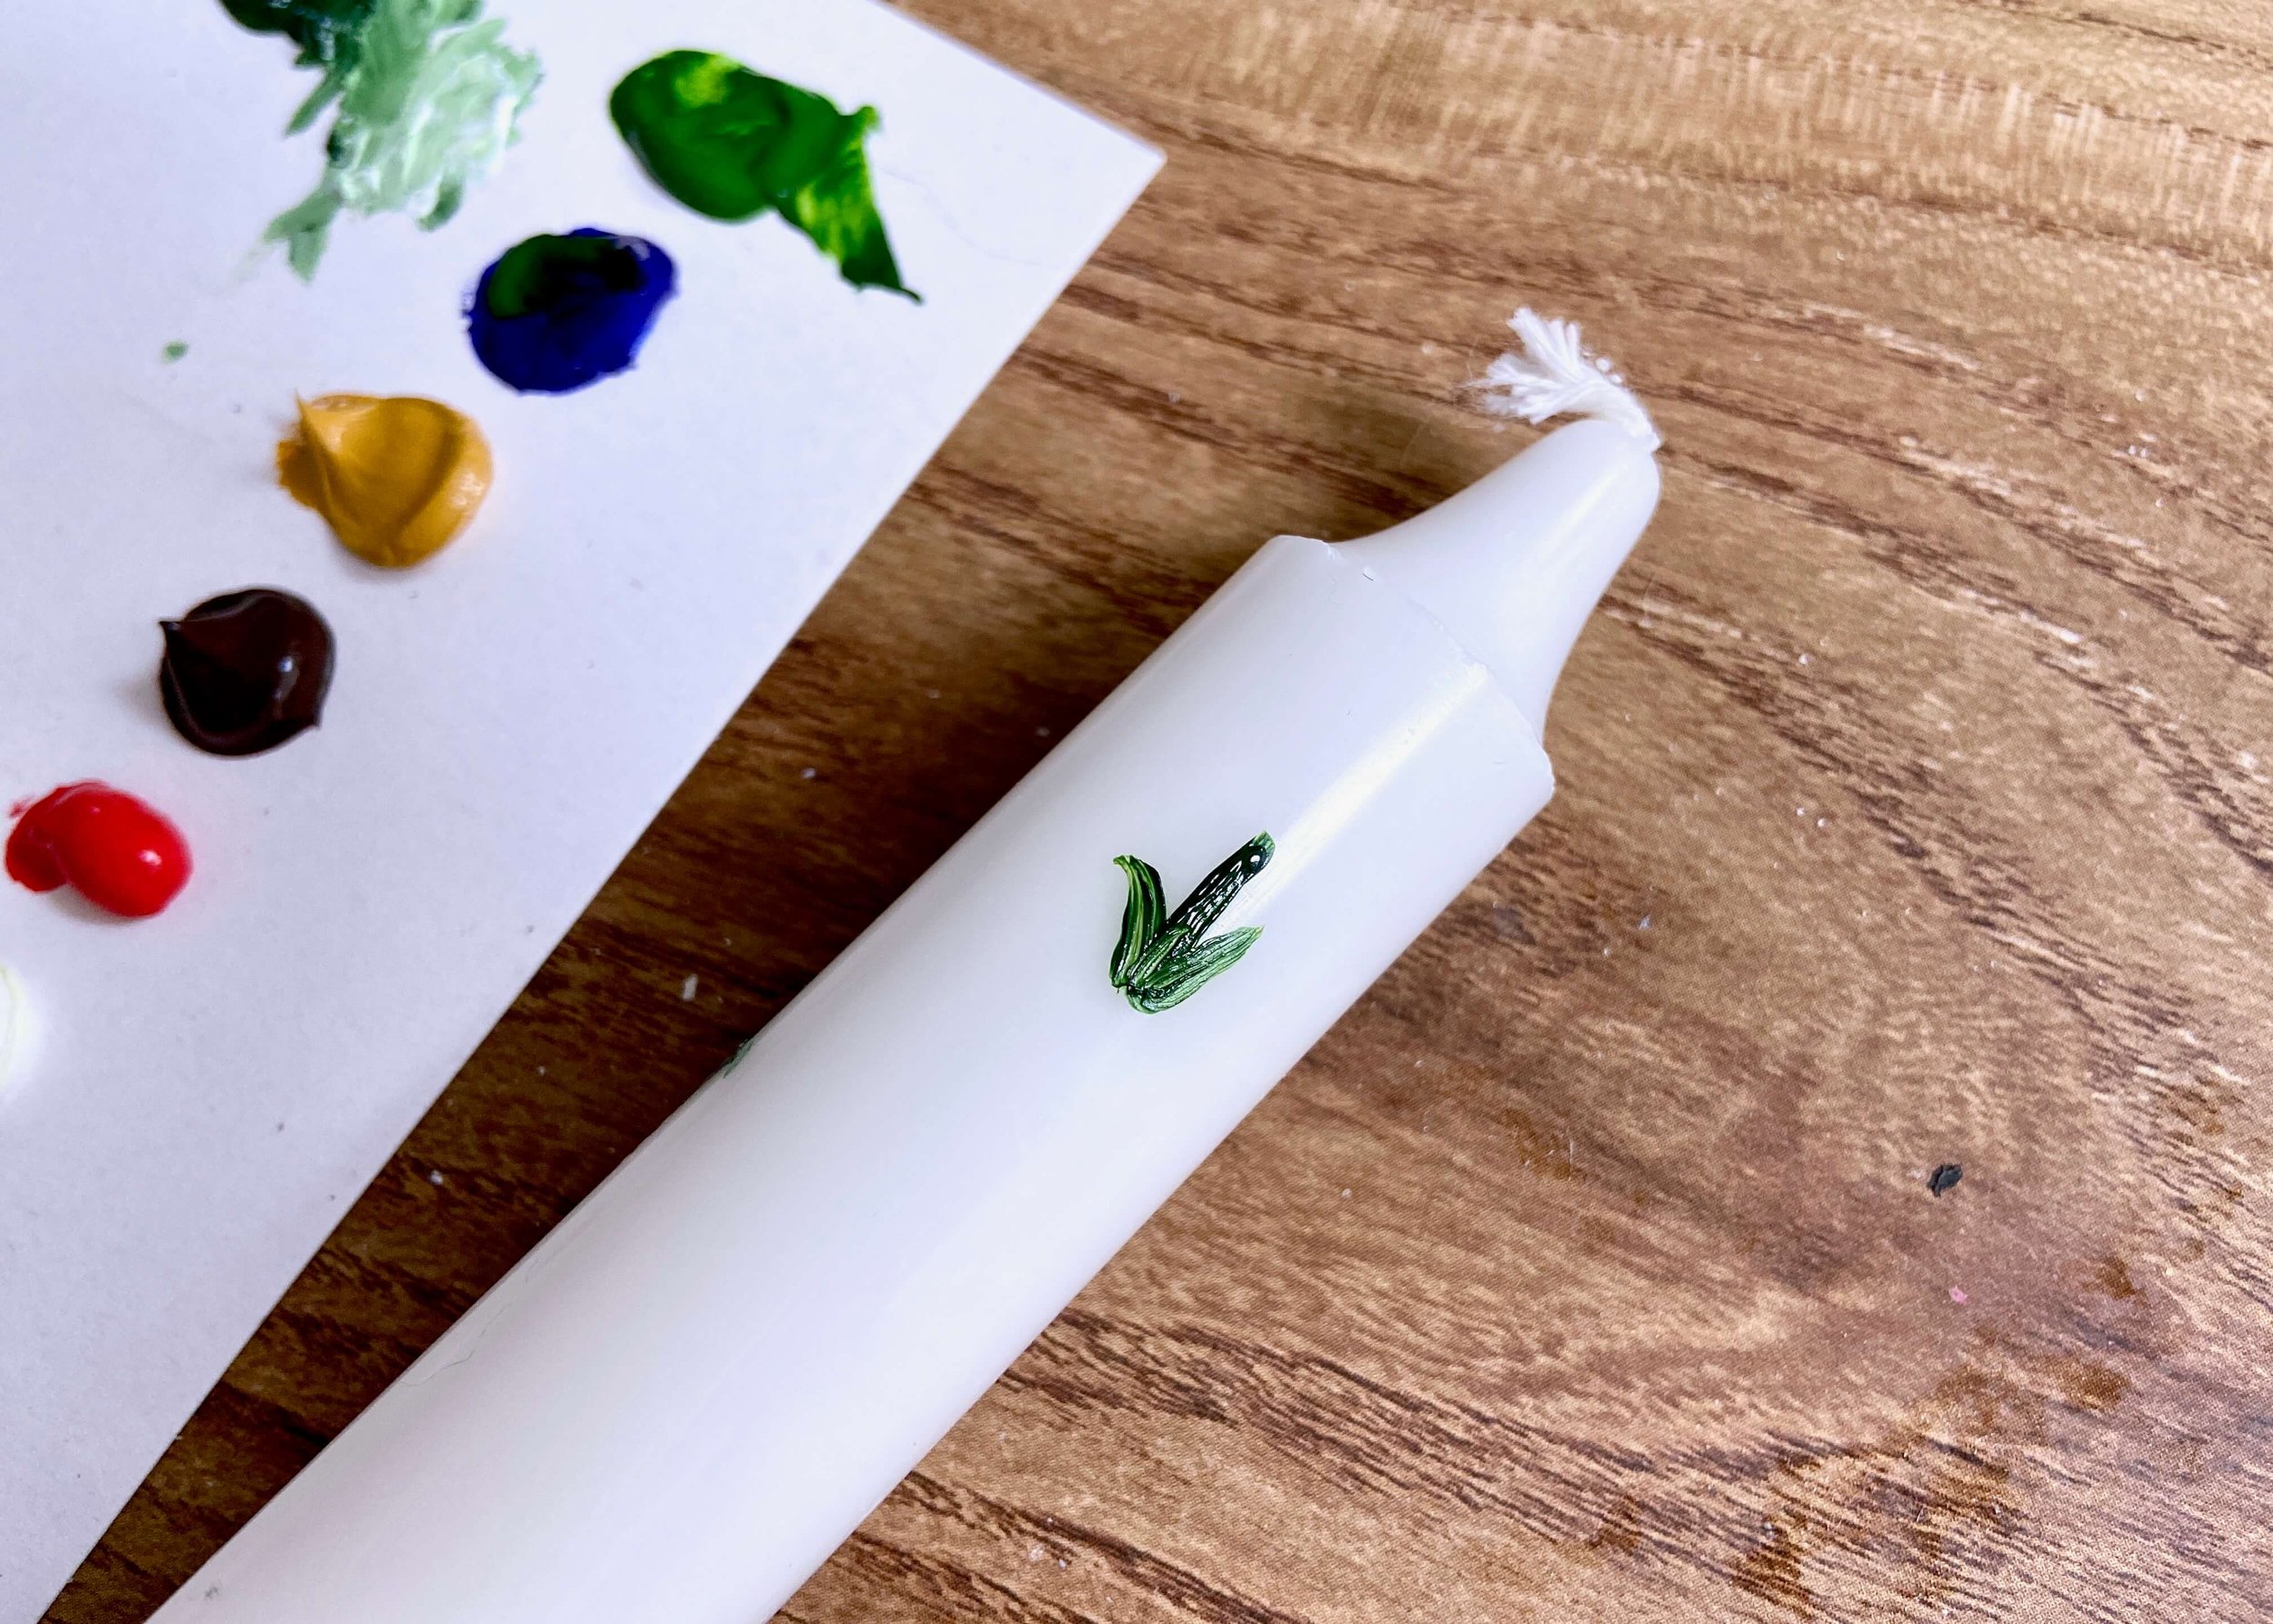
3.
First, mix up a dark green and paint the stem and leaves of your tulips. To do this, paint a line, then two curved lines coming out of the bottom of it.

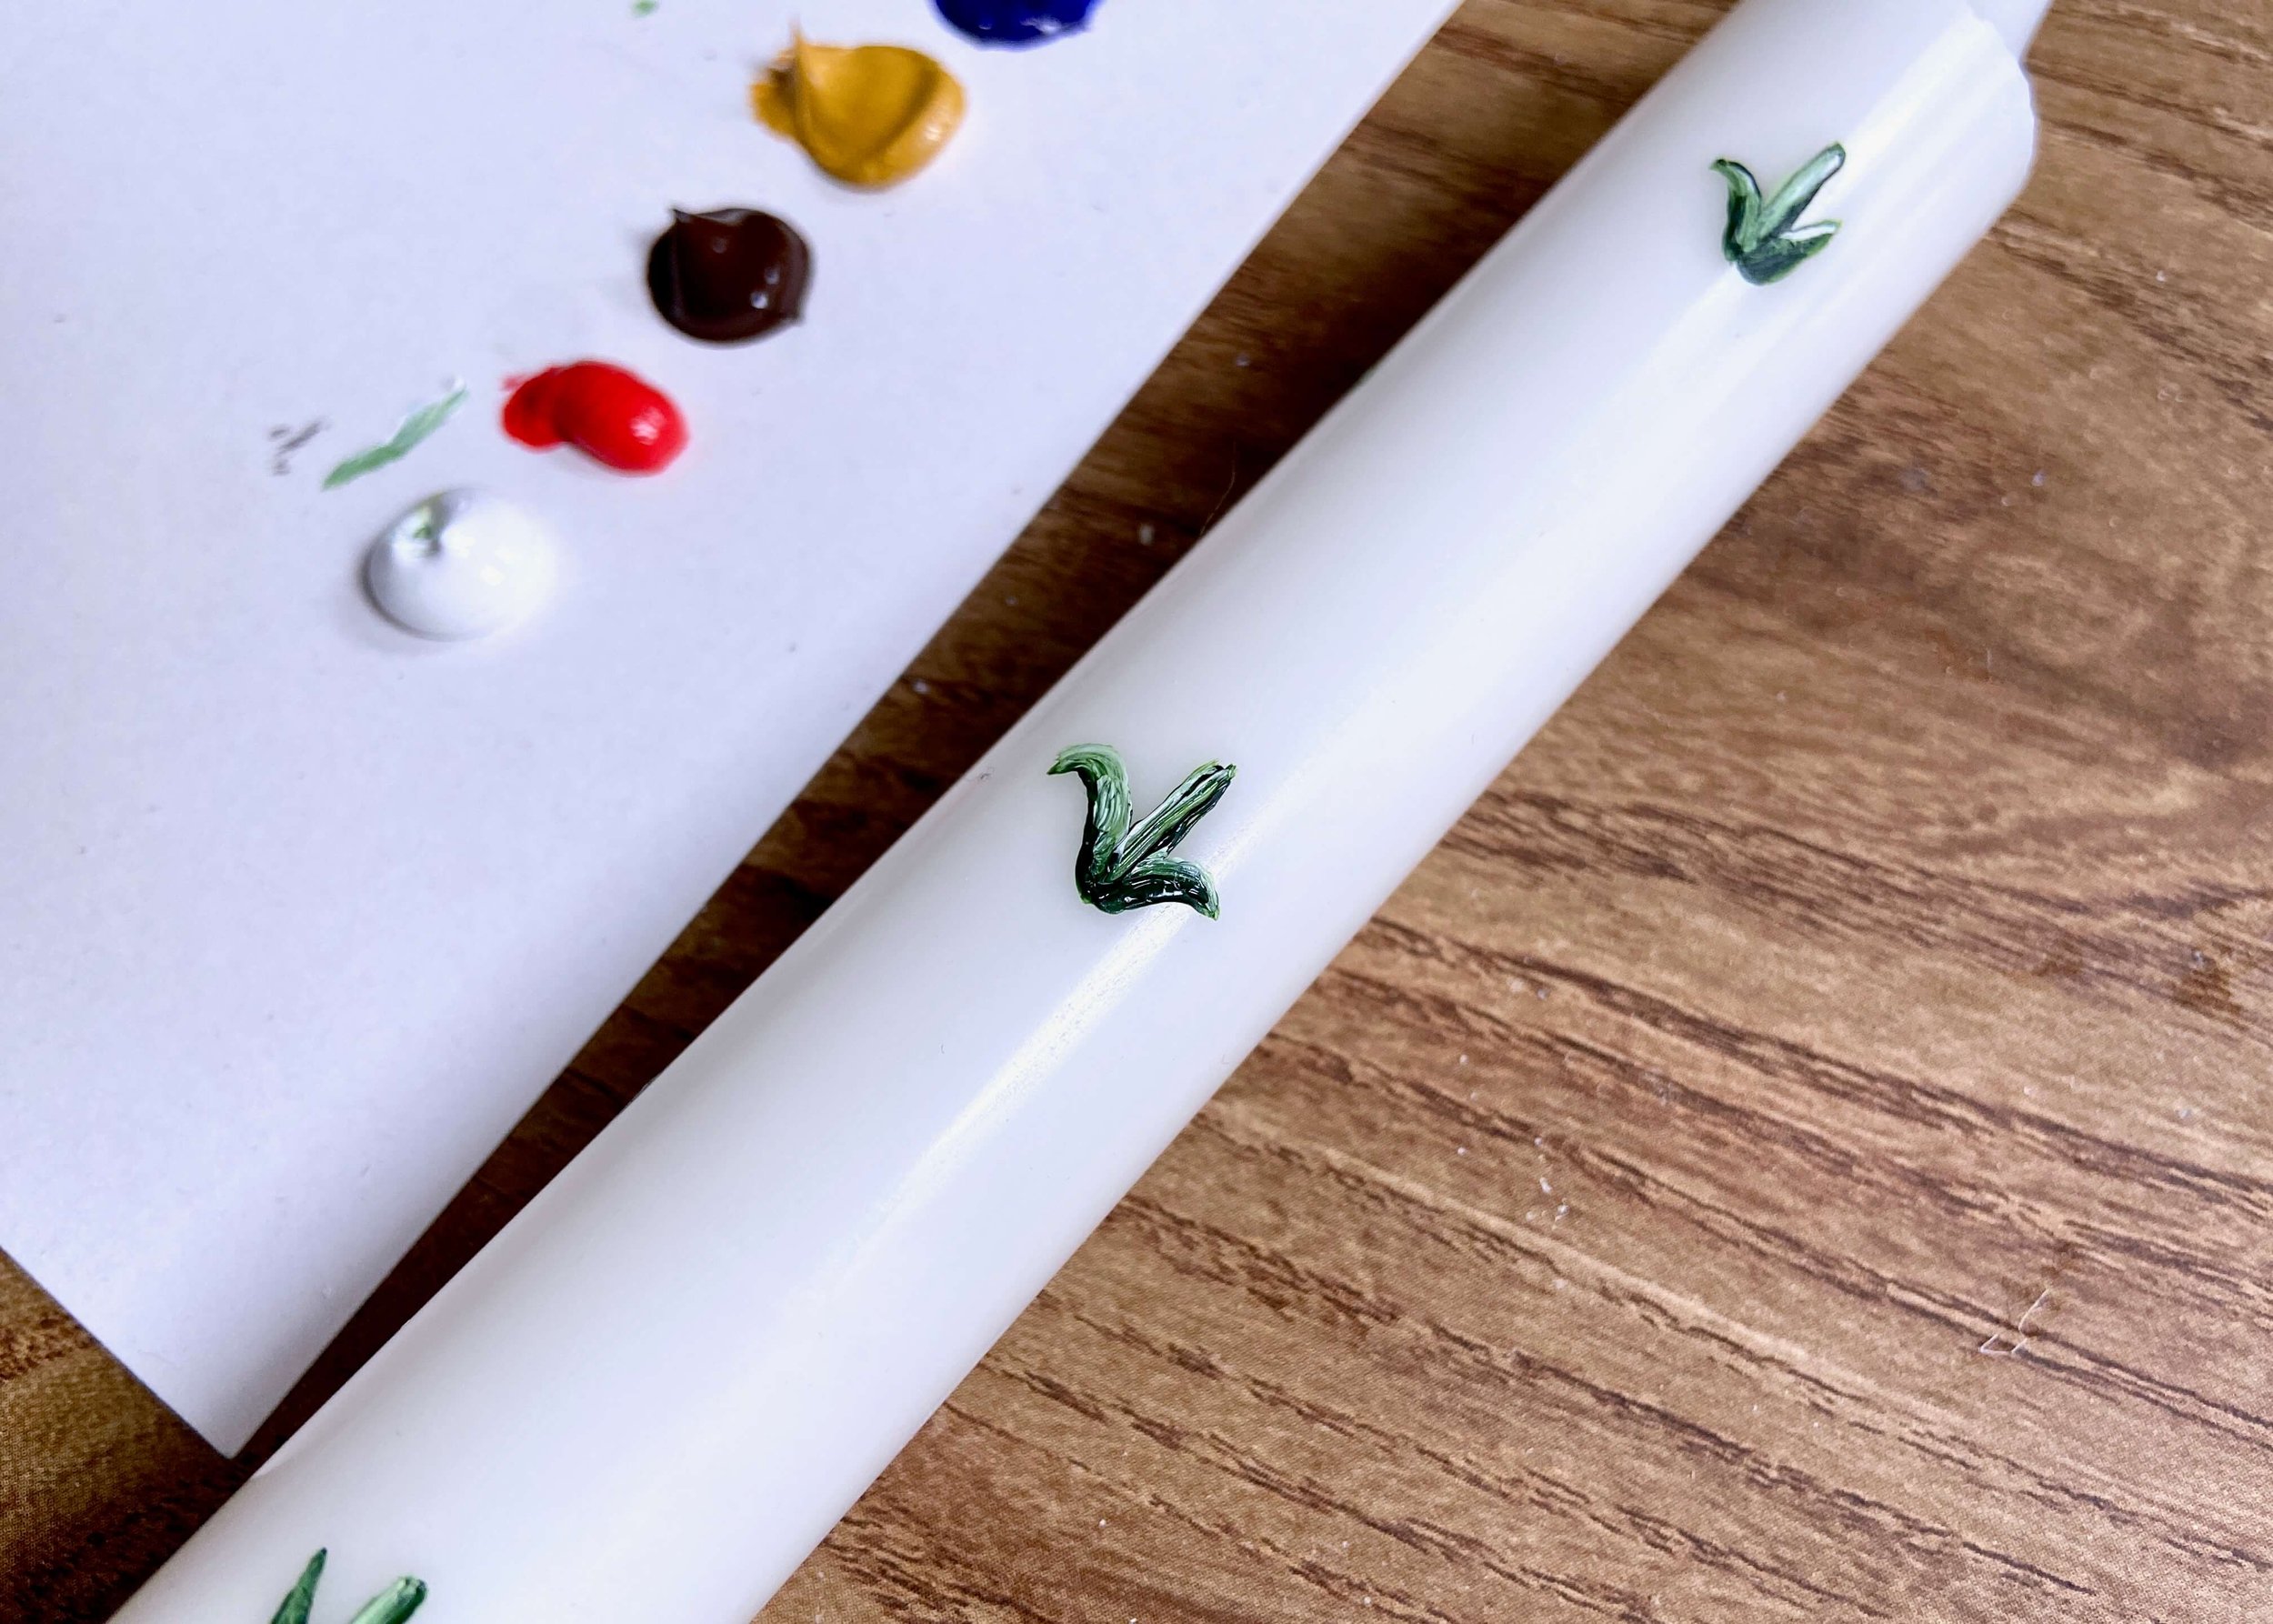
4.
Repeat this down the one side of your candle distributing them however you want. Cover the entire candle.
5.
Mix up some of your green with some white, and paint over the top to one side of your stems and leaves. This will give the illusion of light hitting it.
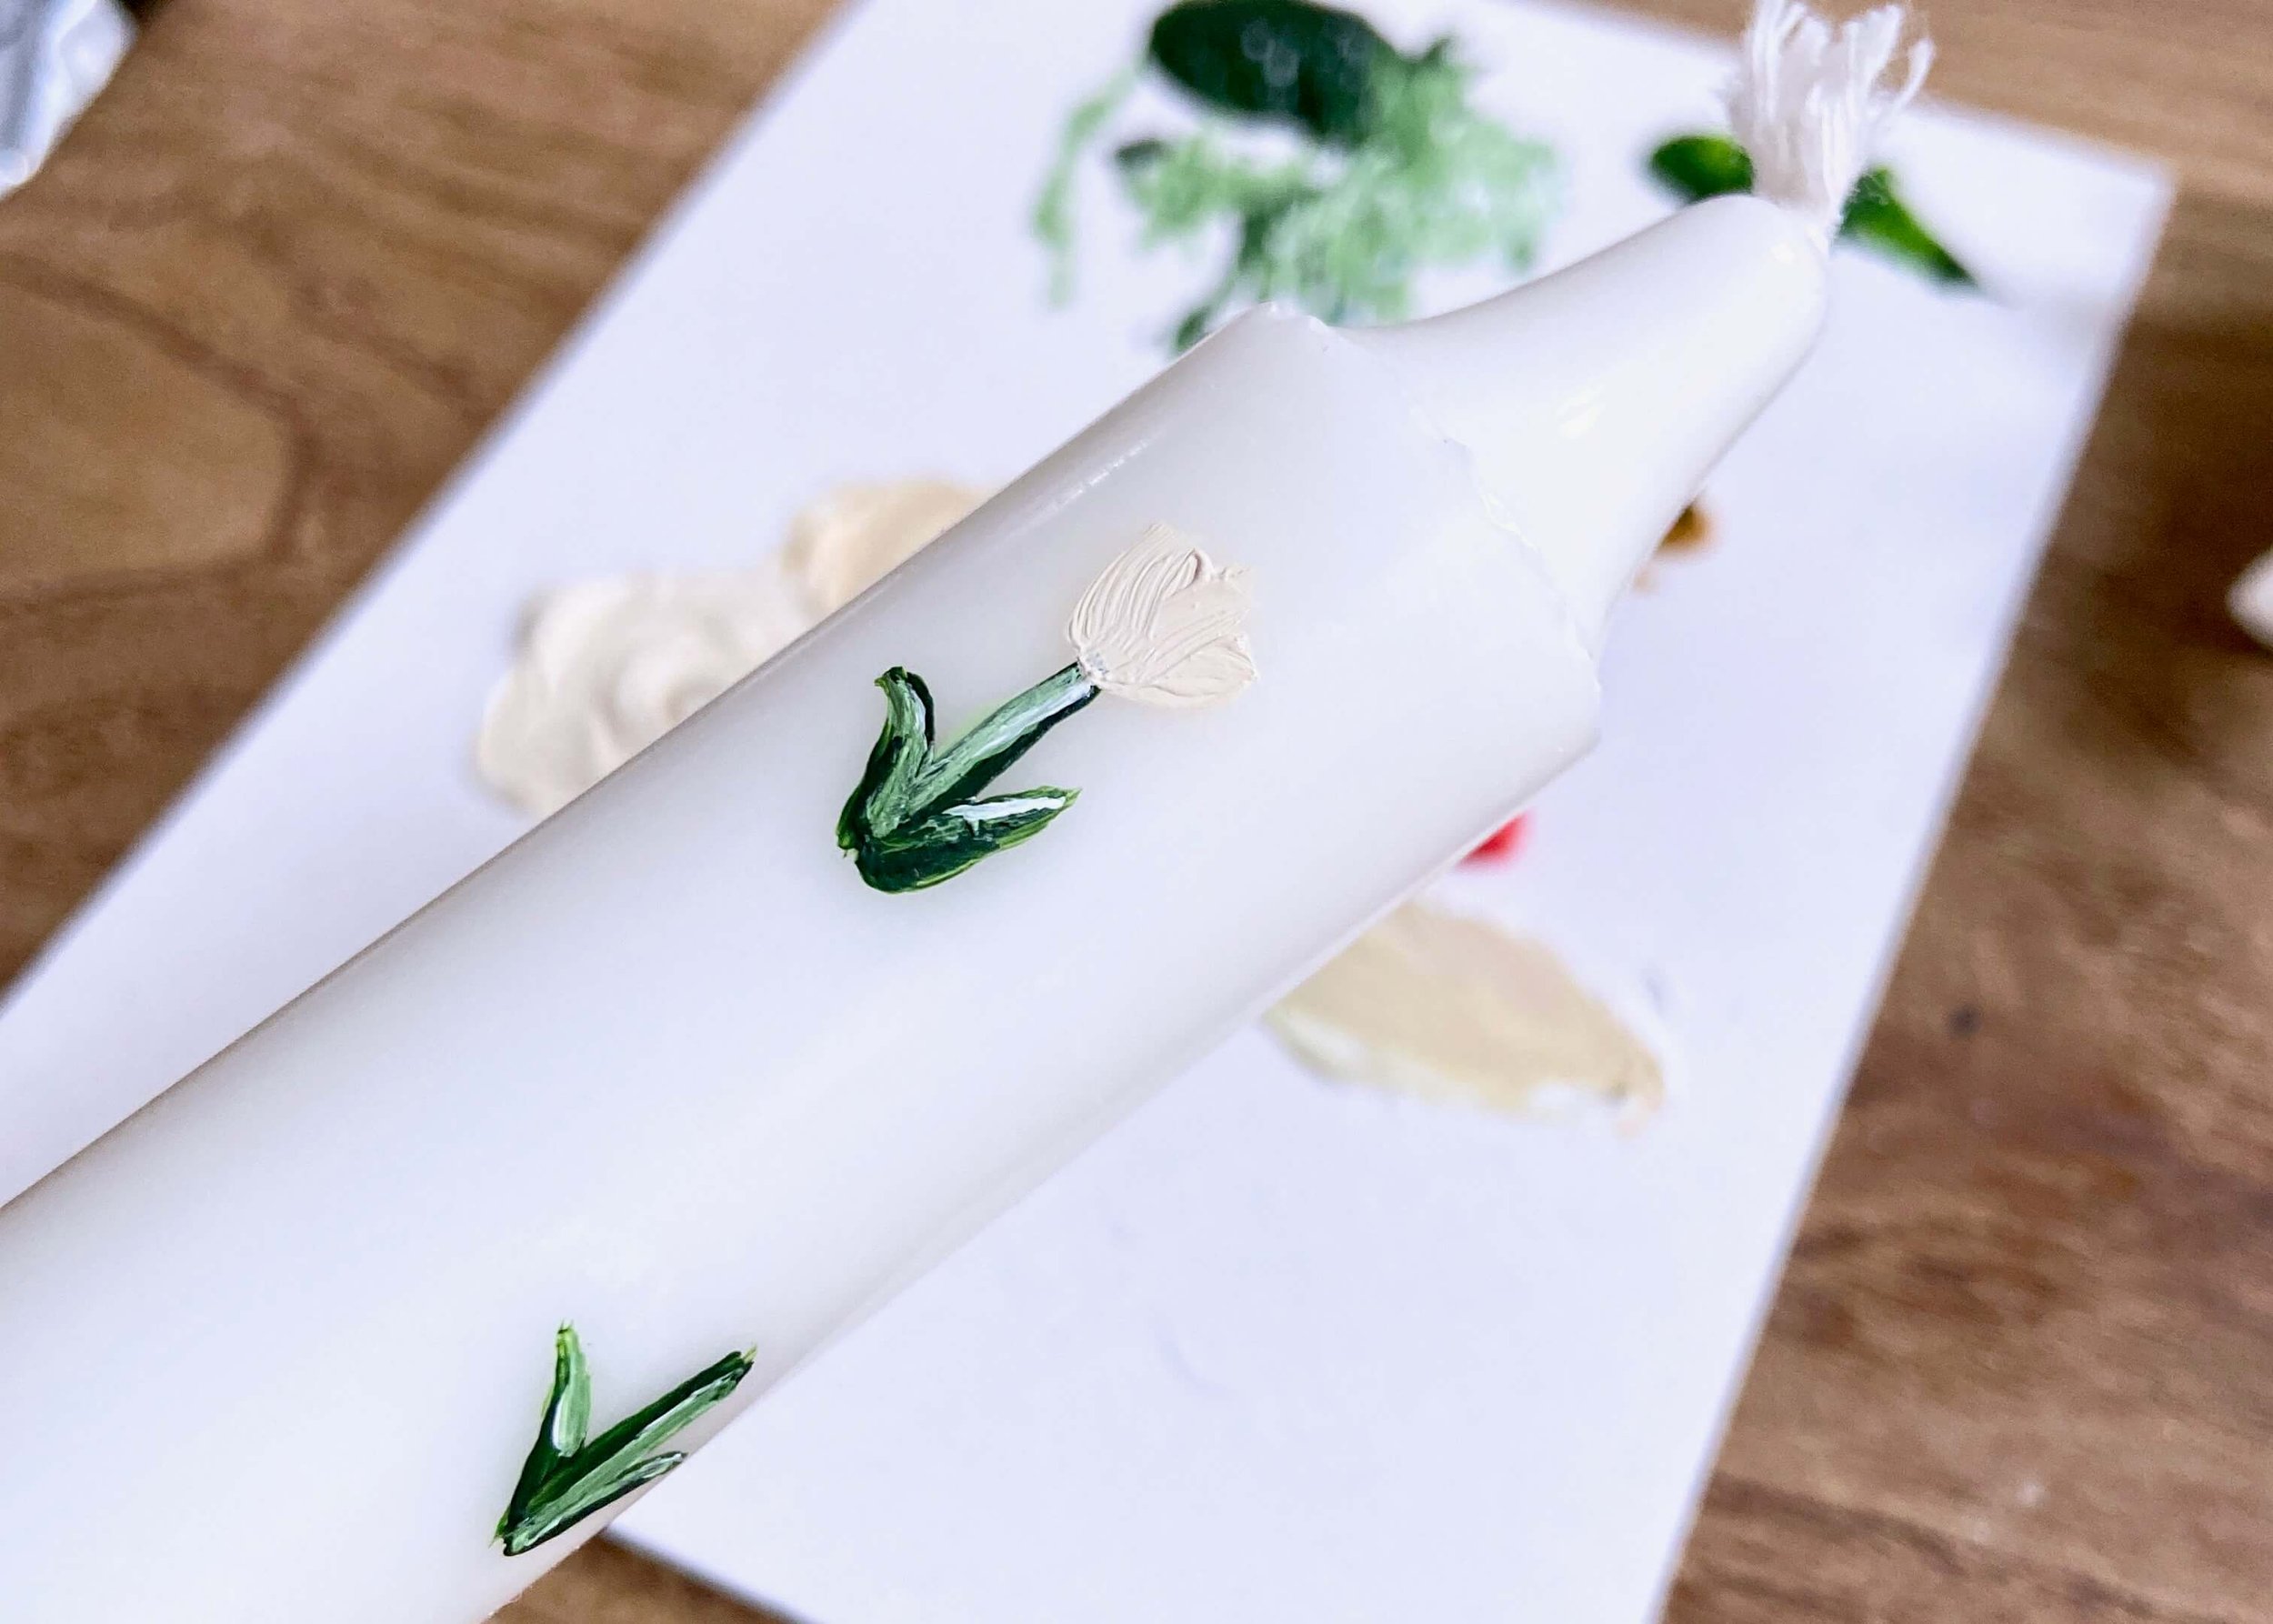
6.
Once the stems and leaves are dry, mix up the colours you want your flowers to be. I went for a beige and peachy orange. Paint the tulips by painting a stroke on top of the stem, and then two slightly strokes either side.
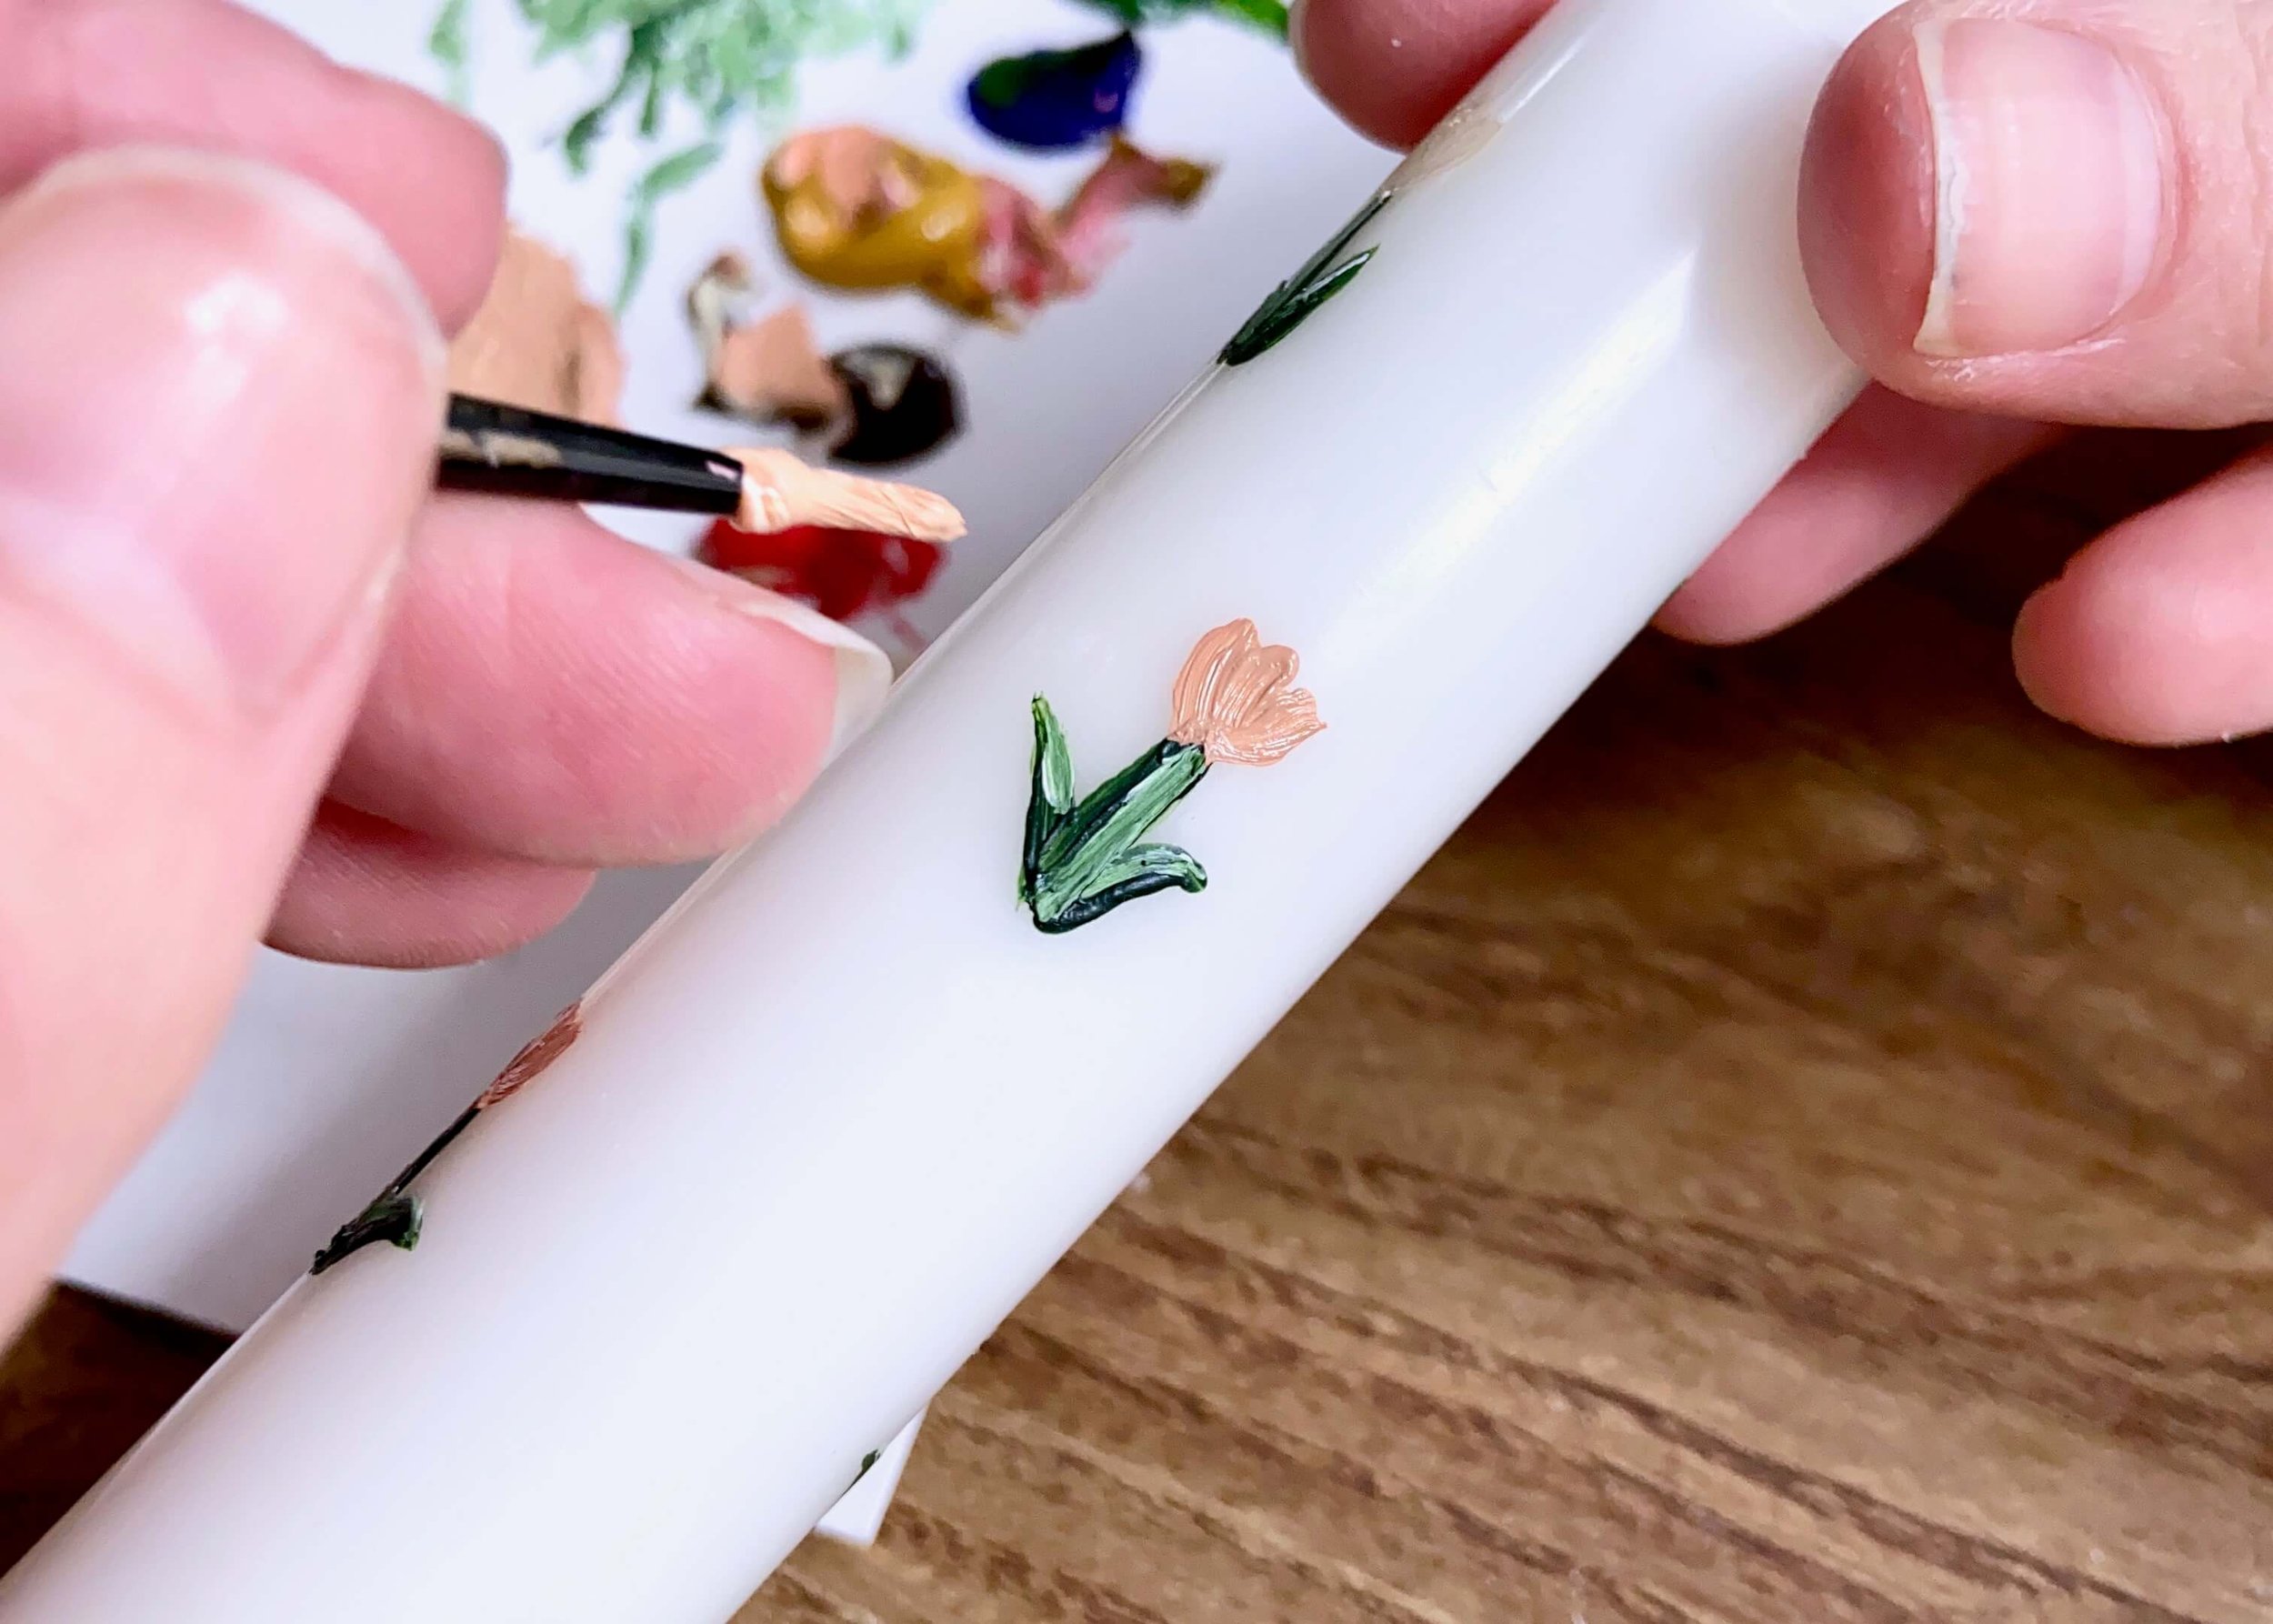
7.
Alternate your colours however you wish. Add some brown to your mixed up colours and use this to add some shade to your flowers.

8.
Once you’re happy, leave your candle to completely dry.