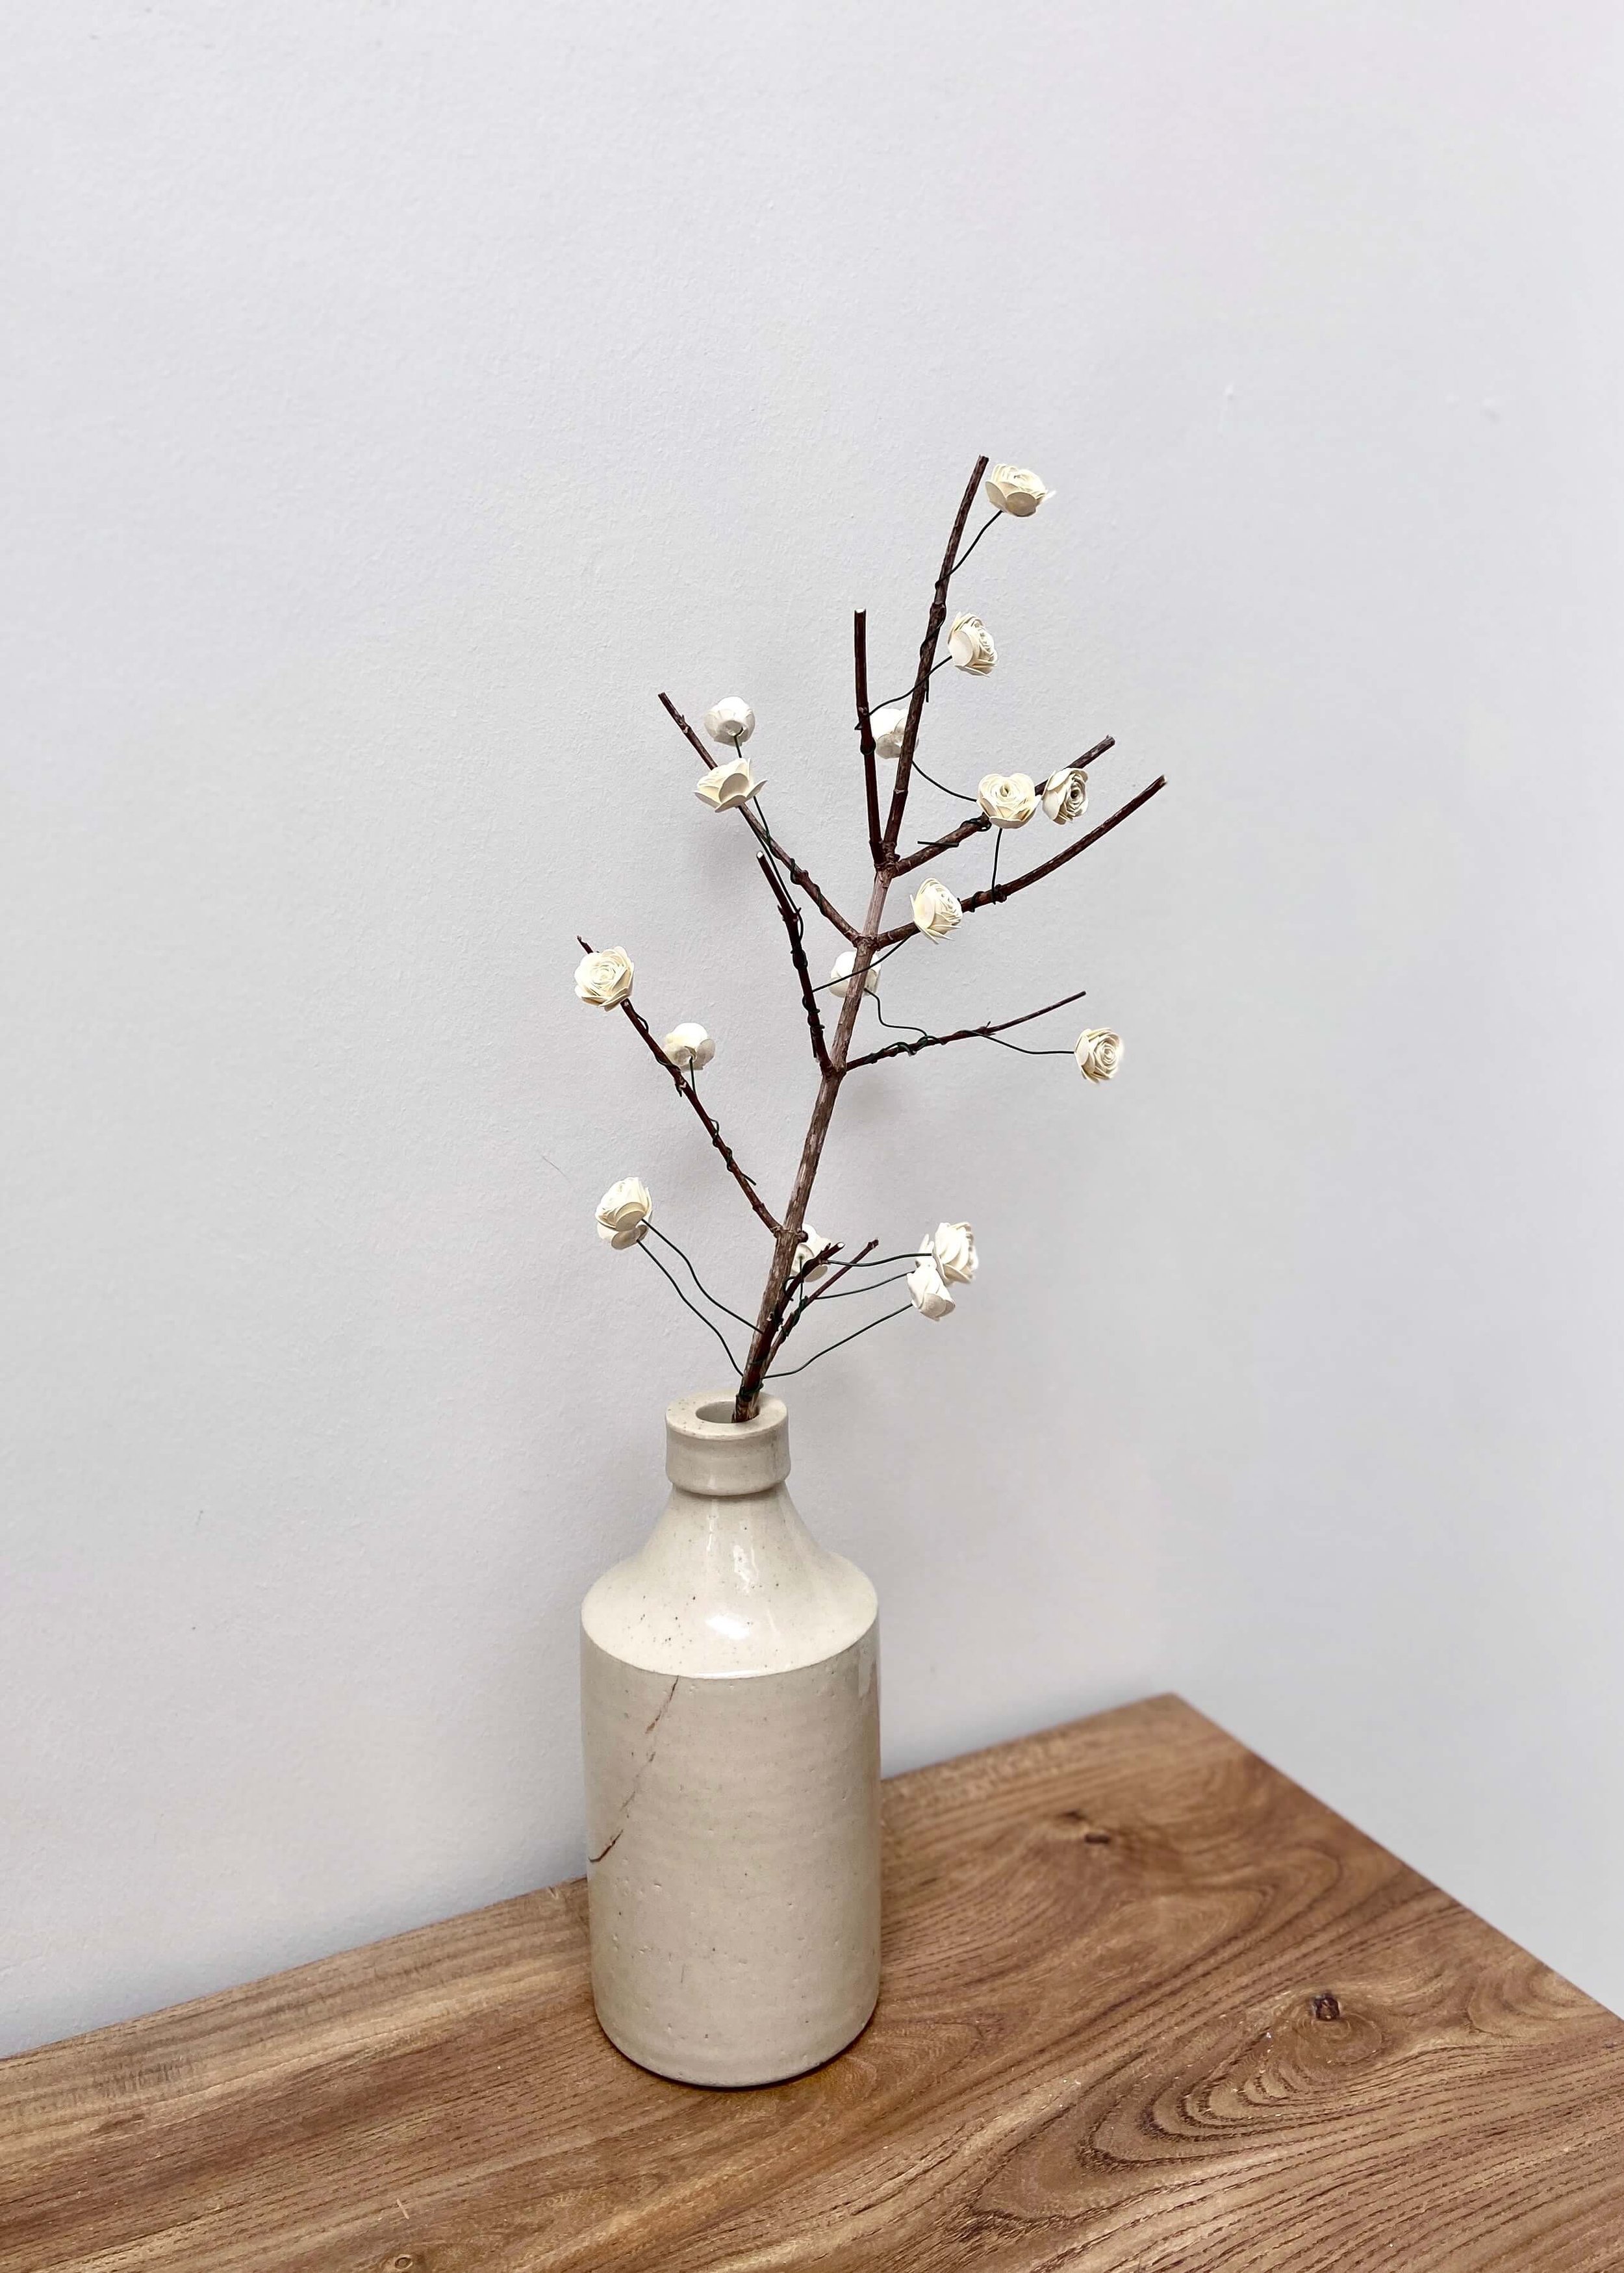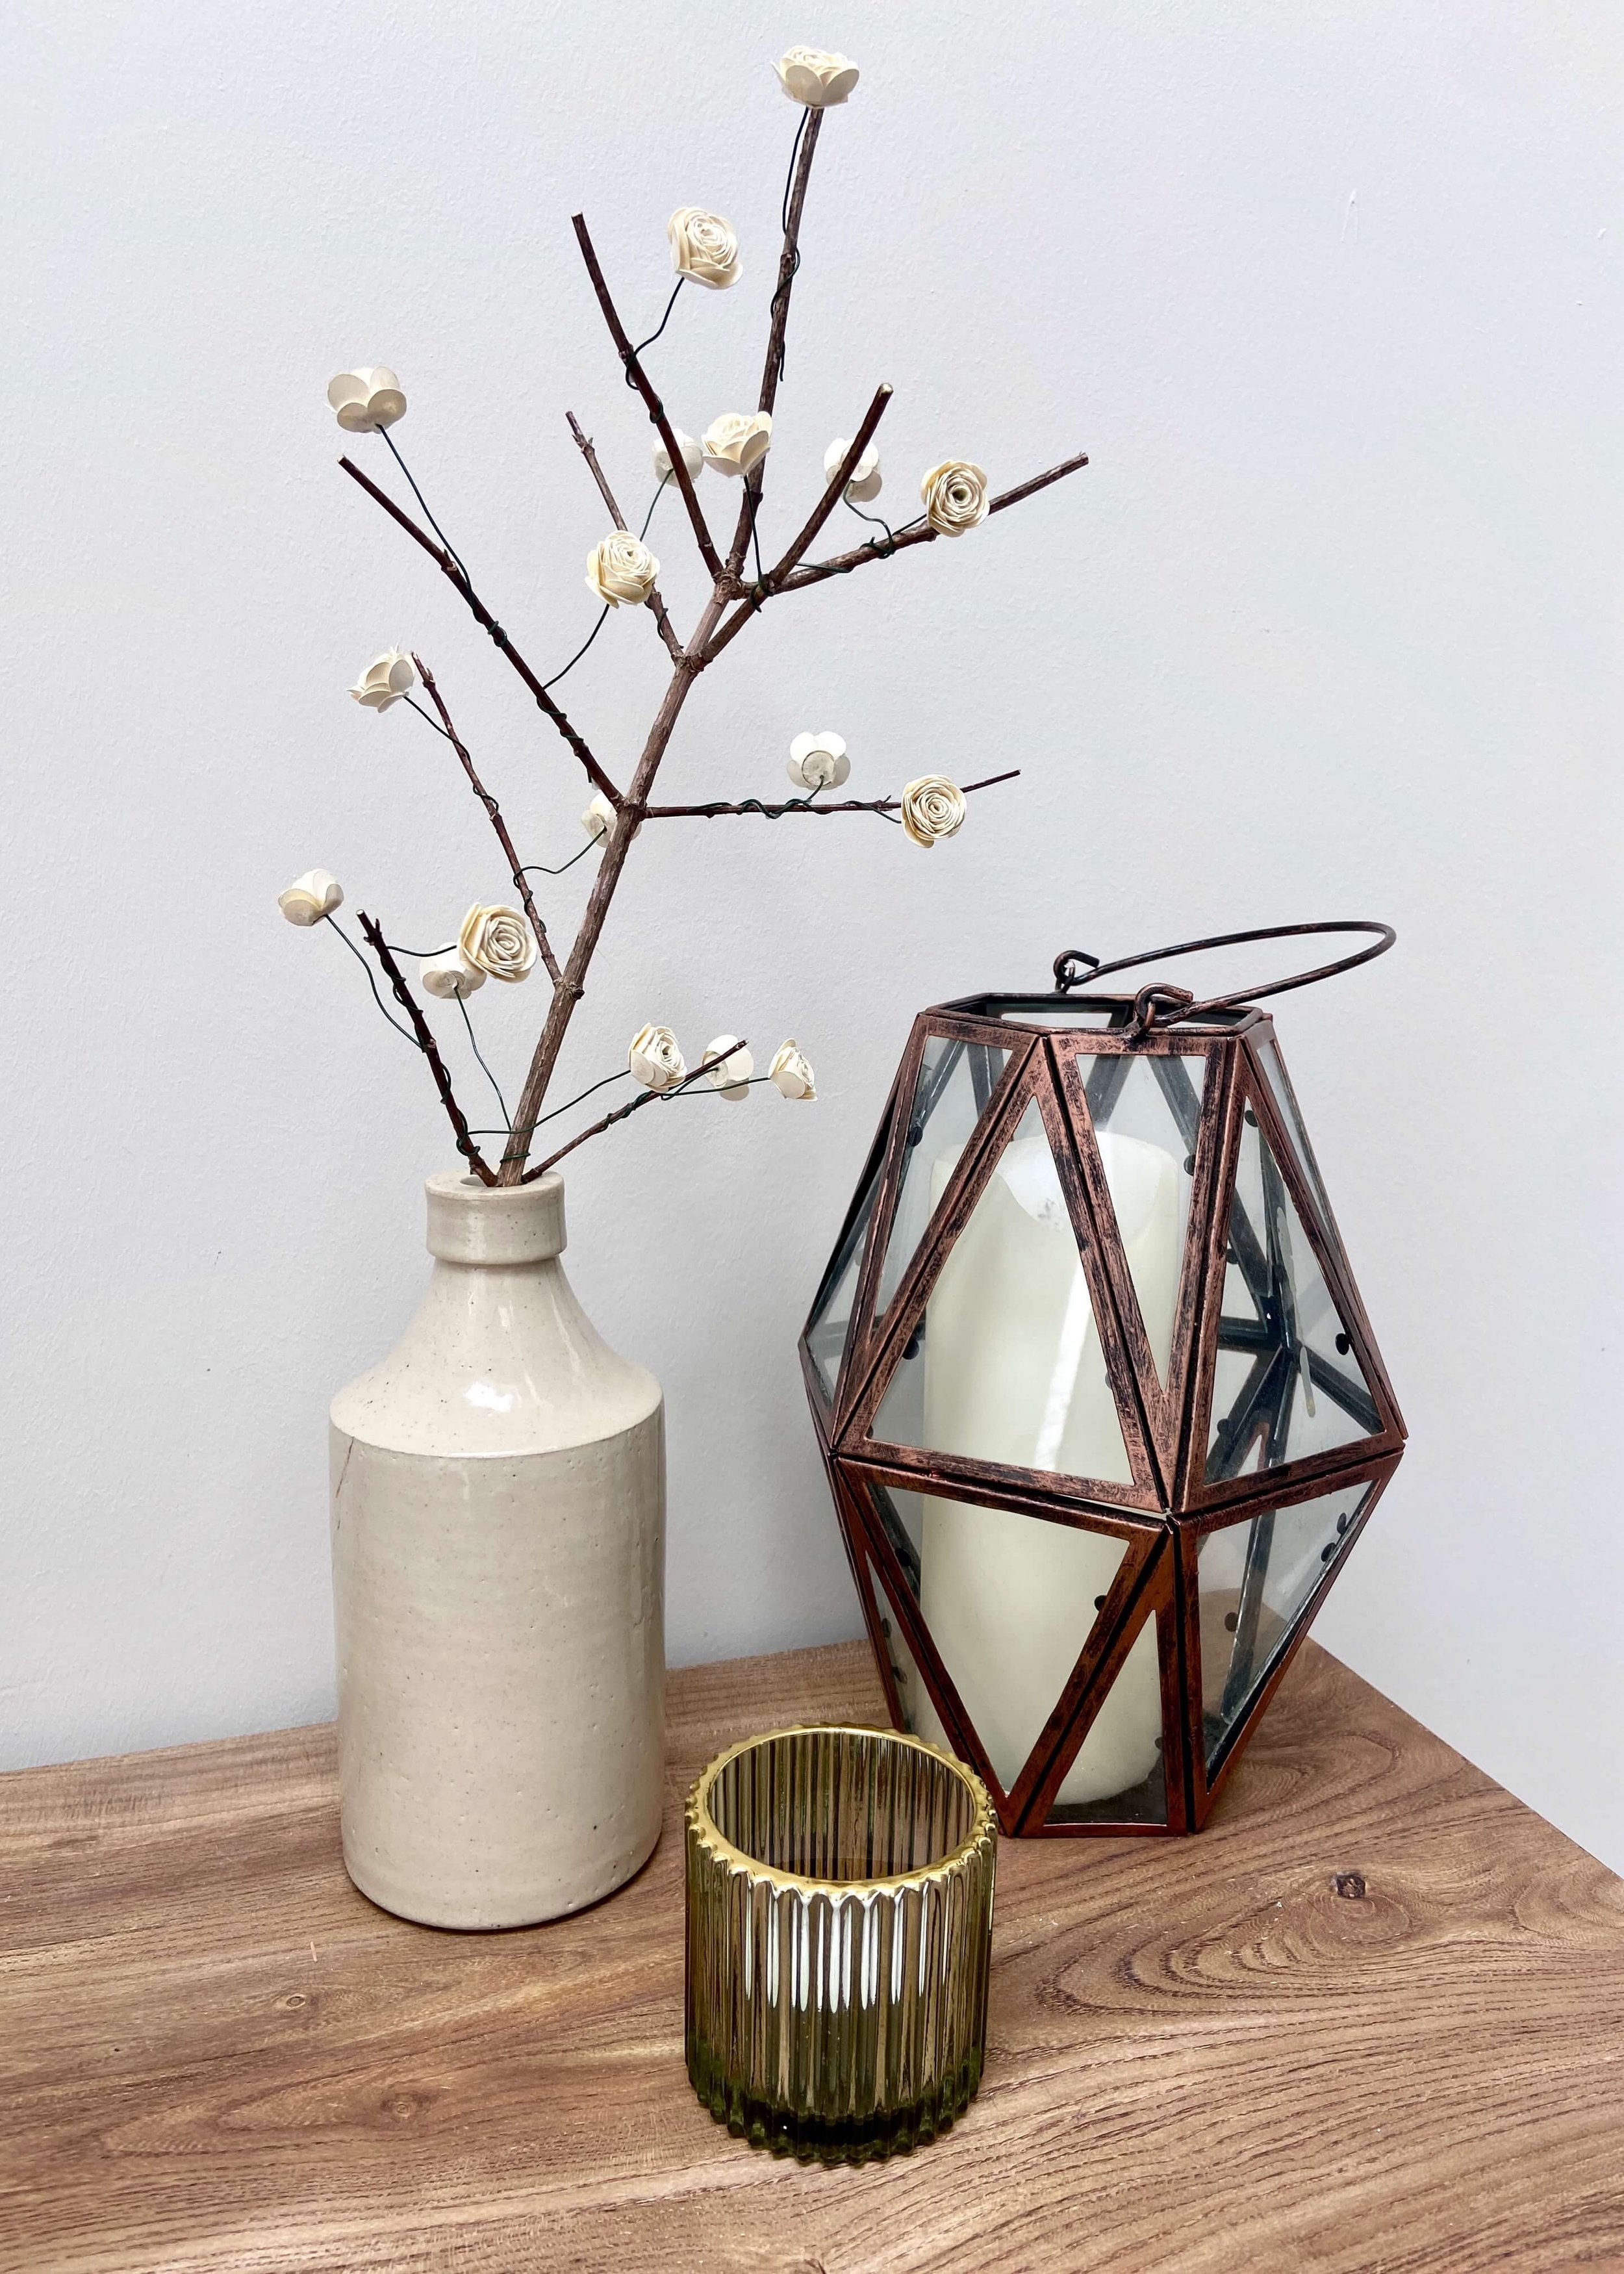
Add some simple Spring decor to your home with this easy paper flower branch!
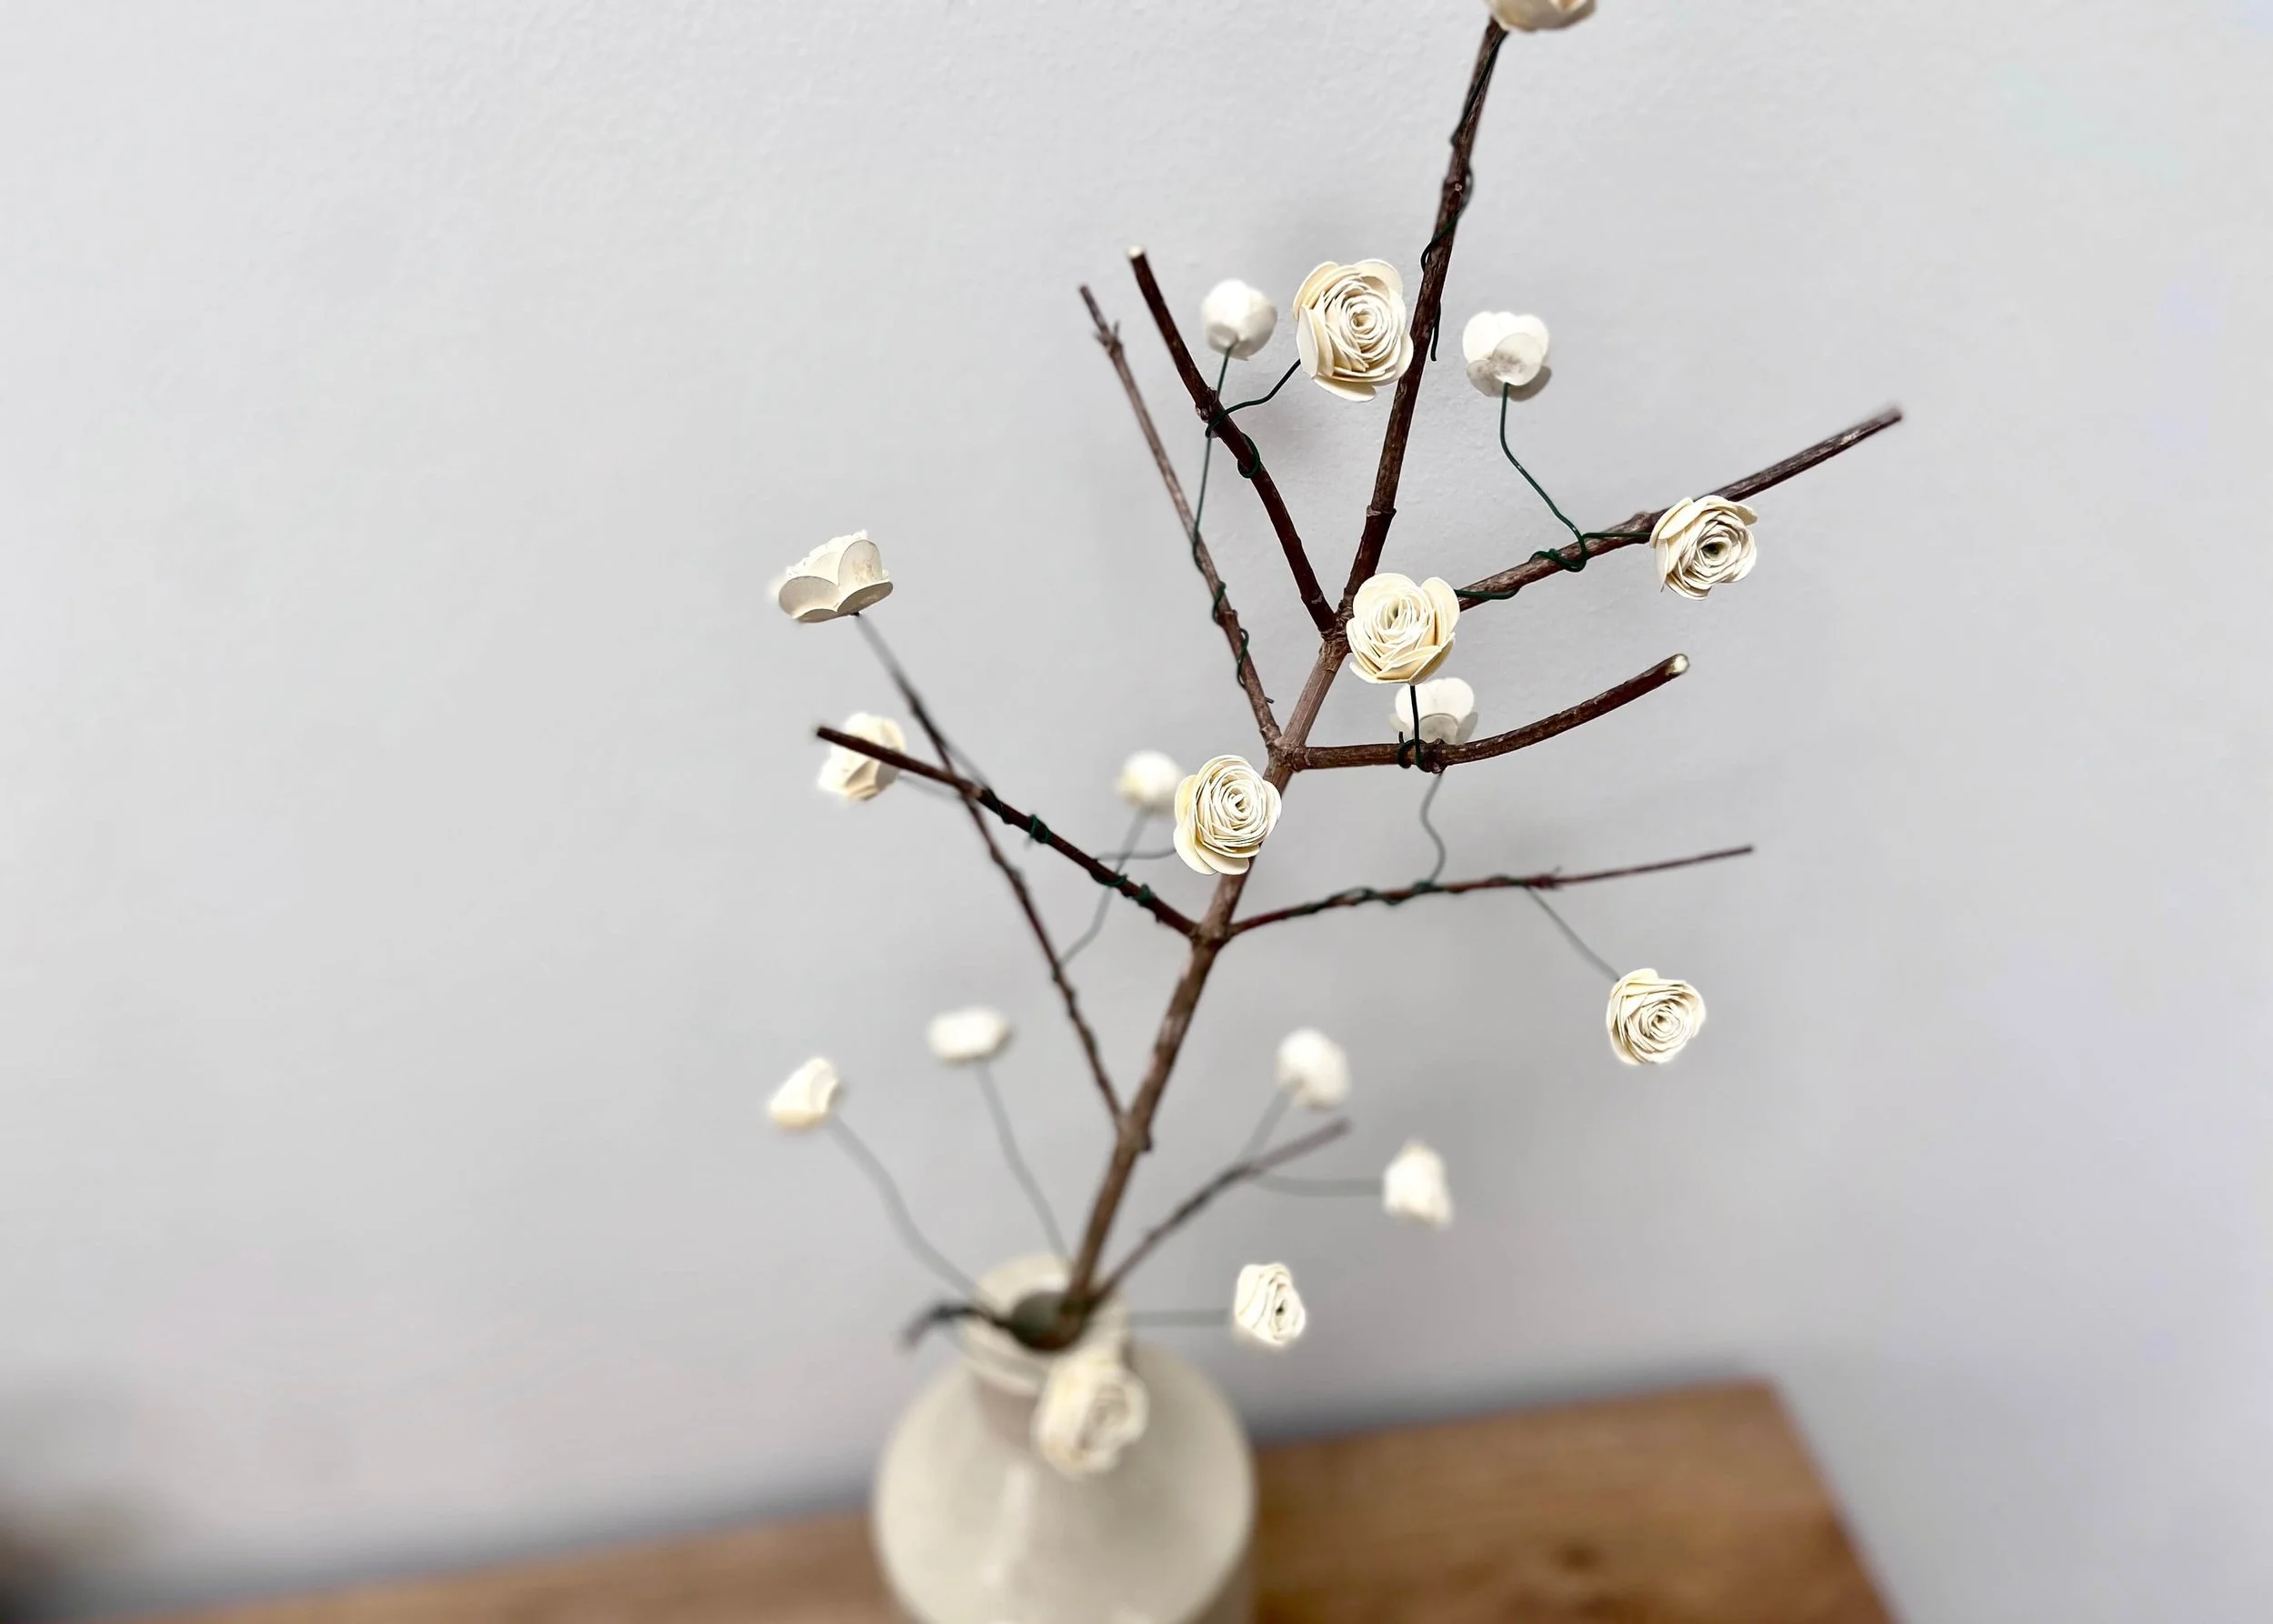
Every Spring I admire the decorated branches i see in other peoples homes, and so this year I decided it was time for me to create my own. I found a couple of branches I thought I could work with and then decided to try my hand at making paper flowers. This is entirely possible without a Cricut Maker, but the Cricut is just perfect for speeding up and making projects like this so much more precise. I had some floral wire left over from a Christmas wreath making kit (the benefits of being a craft materials hoarder!) and glued these into the paper flowers I made to attach them to my branch. The floral wire is green and the branch is brown but I was'n’t too fussed as from a short distance you can’t even tell. I think this is a nice and easy alternative to decorating a branch with easter eggs, and by keeping the flowers neutral in colour, it fits into my home really well. If you fancy trying this yourself, keep reading to find out what I used and for the step by step tutorial…


1.
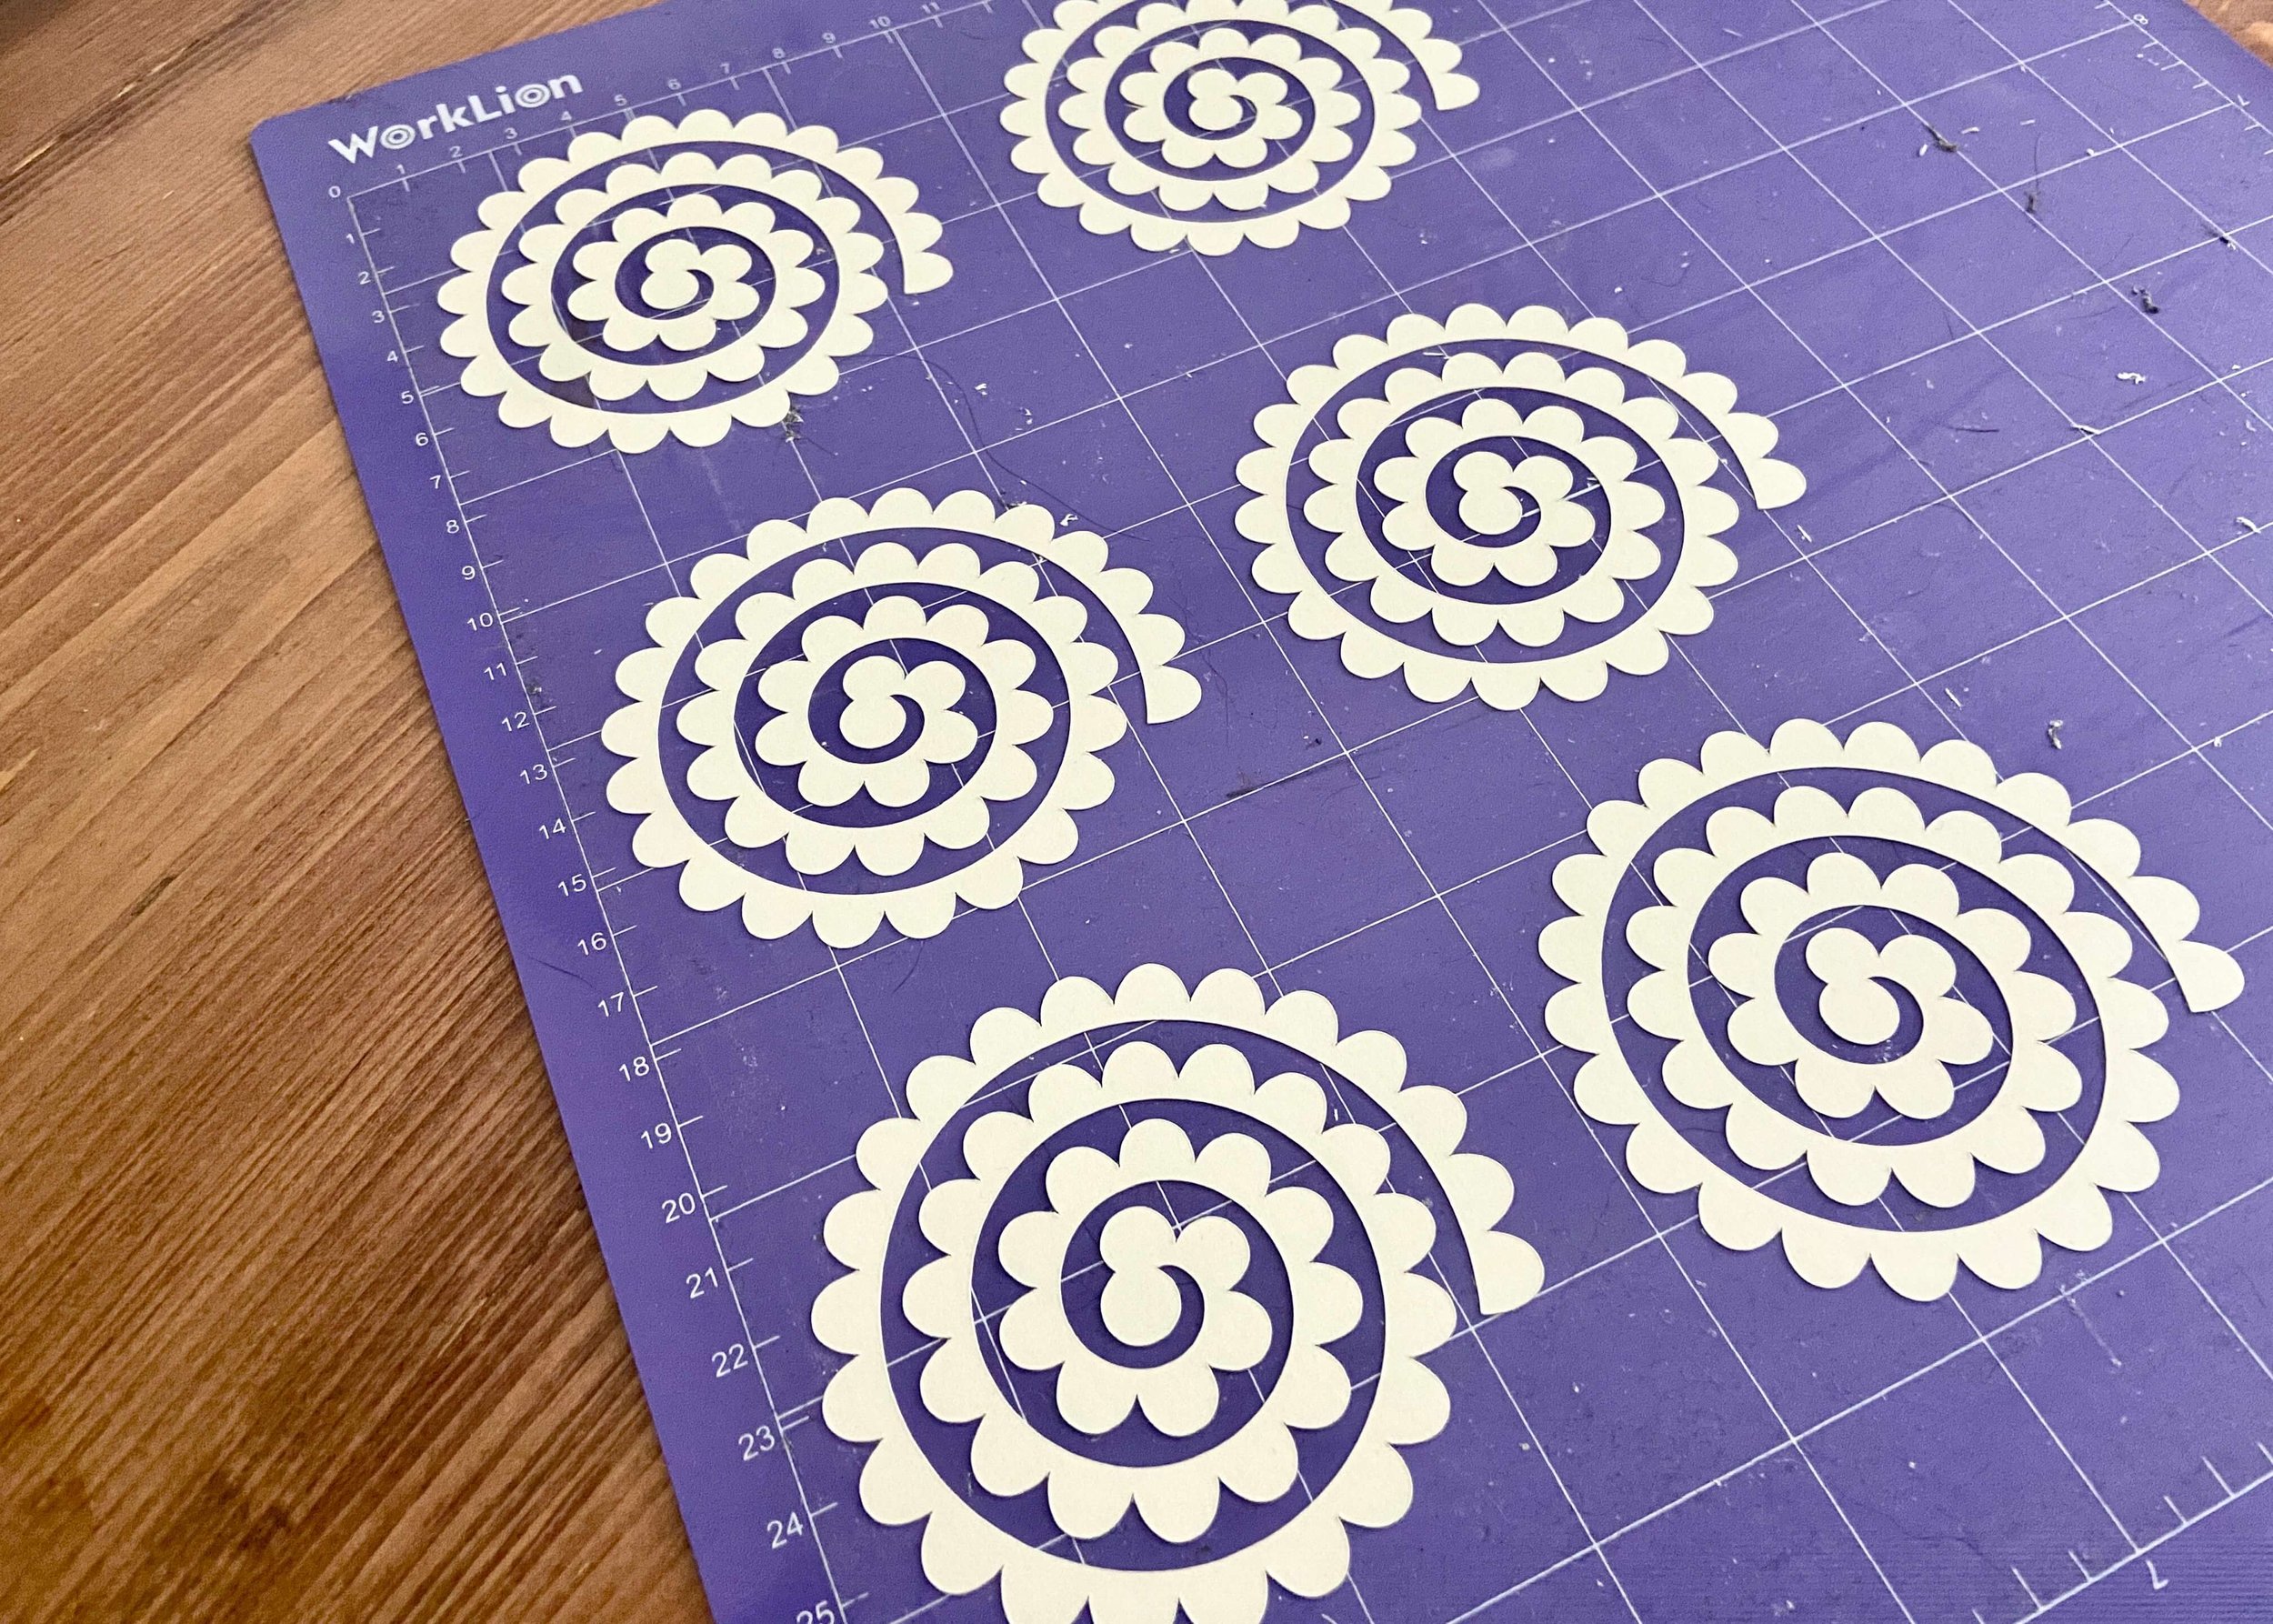
Find a flower template in Cricut Design Space, adjust the size and load your Cricut Maker with coloured card.
2.
Cut out duplicates of the template and remove the excess card.
3.
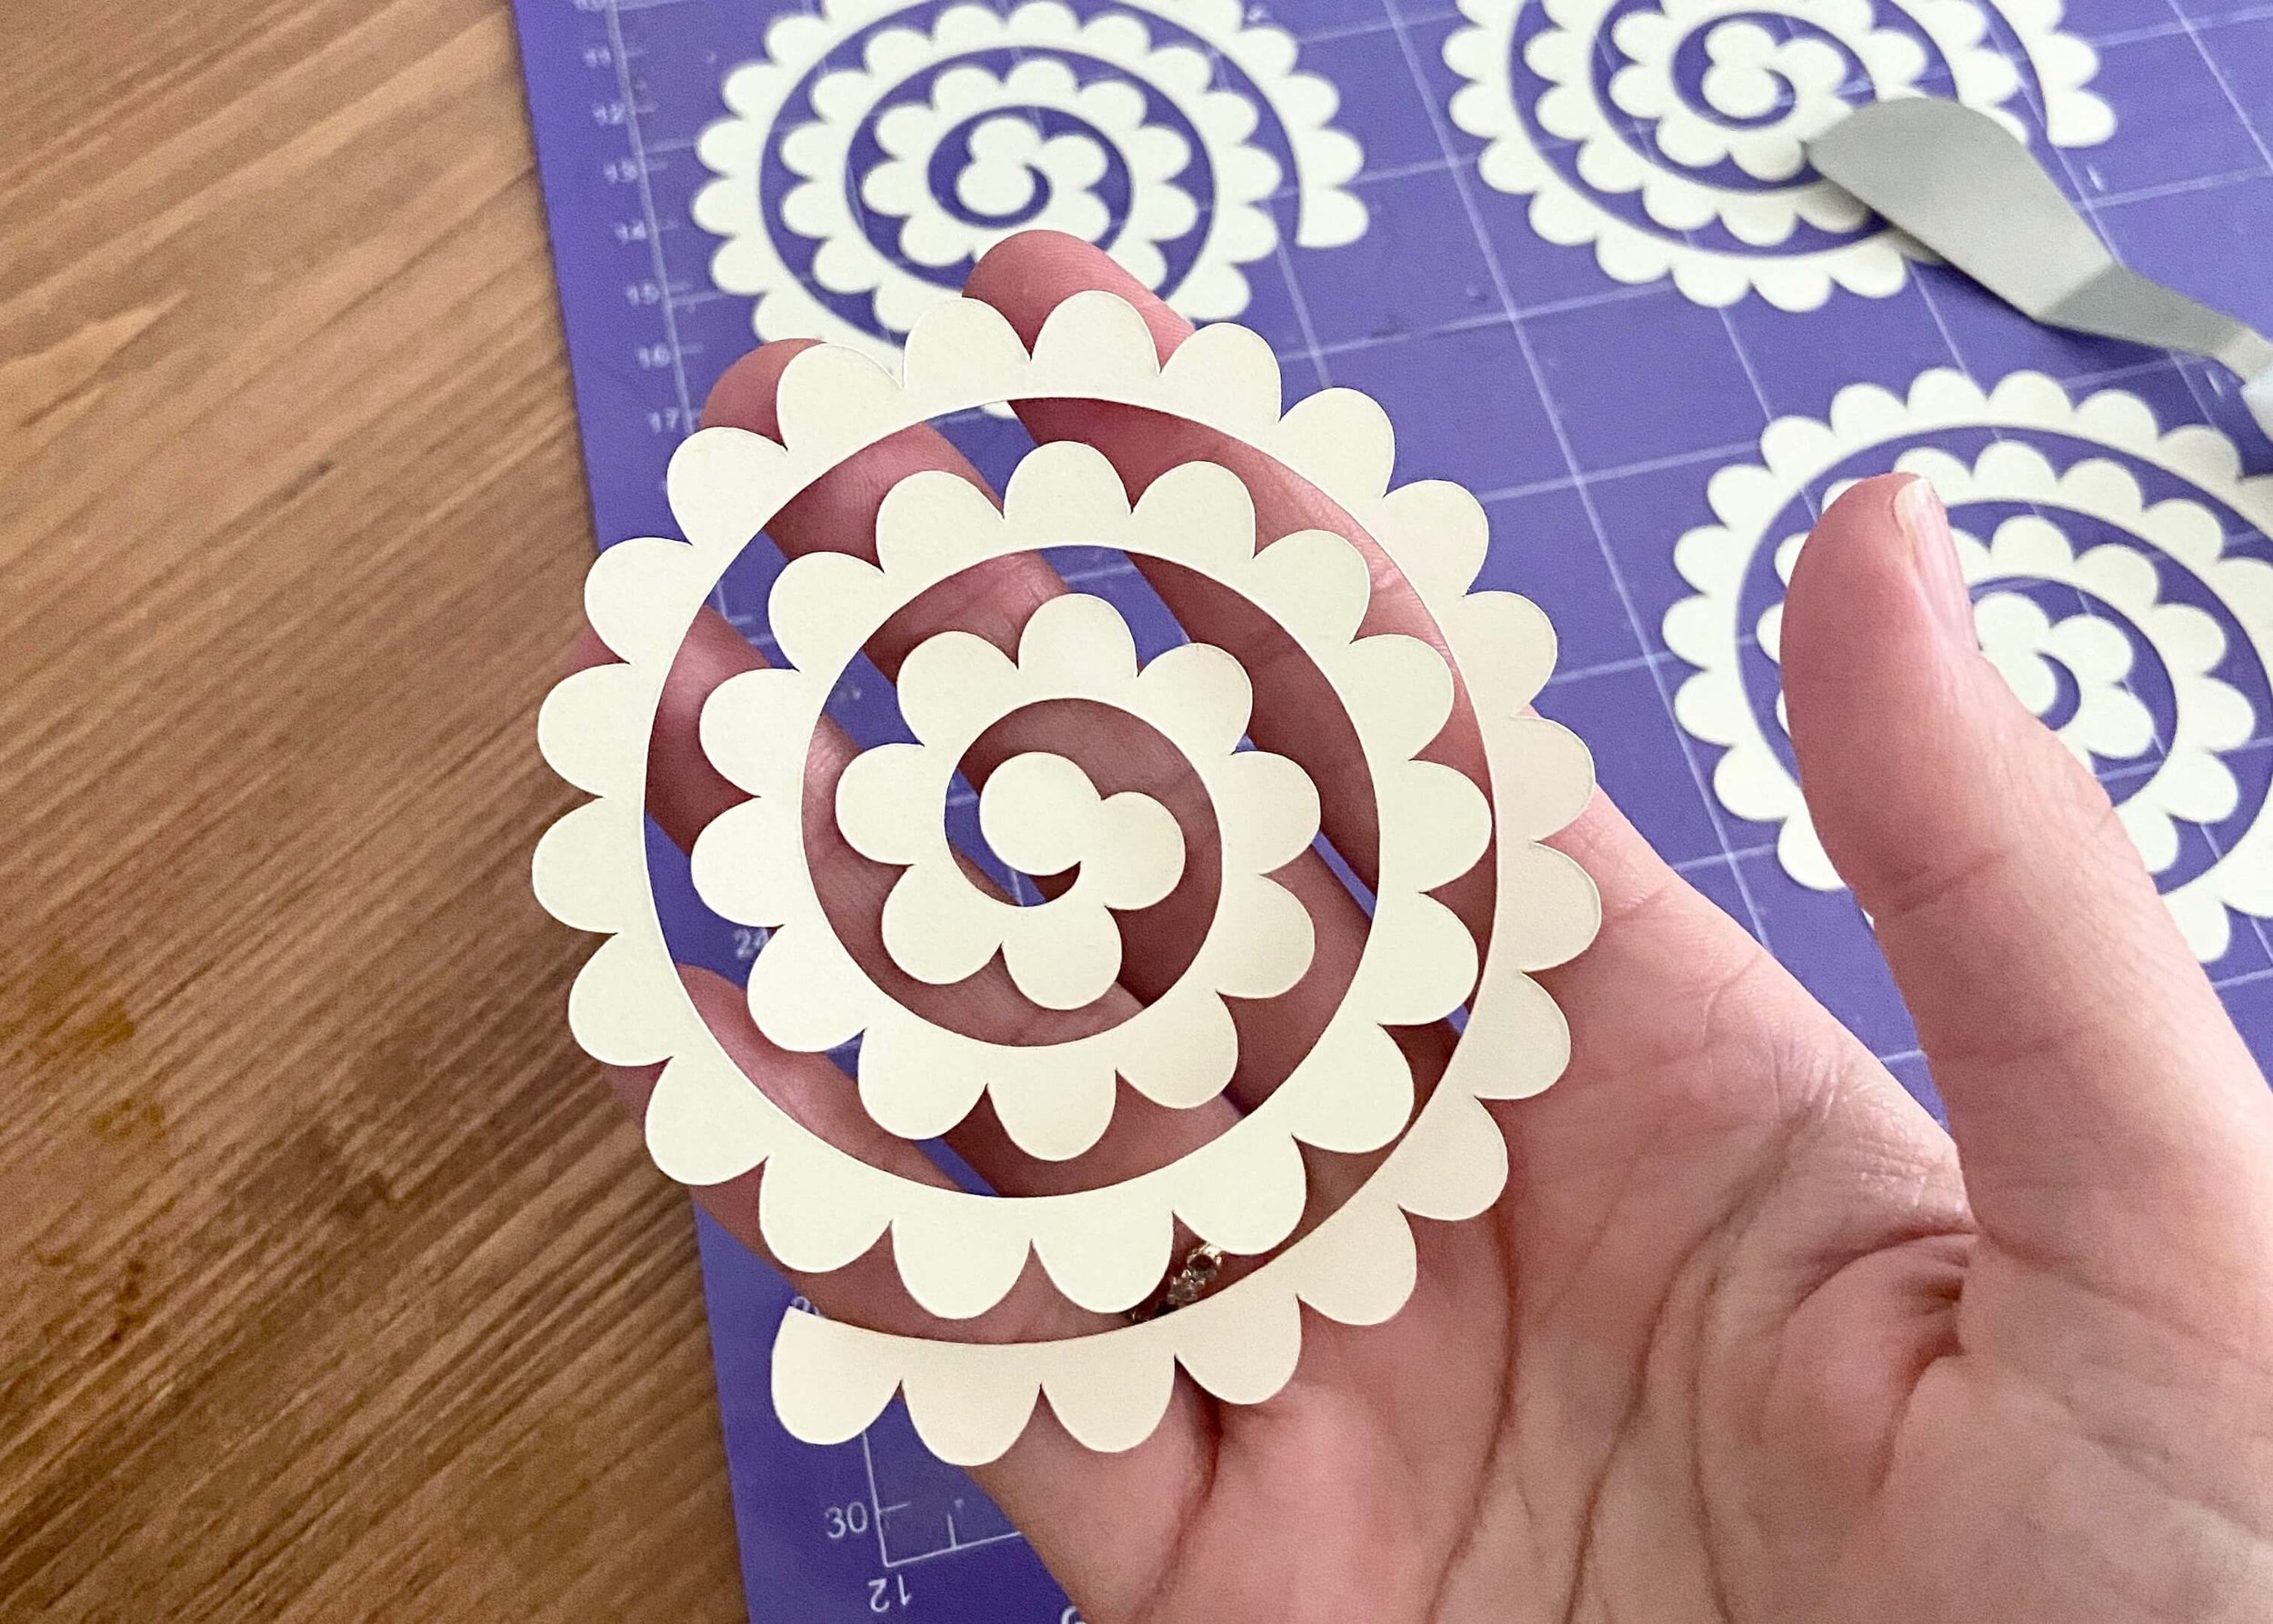
Carefully remove each flower template by bending back the cutting mat.

4.
Next, begin at the end on the outside and begin rolling the paper up. Use some super glue to adhere a short length of floral wire into these initial folds.

5.
Once set, continue rolling the flower template. Every now and again dab some glue to hold the flower together.

6.
Once you reach the end, add glue to the few sections and hold it down around the wire until secure.
7.
Next, grab your branch and decide how many flowers you will need. Repeat the above process to make all of your flowers.

8.
Finally, twist the floral wire around the branch where you want your flowers to be. Use super glue to secure any wire that is moving in place.