Isn't Spring just so lovely?! Here in the UK, we've just started to get some beautiful sunshine, daffodils are cropping up everywhere and the trees have started to blossom. It really does make everything so much lovelier. It seems a shame to leave all that loveliness outside though, and so as a much needed distraction from my thesis, I decided to procrastinate by doing some cherry blossom nail art. I'm really pleased with how it turned out, though being the clumsy thing that I am, managed to chip them the very next day...! If you fancy giving this a go, keep reading to find out what I used and how I did it...
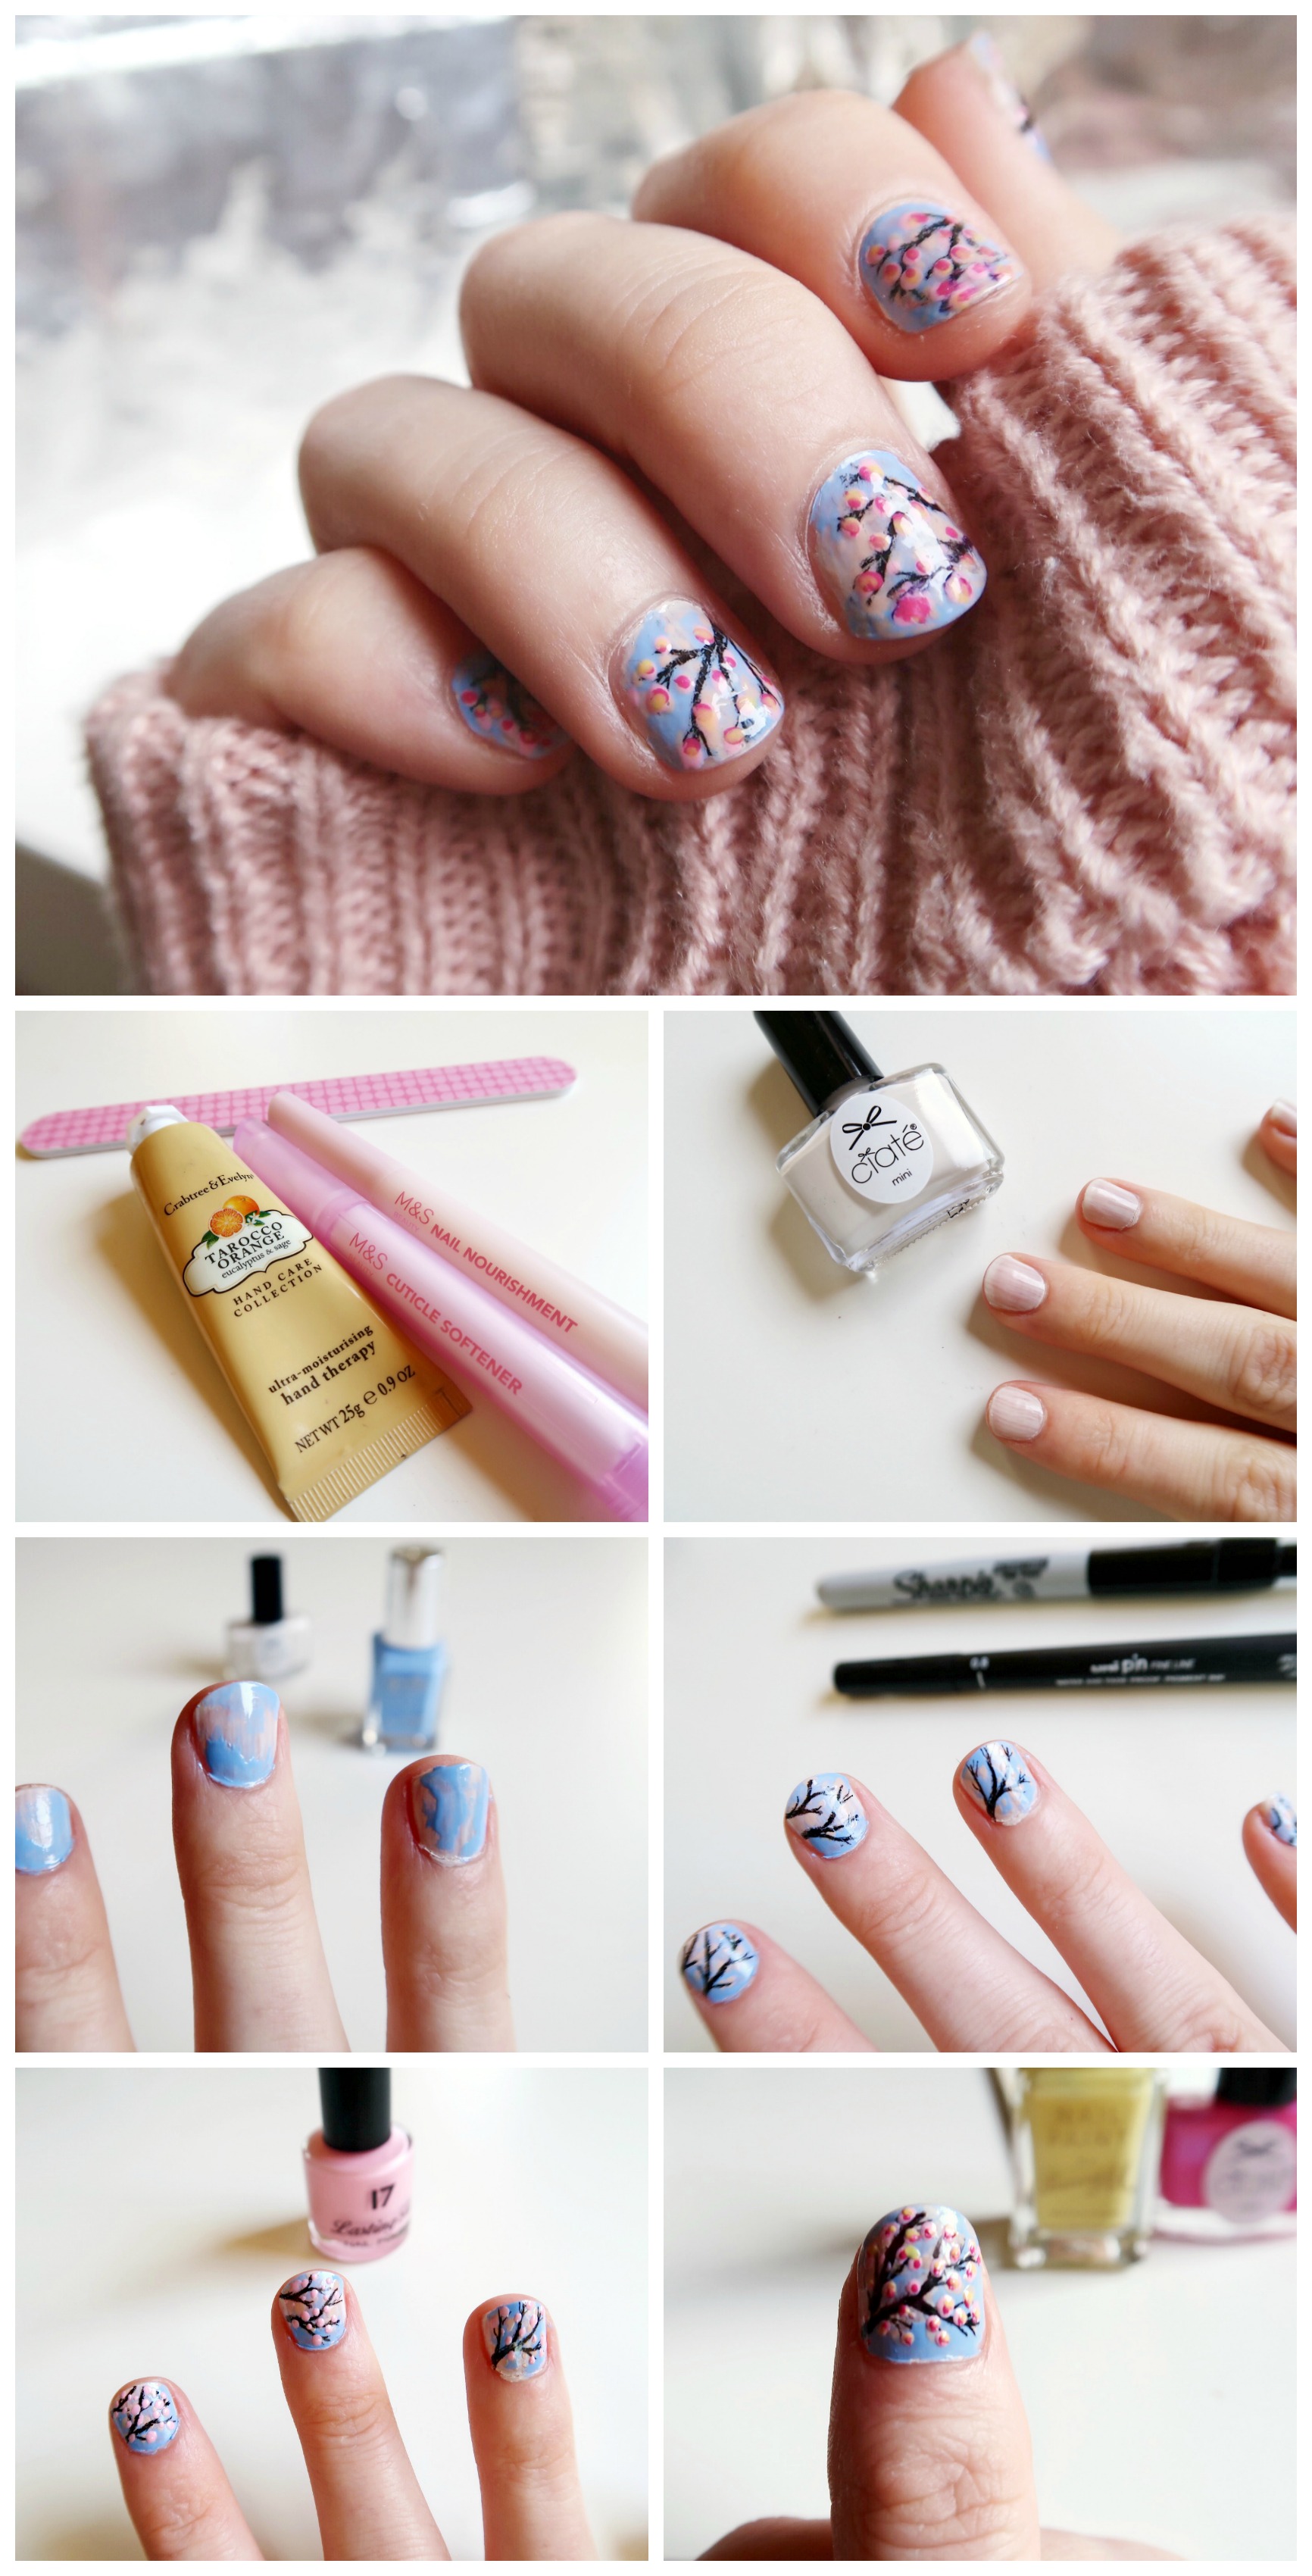


1. First of all, prep your nails and hands. For this I used a nail file and these treatment pens which work so well and are so convenient to keep in your beauty bag.
2. Next, paint all over your nails with a white or cream polish. I started with a white background so that my nails were all one colour to work on and to create areas of light.
3. Once dry, paint patches of blue sky using a blue polish across your nails. I used this lovely Barry M Blueberry polish for this and just dabbed splashes randomly over my nails leaving some areas of white.
4. Once dry, use a blush or nude polish and put dots randomly across your nails. Here, I used another Ciate nail polish in the shade Couture. These dots will be our background blossoms!
5. Again, leave this to dry, and then use a permanent black pen to draw on branches. For this I used a combination of a sharpie and a waterproof uni-pin fine liner. Blossom branches are quite simple and wilting so I started from one corner or side and drew lines with this in mind.
6. Make sure you leave this to dry thoroughly before adding slightly brighter, but still pastel pink dots of polish along the branches. For this I used an old Seventeen polish I had in the shade Fairy Cake and I used the tip of a cocktail stick to dab on perfect little dots.
7. Next, add dots of a hot pink or fuschia polish on top of the pink dots you added in step 6. For this I used Ciate Cupcake Queen and again used a cocktail stick to dab on dots of it. I wasn't too fussed about where I added the hot pink, just as long as it was on top of the pastel pink.
8. Use a yellow polish, to add dots of yellow on top of the dots you added in step 6. Here, I used Barry M Lemon and a cocktail stick. Again, I wasn't too fussed where I added these dots just as long as I coudl still see some of the pastel pink and fuschia shades.
9. Leave this to dry completely before adding a top coat. I used my absolute favourite Ciate Gelology top coat and painted on several layers to protect all my hard work.
...and that's it!


I didn't realise quite how popular blossom nail art was before I did this, but after giving it a go I can see why. Let me know what you think and if you like it, don't forget to share it!
♥