


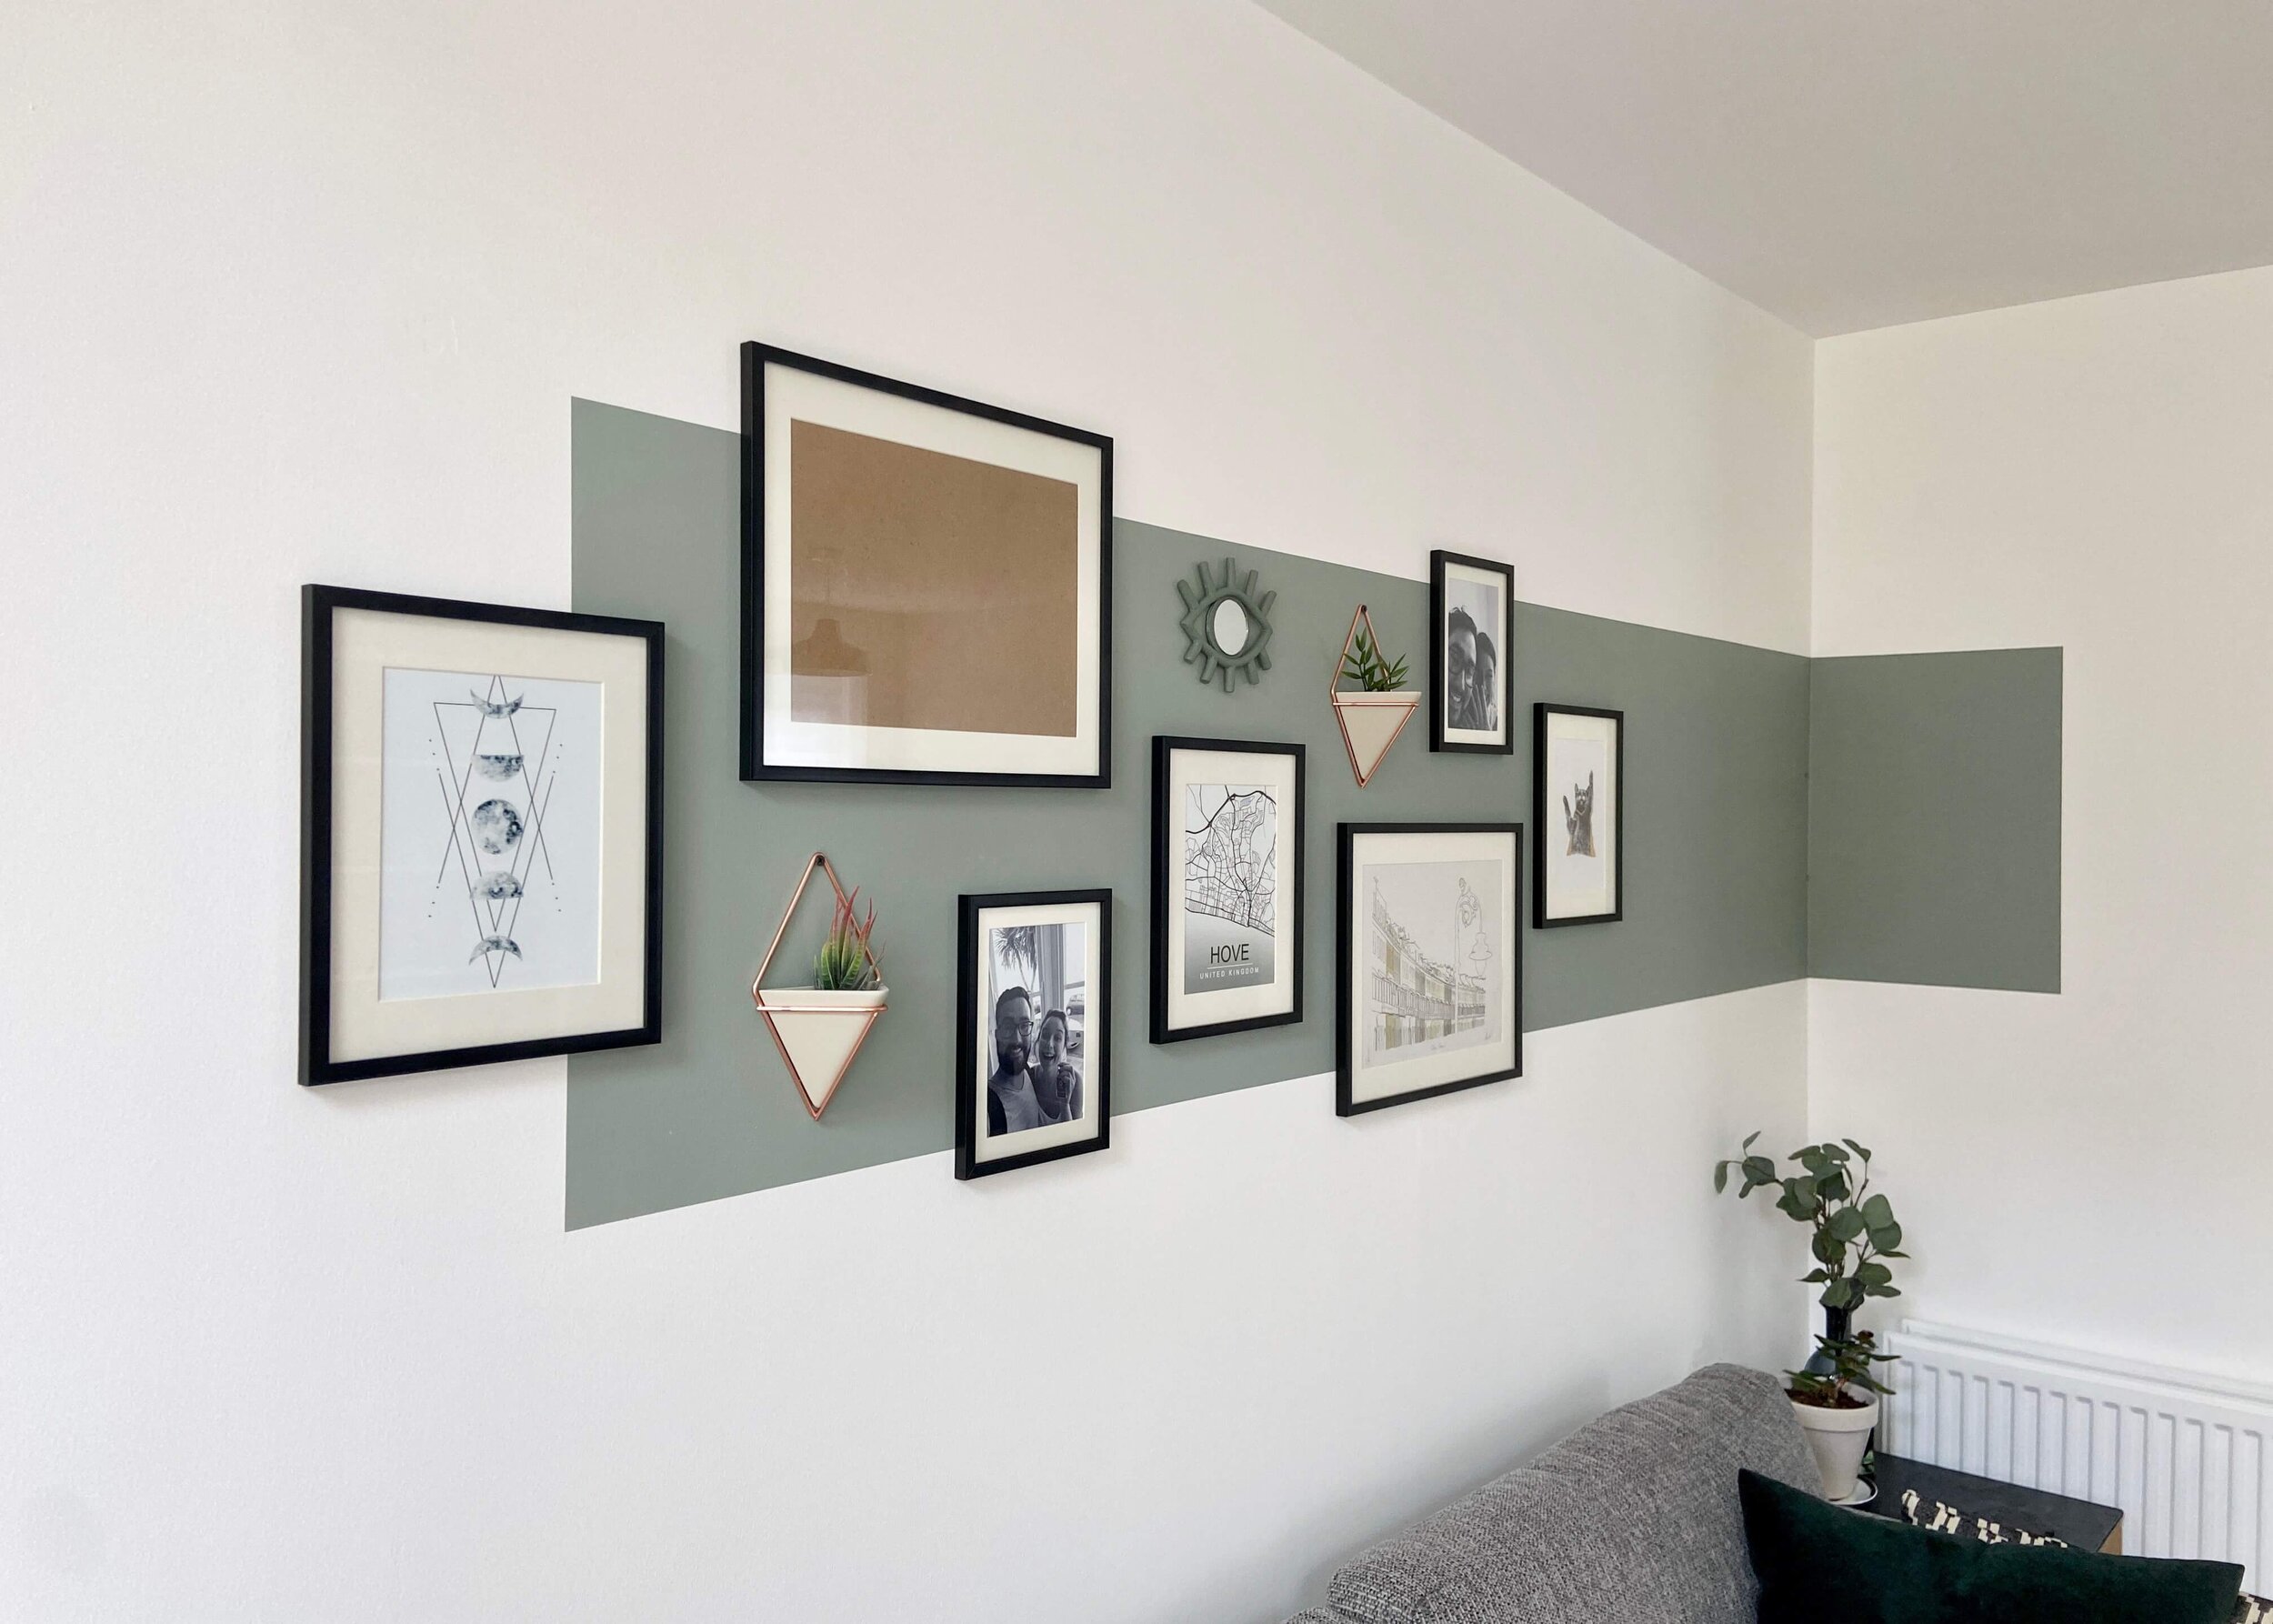
Make your gallery wall even more interesting with a colour block!
Gallery walls are a great way to display art prints and photos, and to create a feature in the room. The possibilities are endless with a gallery wall and there are so many ways that you can keep them interesting; you can hang different coloured, style and sized frames. Something I’ve been seeing a fair amount on social media recently though, is to paint a block of colour behind the gallery wall first, and to add in interesting objects, wall hangings and items. I wanted to have a go at this myself and although it was terrifying initially painting on to our brand new crisp white walls, I’m so happy with how it’s turned out. I have one frame without a print at the moment, but we’re still on the hunt for something we both love for that. Keep reading to find out what I used and how I did it…


1.
First of all, decide where you want your colour block to go, and using a measuring tape or ruler, start marking on your wall where you want it and it’s shape. I opted for an off-centre rectangle and decided to have it continue just ever so slightly onto the next wall.

2.
Once you’re happy with your placement, shape and size, use painter’s tape (and I’d really recommend using the less sticky tape) to outline your colour block.

3.
Decide on the colour your want your colour block, here you can see I was torn between green and greige. Of course I went for green in the end!

4.
Paint within your painters tape using your chosen coloured paint. Leave to dry.

5.
Once dry, carefully remove the painter’s tape and using command strips start placing your frames on top of your colour block. Leave some gaps in between the frames to add other items.

6.
The possibilities are endless in terms of what you can put in the gaps in between the frames. I hung two wall planters from Umbra and added these faux succulents, as well as the clay eye mirror that I made for our last home.


