


Bring some warmth to your home with this DIY rattan inspired lightshade
I know it’s not for everyone but the rattan / wicker trend is going strong and I love it. Our previous property had a lot of grey and so we’ve ended up with a lot of grey furniture here. Natural materials like rattan and wicker are such a nice way of adding texture and warming a space up, and so I’ve been fully embracing this trend to combat the cold grey. In all honesty, I have no idea what our decor style is. We have furniture that is industrial looking, we like white and minimal walls, black furniture and rattan.. so it must be some sort of hybrid of industrial, Scandi and Japandi… Scandustrialandi?
I’m no interior design expert and so that might be breaking all sorts of rules but we love it. We’re currently doing up our office space, which if you saw my previous post you’ll know we recently added some minimal wall panelling to. I’d been looking for some sort of rattan-like lightshade for in here for ages, but none of them were quite the right size or style. I had in my mind exactly what I wanted, knew that it looked a bit like this one from Urban Outfitters, and also knew that it was most definitely not this expensive. So, I had a crack at making my own and it really was quite the journey.
I wasn’t sure if I was going to get to the point of having a sturdy lightshade but with some perserverance, I got there! The trickiest part of this was connecting the top and bottom frames together. I used dowels and superglue for this, and it took a lot of time, patience and superglue, but it would probably be easier to either use wire or to use lightshade that already has the top and bottom connected with wire. Still, once this is nice and sturdy, sticking on the decorative dowels is pretty easy and the final result is worth it. Keep reading to find out what I used and how I did it…


1.
To create your lightshade frame, trim 4 of your dowels so that they are the dowel length minus 2 x your wire frame height.
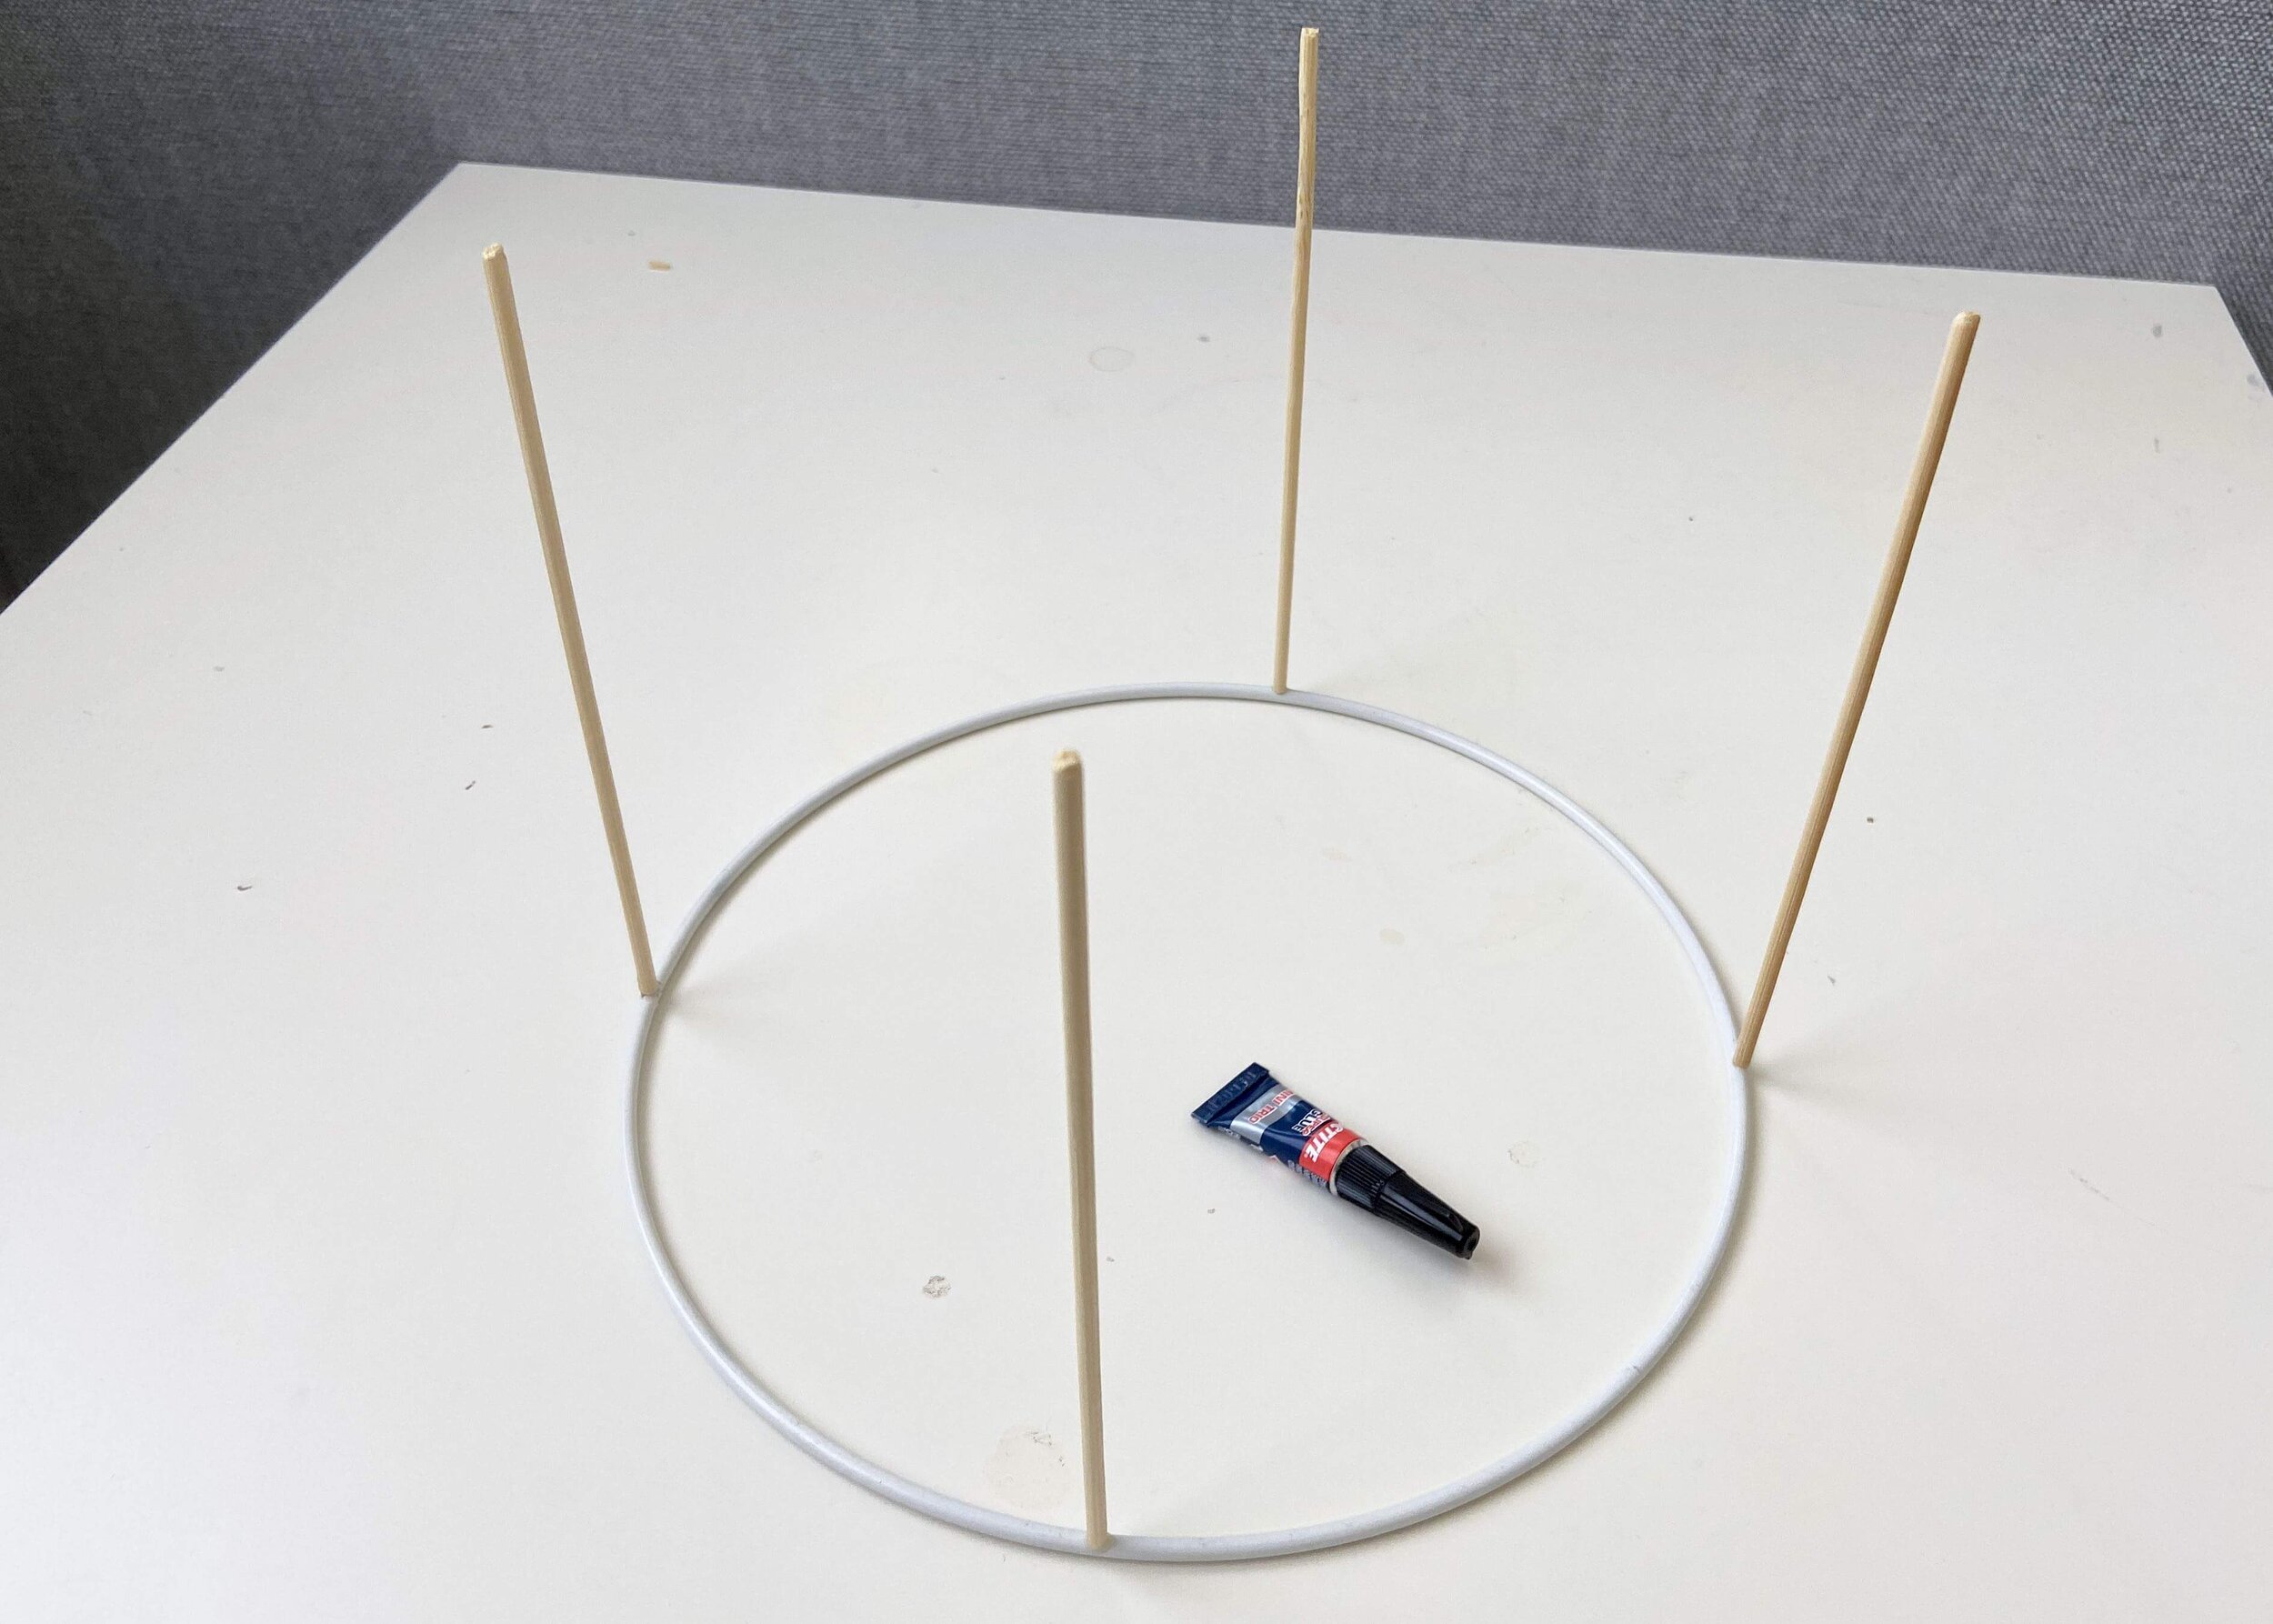
2.
Using superglue, stick these evenly around one of your lightshade rings and on top of the metal. You may want to sand the end to make sure it’s flat and sticks as well as it possibly can. Use a hairdryer to speed up the drying process and try to get them stuck in position as straight as possible.

3.
Next, place the top ring of your light shade frame on the bottom, and add dabs of glue to the end of each of your dowels from step 1 and 2. Connect your lightshade frame using these and hold in place until firmly adhered. Use bottles and pots to held support it and keep it straight.

4.
Next, take full length dowels and stick these on top of your structural dowels to reinforce them. These should be stuck to the outside perimeter of the frame. You can also start adding dowels to the outside of your frame in between the supports.
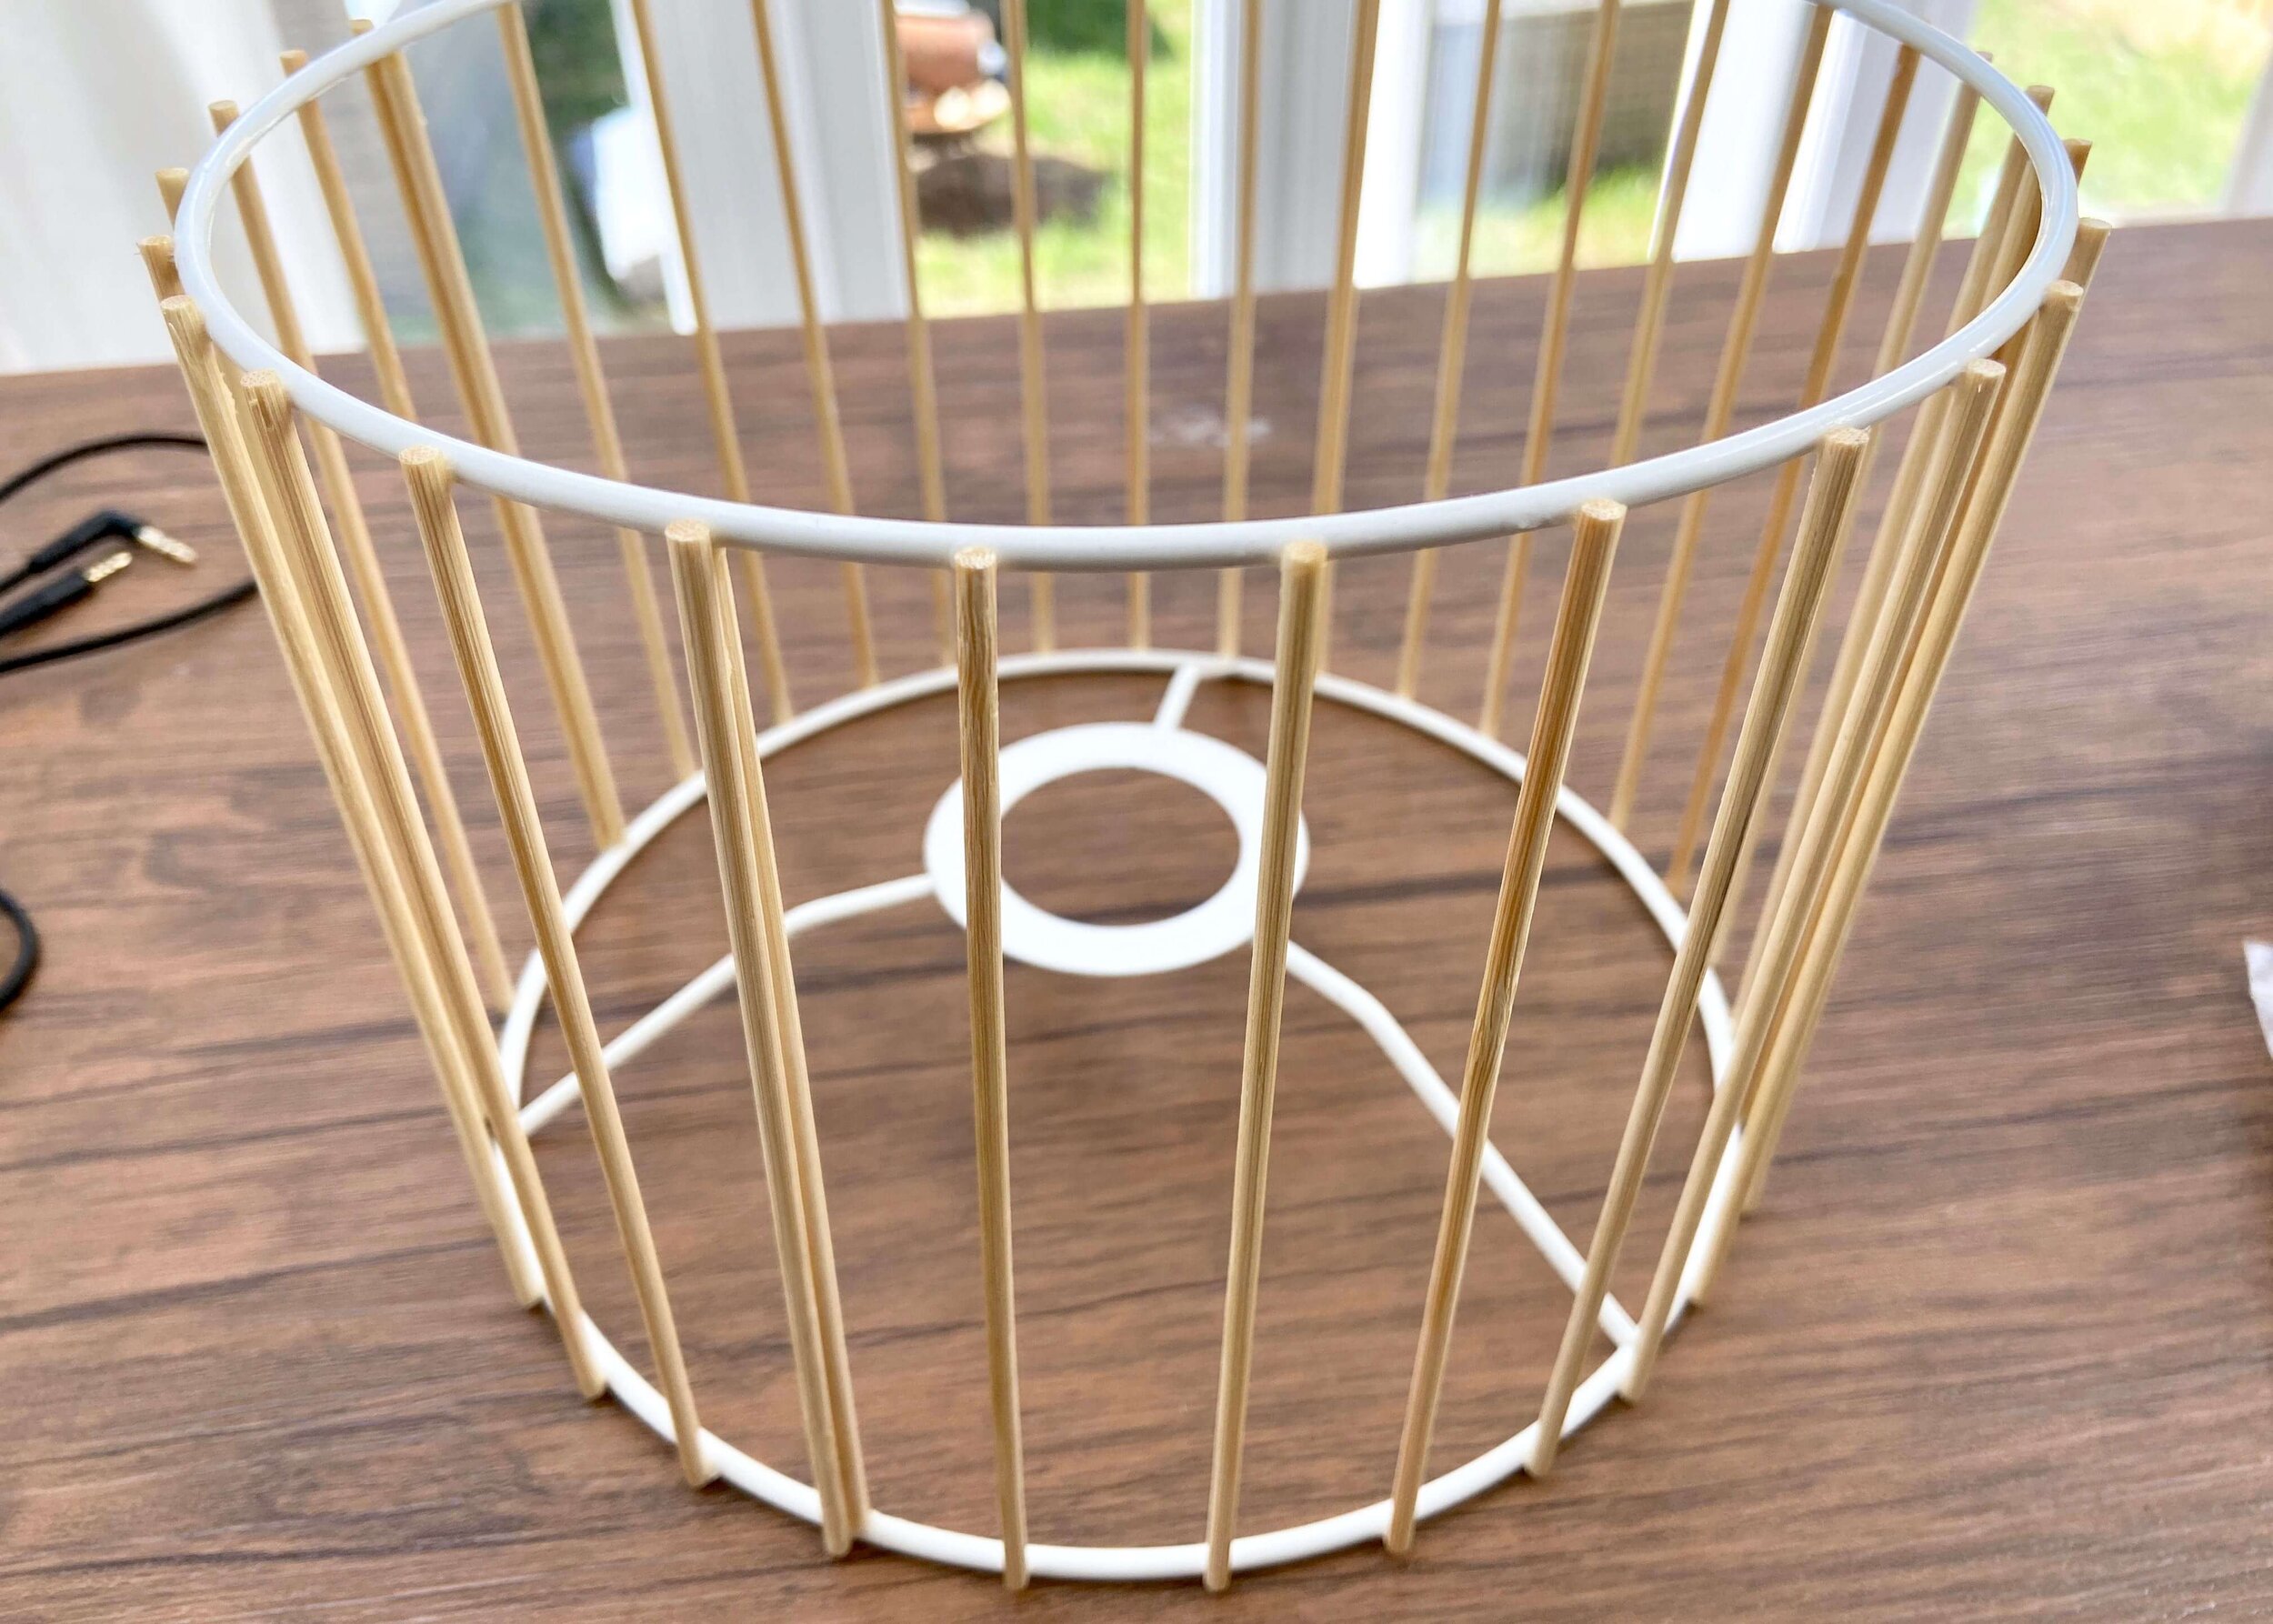
5.
Keep adding dowels in between the other dowels until your frame is structurally sound, and until you’re happy with the distance between your dowels.

6.
I wanted mine pretty close together and so I kept adding dowels in between the existing dowels until I was happy with how the frame was looking.

7.
When you’re happy with your frame and all of your dowels are stuck, leave the entire thing to dry and fully set overnight. Superglue can take a good 24 hours to properly set.


