
How to make a rainbow clay planter in 8 simple steps!
If you follow me over on instagram, you might know that I had a little garden centre spree a couple of weeks ago. I bought a few new plants and plant pots, but when I got home, decided I wanted to make a quirky little plant pot for a mini succulent I bought out of clay. I’m a huge fan of air dry clay and I love making all sorts of things with it from jewellery to decor. The possibilities really are endless once you get the hang of it.
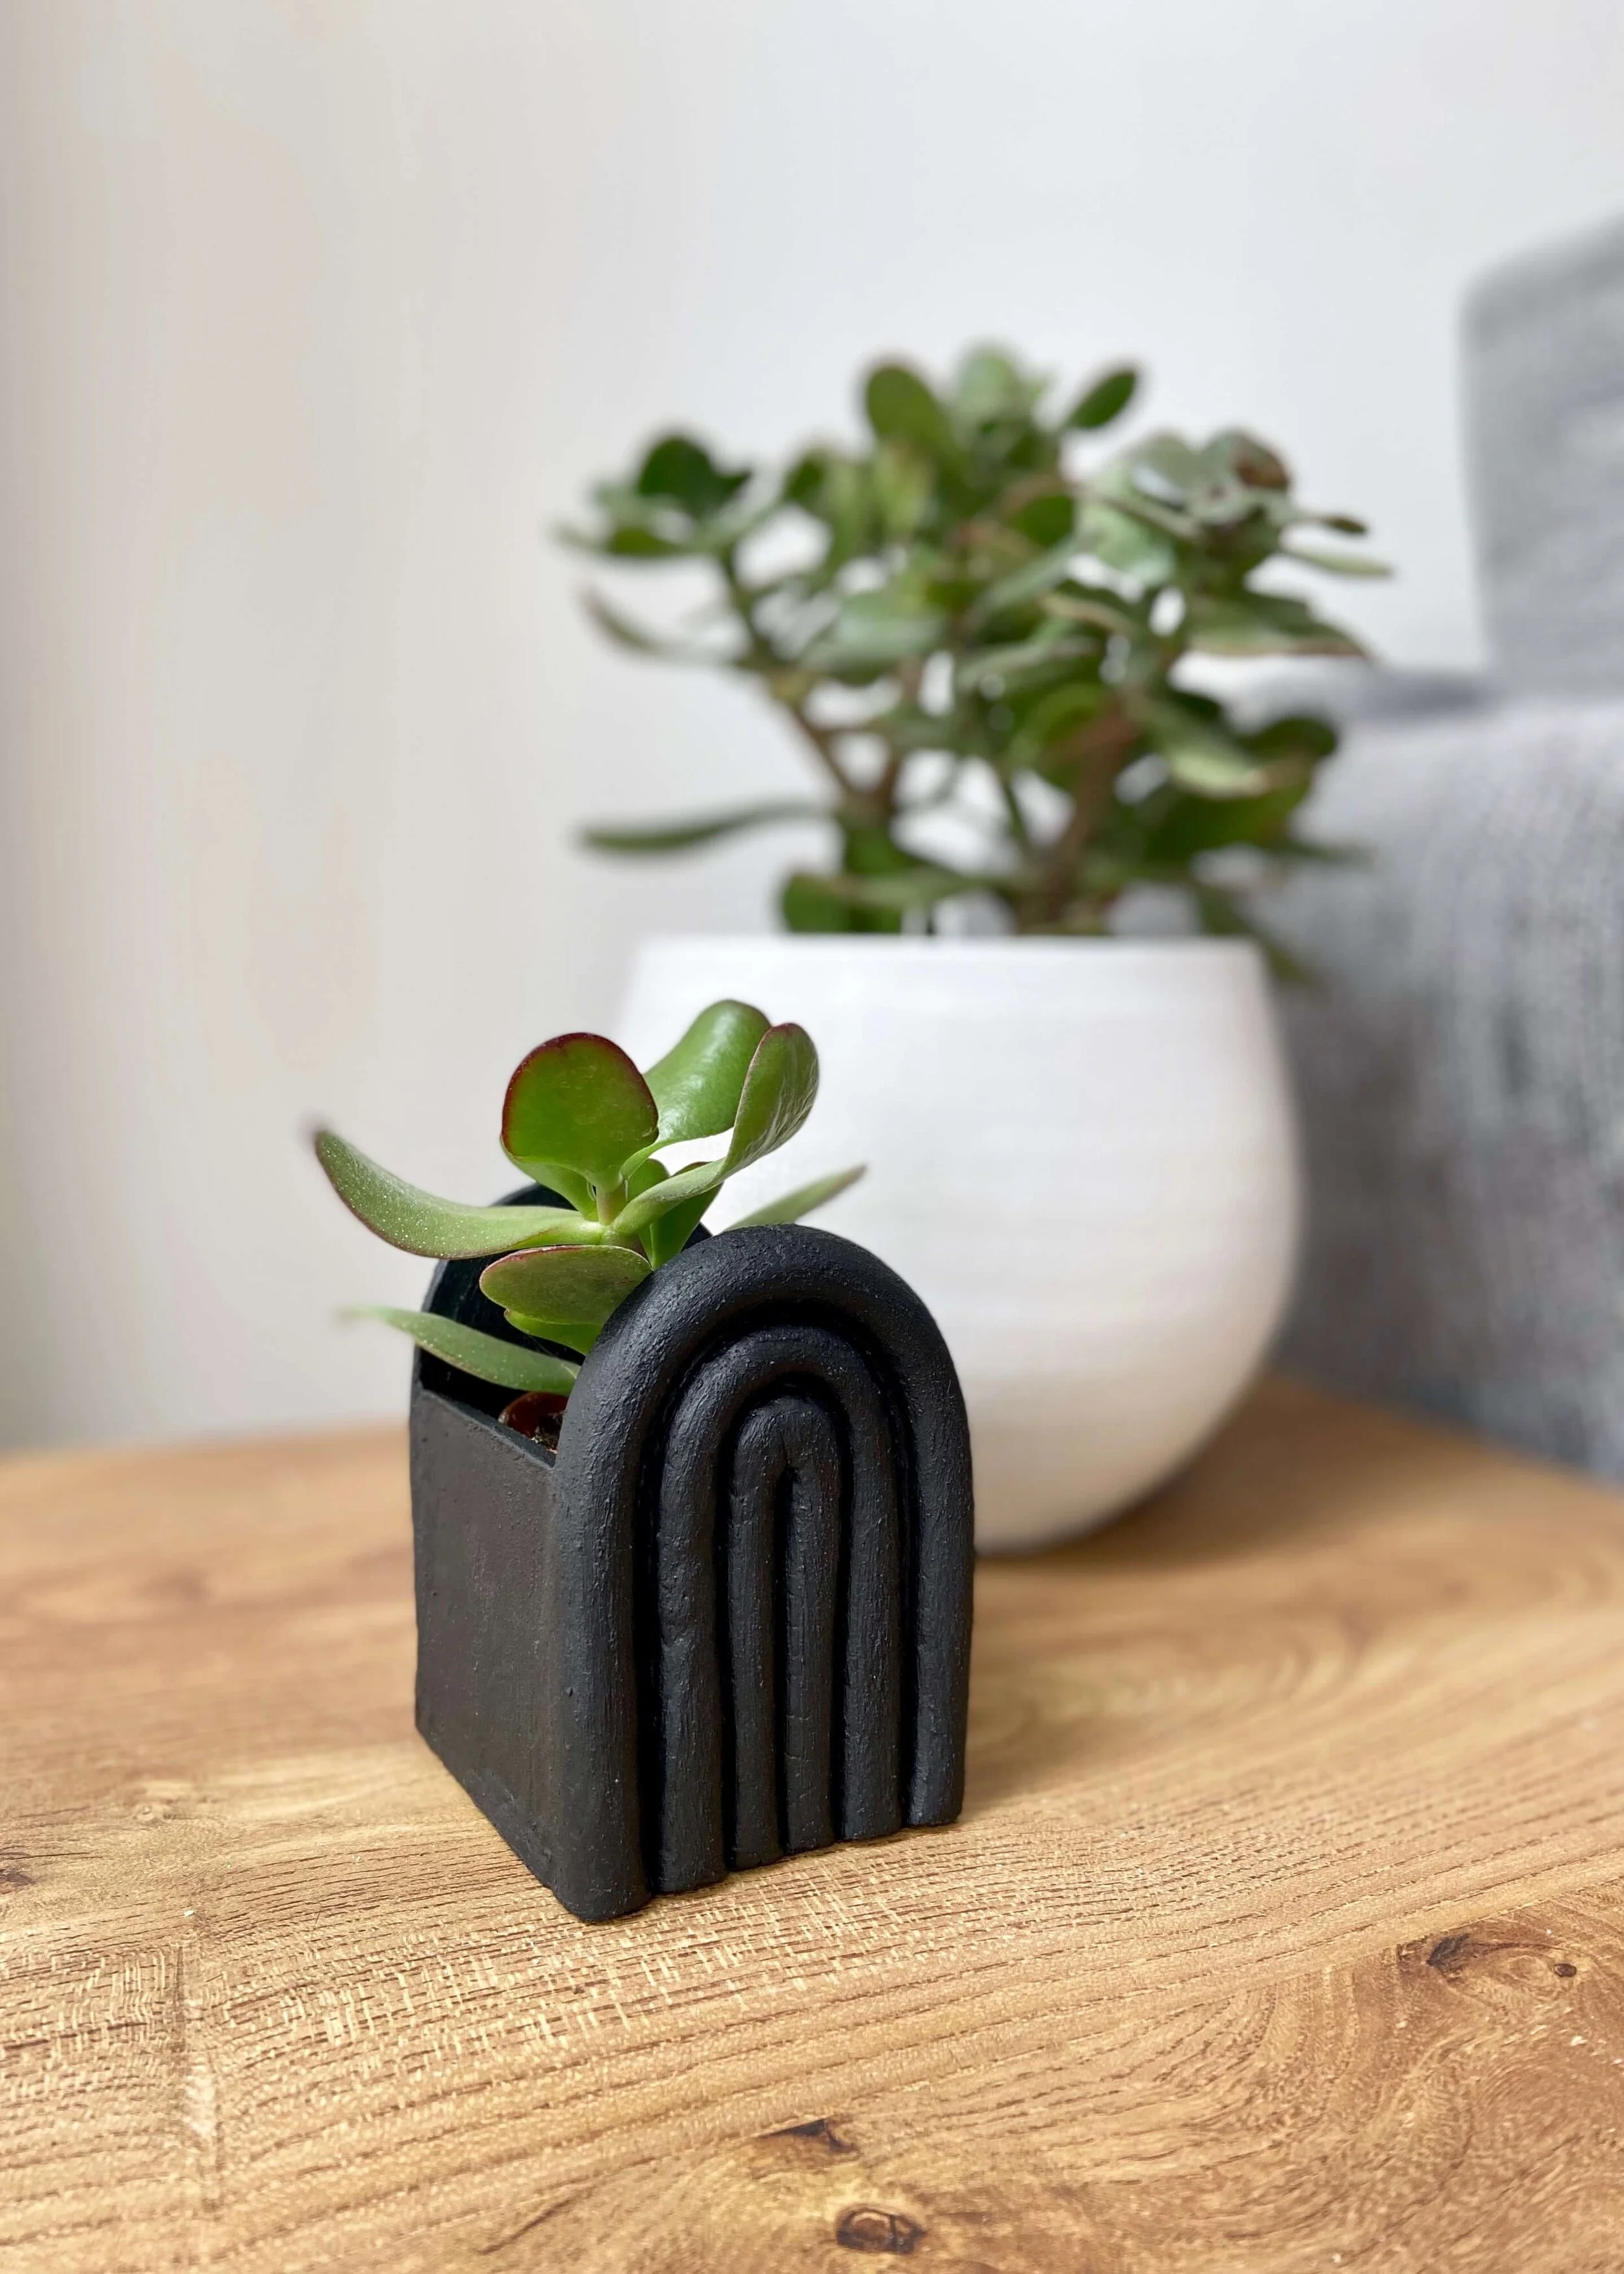
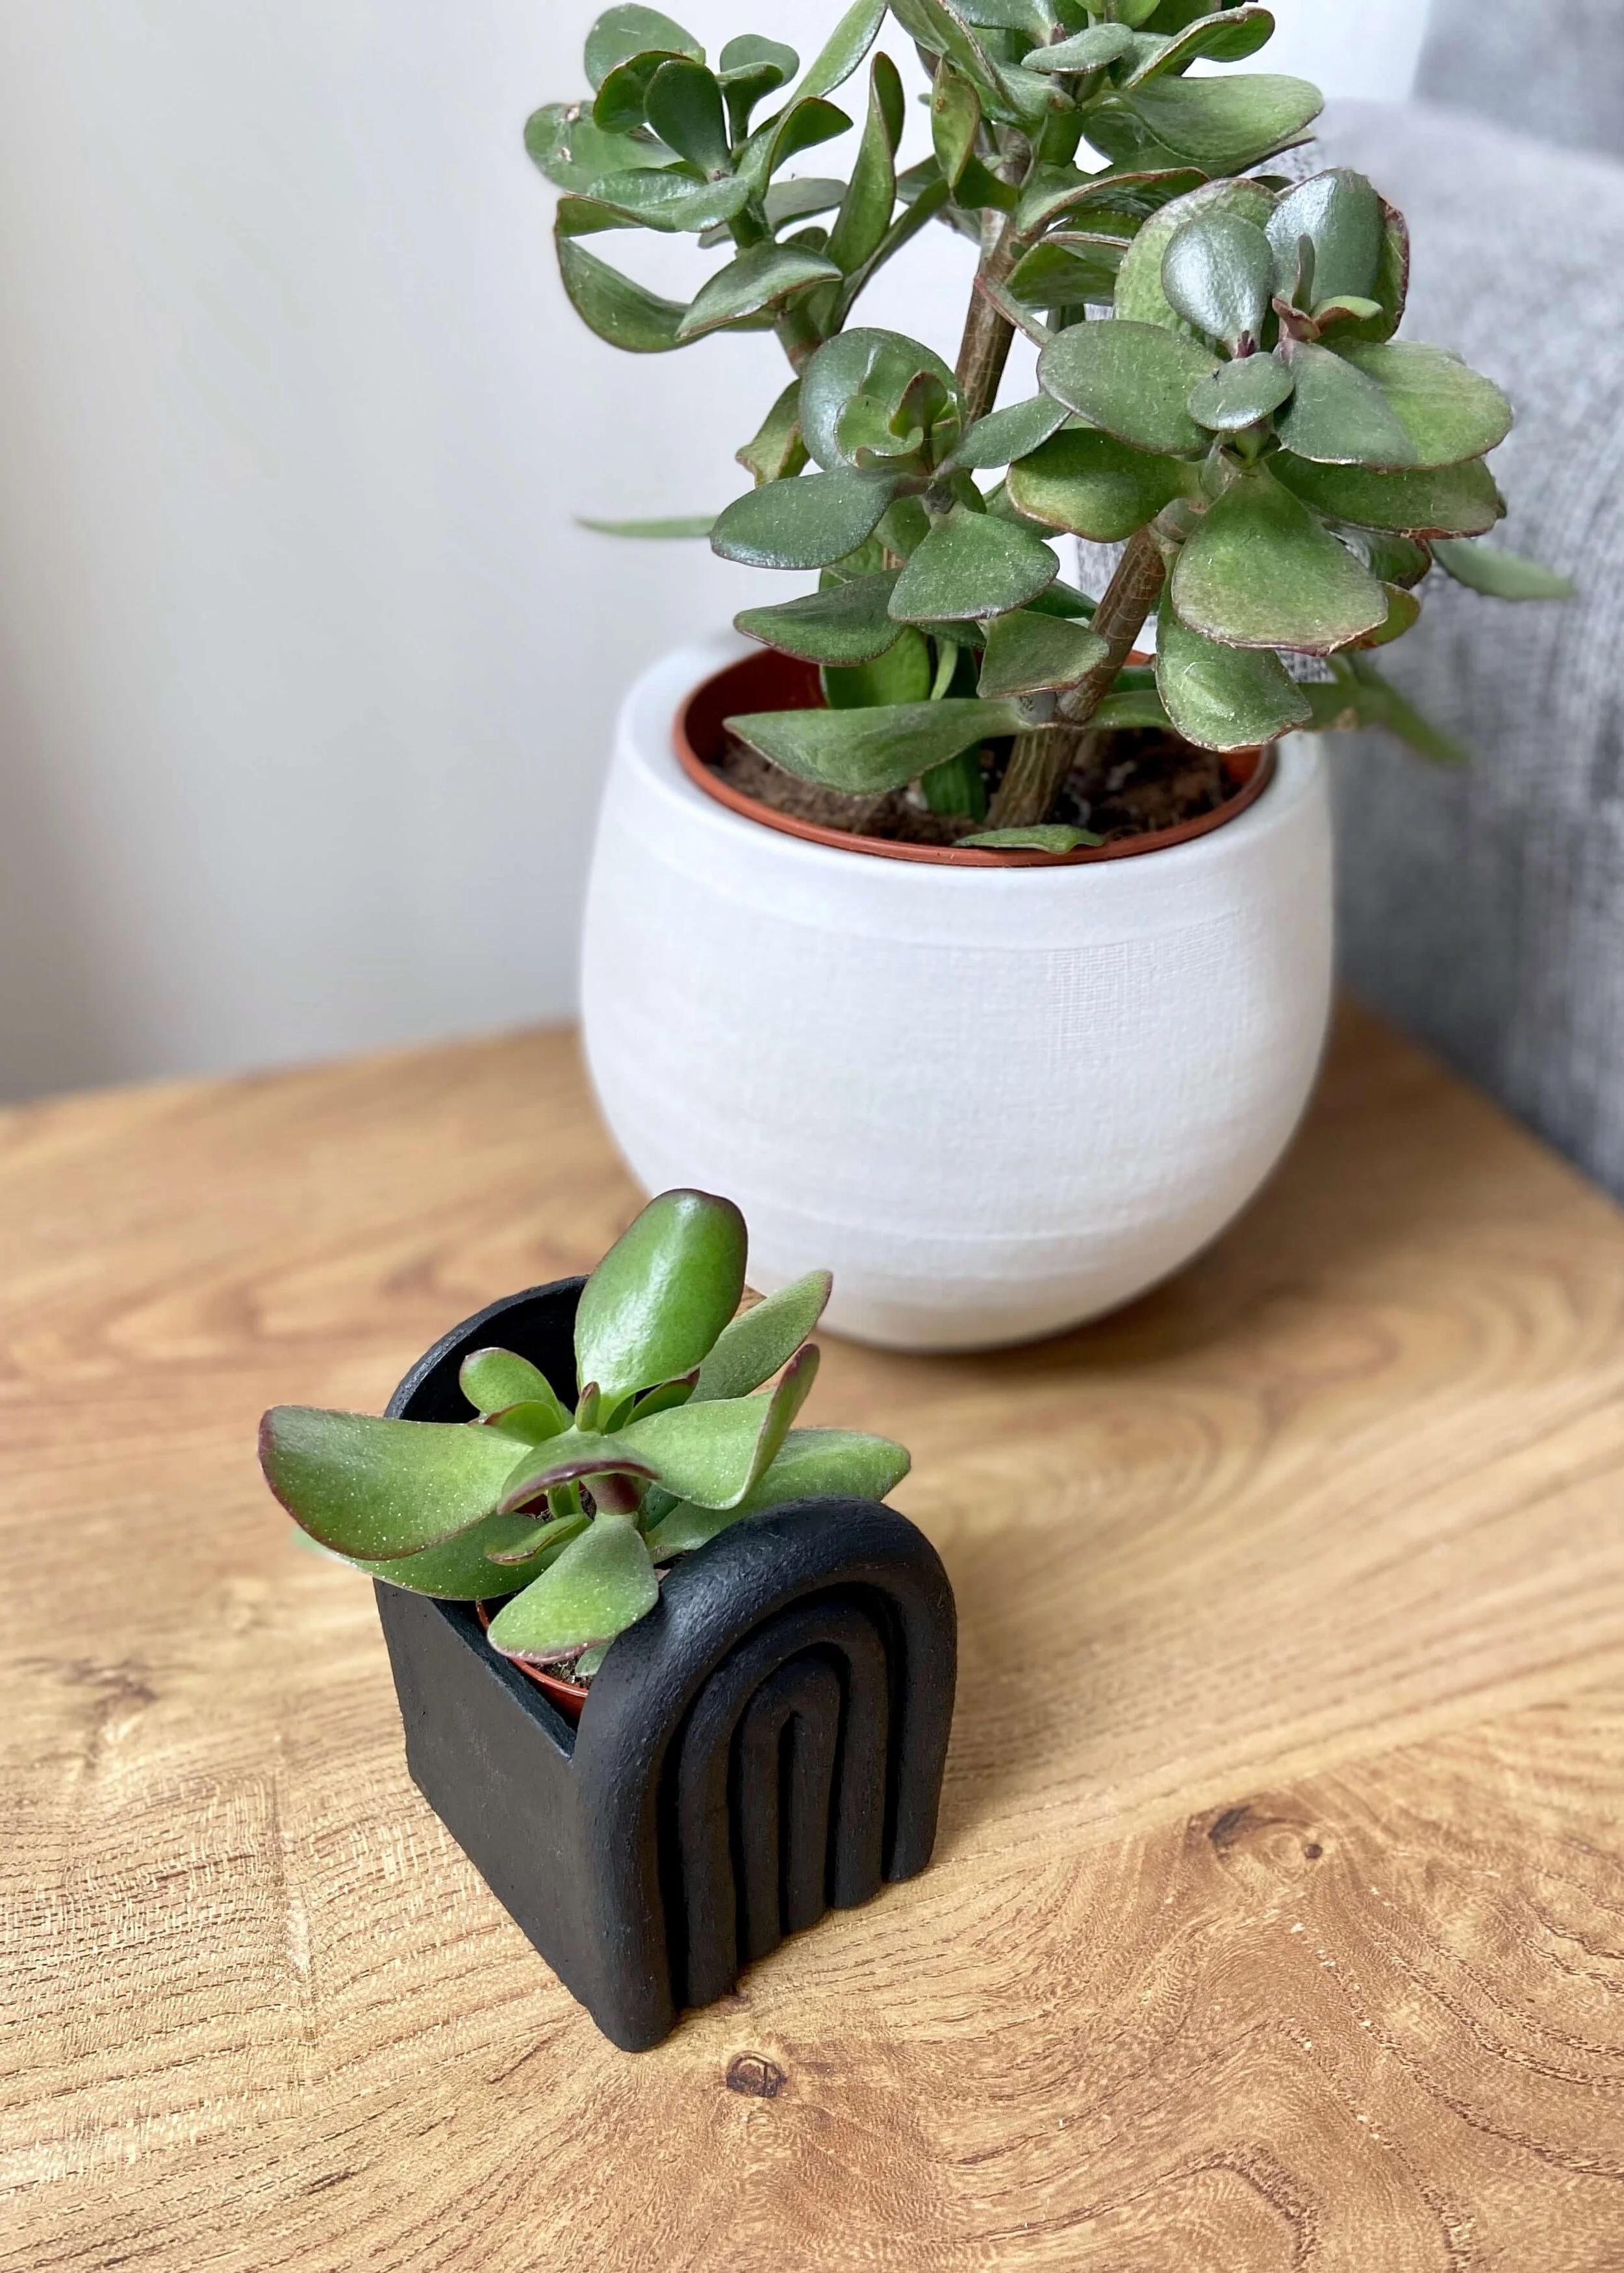
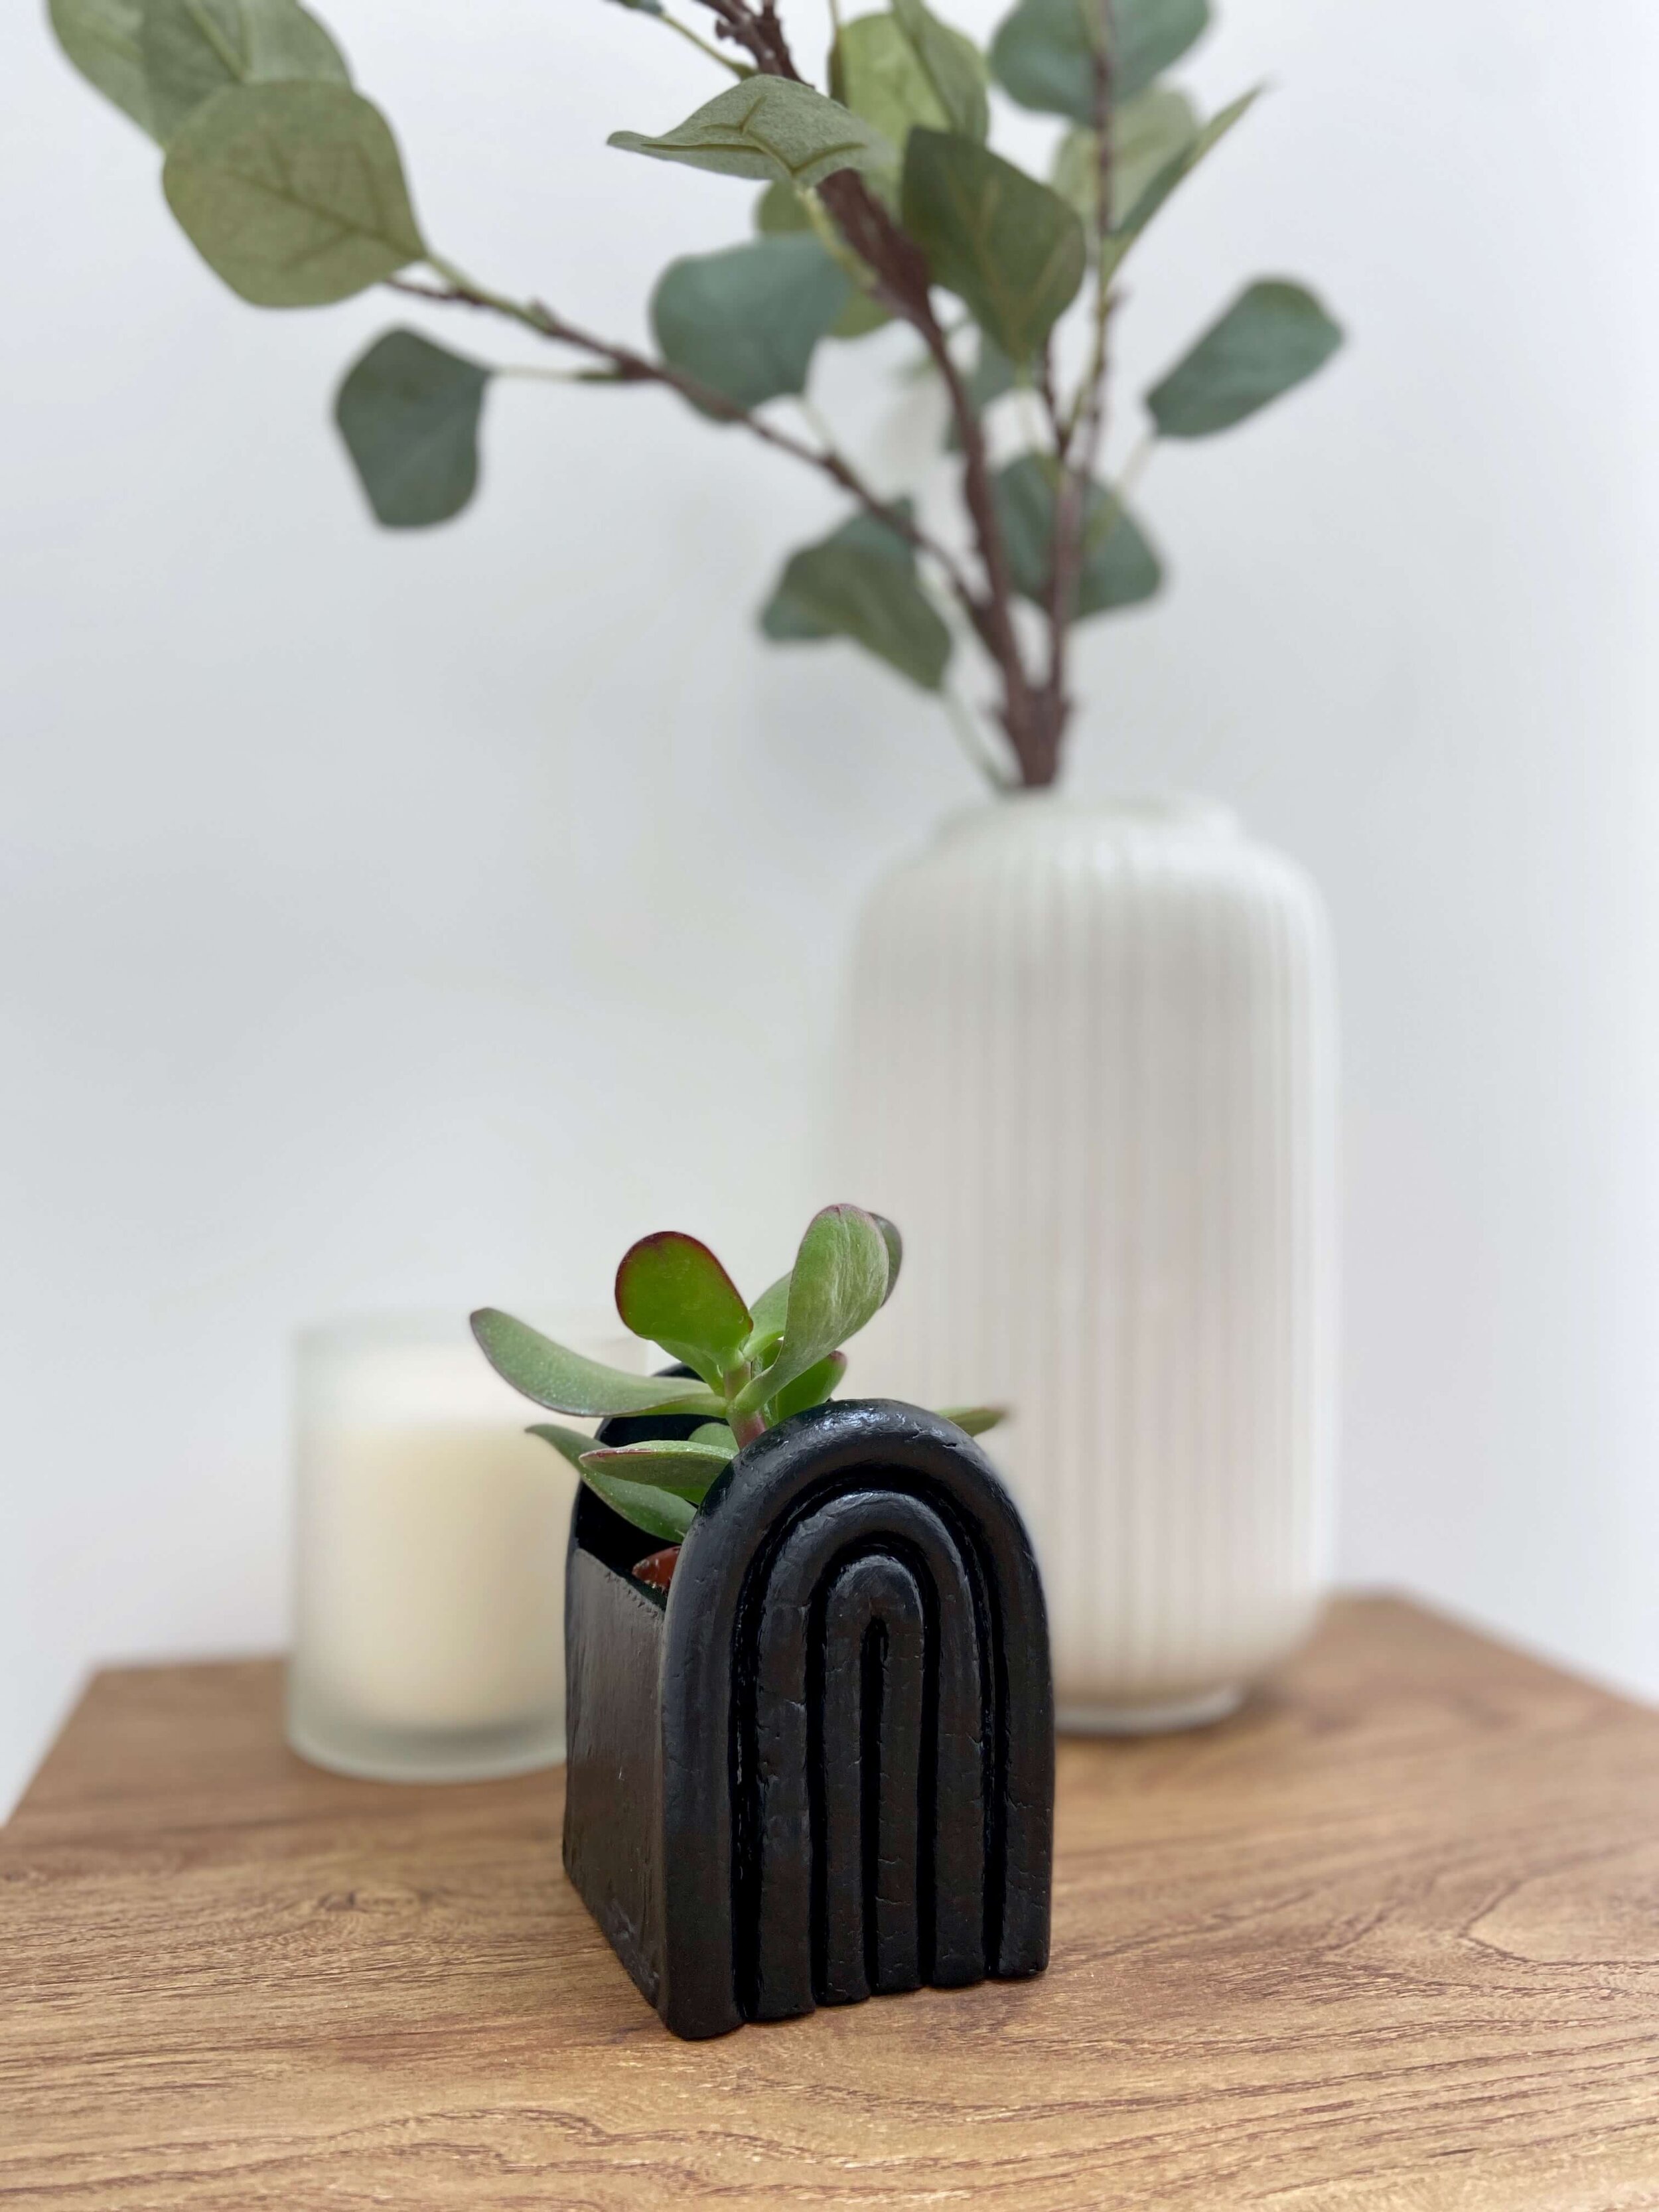
This project was definitely inspired by The Lovely Drawer and her polymer clay rainbow trivet (she really is a whizz with clay!) and it got me thinking about making a rainbow planter. I’ve seen them sold in shops but haven’t seen any DIY versions so thought I’d have a go myself. I was relatively pleased with how mine turned out, however when I went to share this post a couple of weekends ago (hence no posts for a while), I just didn’t feel it was up to scratch. I couldn’t quite put my finger on it at the time, and now a week later, I’ve cracked it; I didn’t like the satin finish the paint I used gave it. With the pot black and shiny surface, it reminded me of tyre.
Thanks to Collective Gen’s trash to terracotta hack, I once again mixed up some baking powder with my paint and the shine was replaced with a textured matte finish. Perfect! Some of you might prefer the satin finish, which you can see in some of my images, but personally I prefer the matte finish. Keep reading for the step by step tutorial…


1.
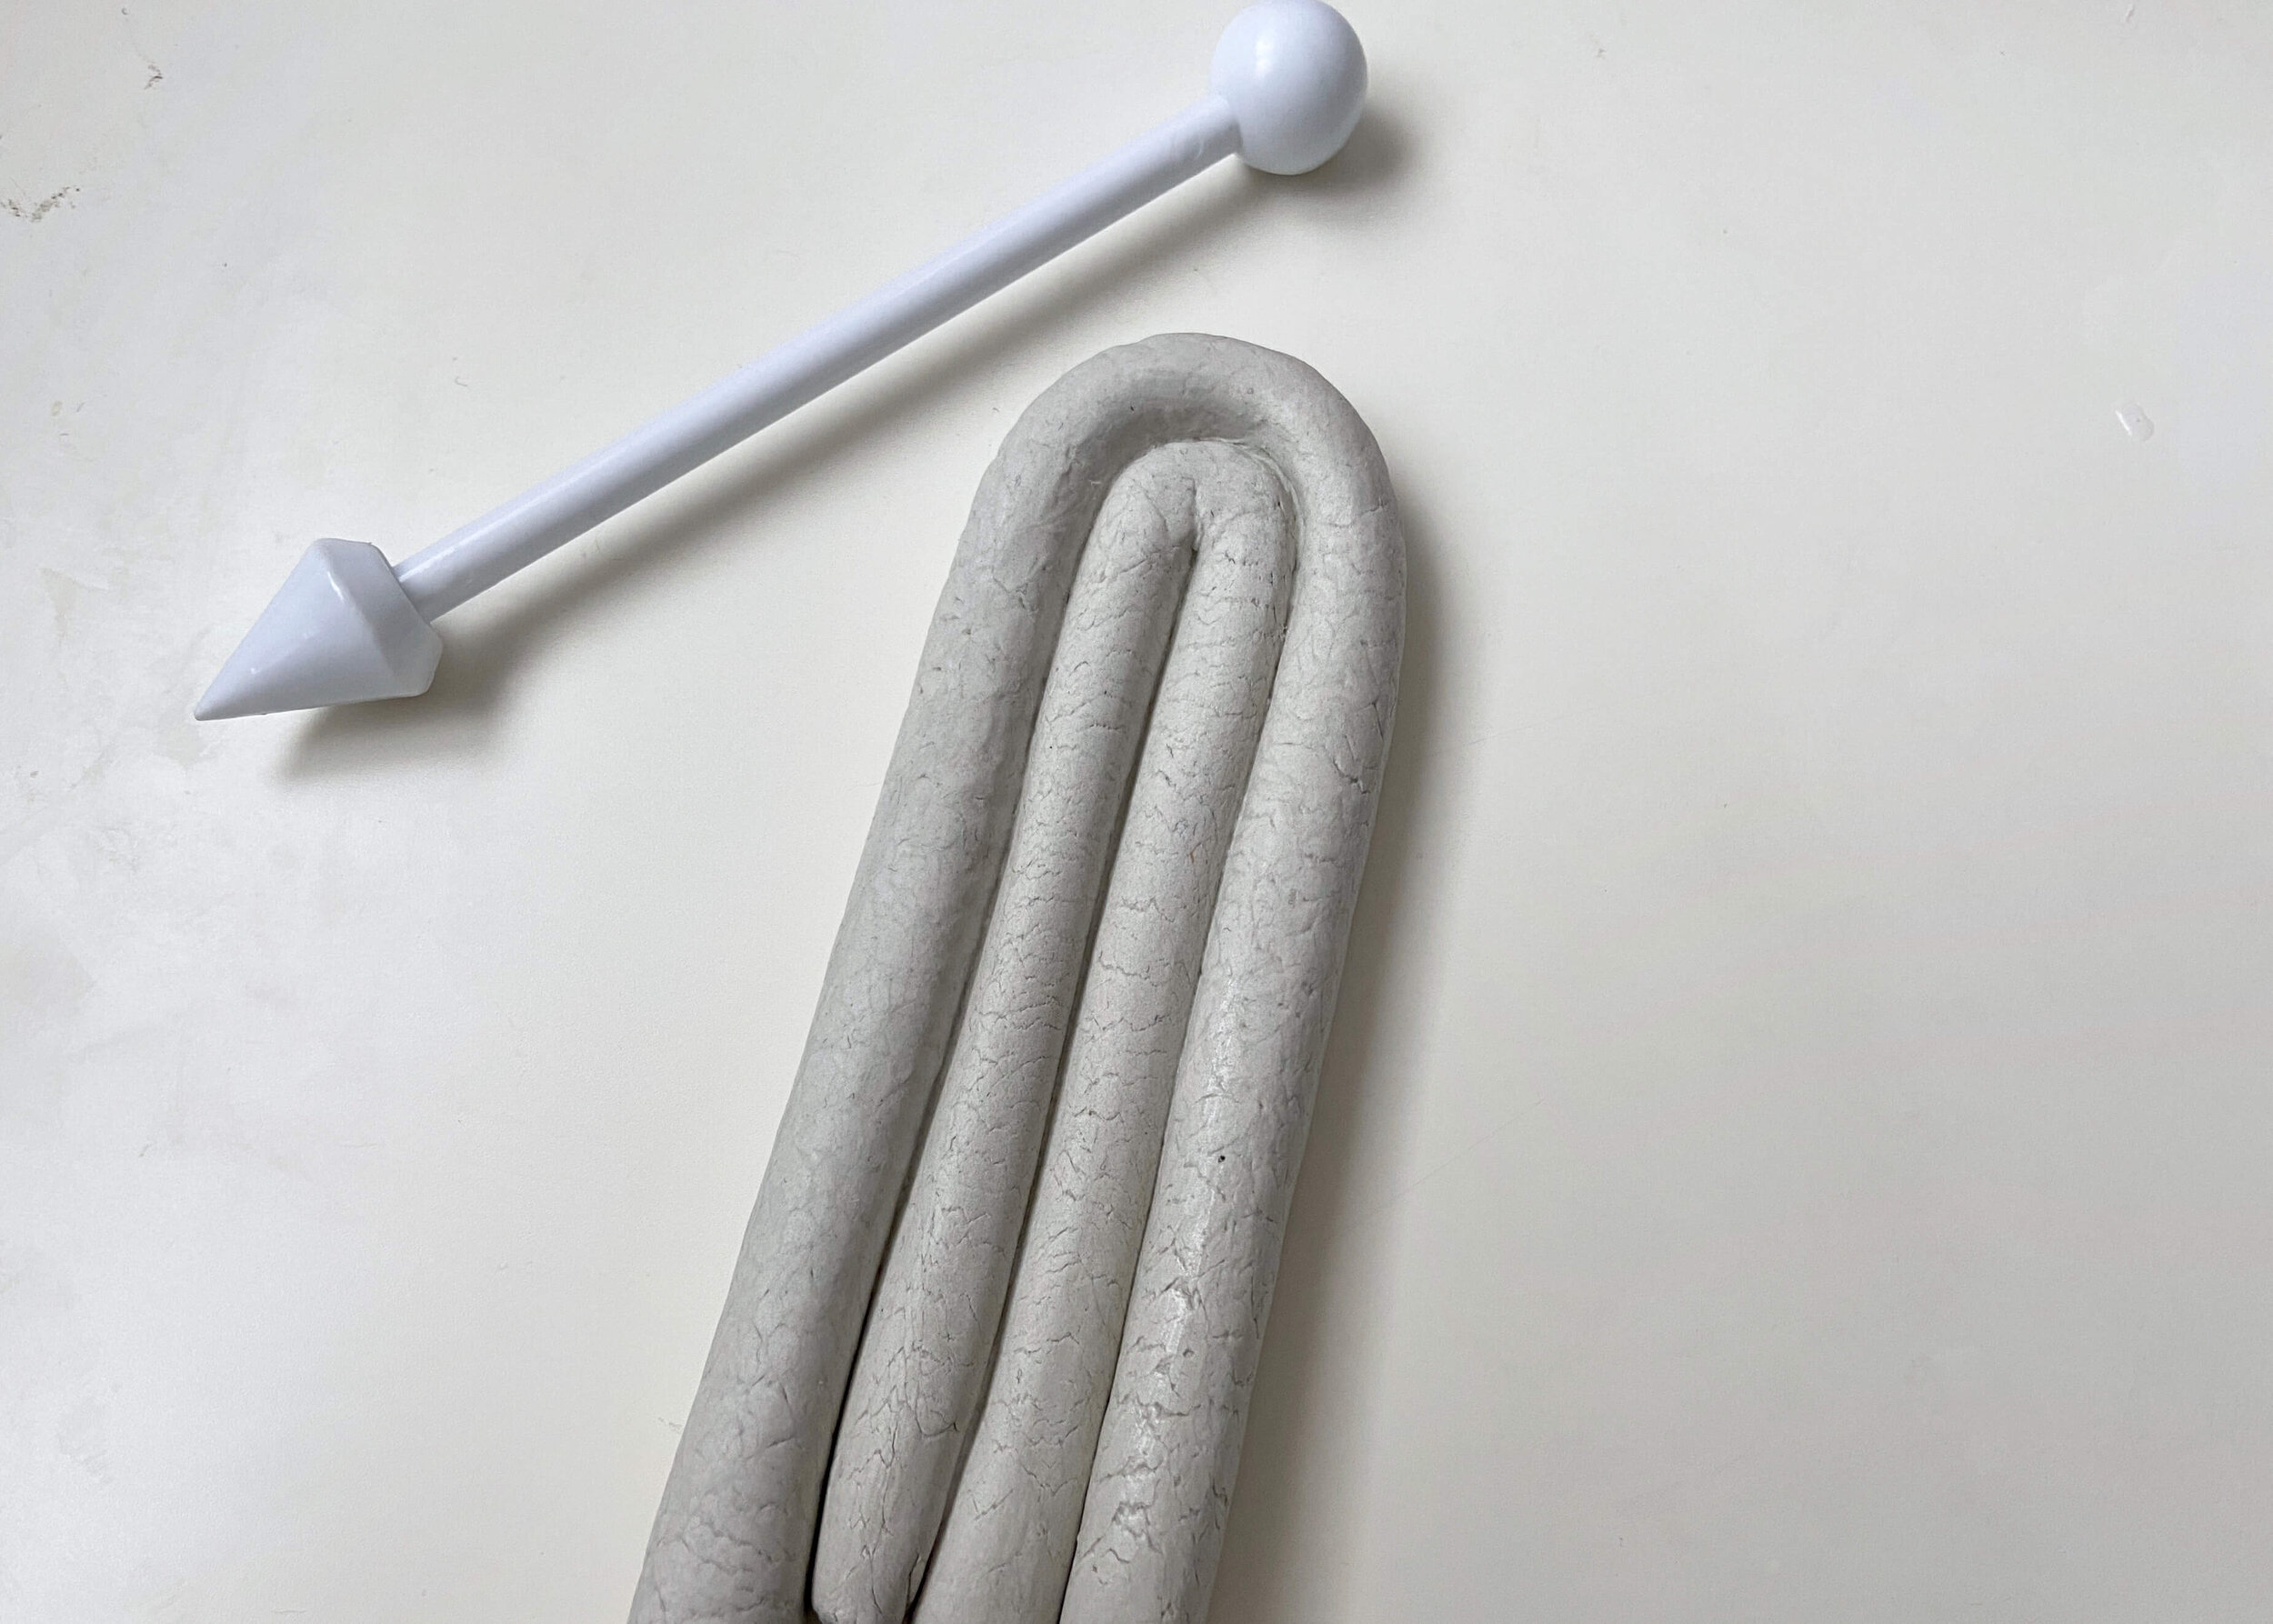
First of all, break off some clay and roll this out into a thin sausage of about 1cm wide all the way along it. Fold this in half and secure the two sides together with a water.
2.
Repeat step 1 to make several similar sized clay lengths. Place one of these around the folded clay from step 1. Repeat this until you’re happy with the size of your rainbow.

3.
Next, roll out some more clay so that it is larger than your rainbow. Place your rainbow gently on top and cut around this. This will be the back of your pot.

4.
Next cut off the bottom of the rainbow and the back of the pot so that they are the same height.

5.
Measure the sides of your rainbow and back piece and then roll out some more clay and cut out rectangular pieces to adhere between your front and back piece. Cut out a square for the bottom.

6.
I made sure the pieces fit together and then left them to dry completely. Once dry, secure them together with superglue.

7.
Mix up some air-dry clay with water to make a pulp, and then use this to fill in any gaps and to smooth out the edges of your planter. Leave this to dry completely.

8.
Finally, sand your planter and then paint in whatever paint you want. I mixed some baking powder with my paint to give a textured matte finish.