


Give a room some understated texture with this minimal wall panelling
It’s all over Pinterest. All over instagram. Wall panelling is seemingly everywhere. Like it or loathe it, it’s huge right now. I’m someone who loves it, and so I’ve been desperate to jump on the bandwagon myself. Having been in our home for around 5 months, it’s taken us some time to feel ready to make our mark. I don’t know about anyone else, but painting or sticking anything on to brand new crisp white walls felt daunting! A few dents and scuffs later as we’ve settled in though and we’re finally ready.
I knew I wanted to do it on what will be our office wall, and knew I didn’t want anything too loud or distracting. We’ve got a good idea of how we want this wall of the room to eventually look, with a DIY scaffold board desk and shelving, so the vertical lines felt like the best choice to have behind them. I’m also really appreciating the subtleties of texture on neutral surfaces at the moment and so we decided to keep the wall and panelling white, for now. It was a fun process and relatively quick once we had everything and got into the swing of it. Keep reading to find out what I used and how I did it…


1.
First of all, measure the width and height of the wall you want to panel. Decide what you want to use for panelling and how many panels you want on your chosen wall. Get your panels or have a larger piece of MDF cut down to size.

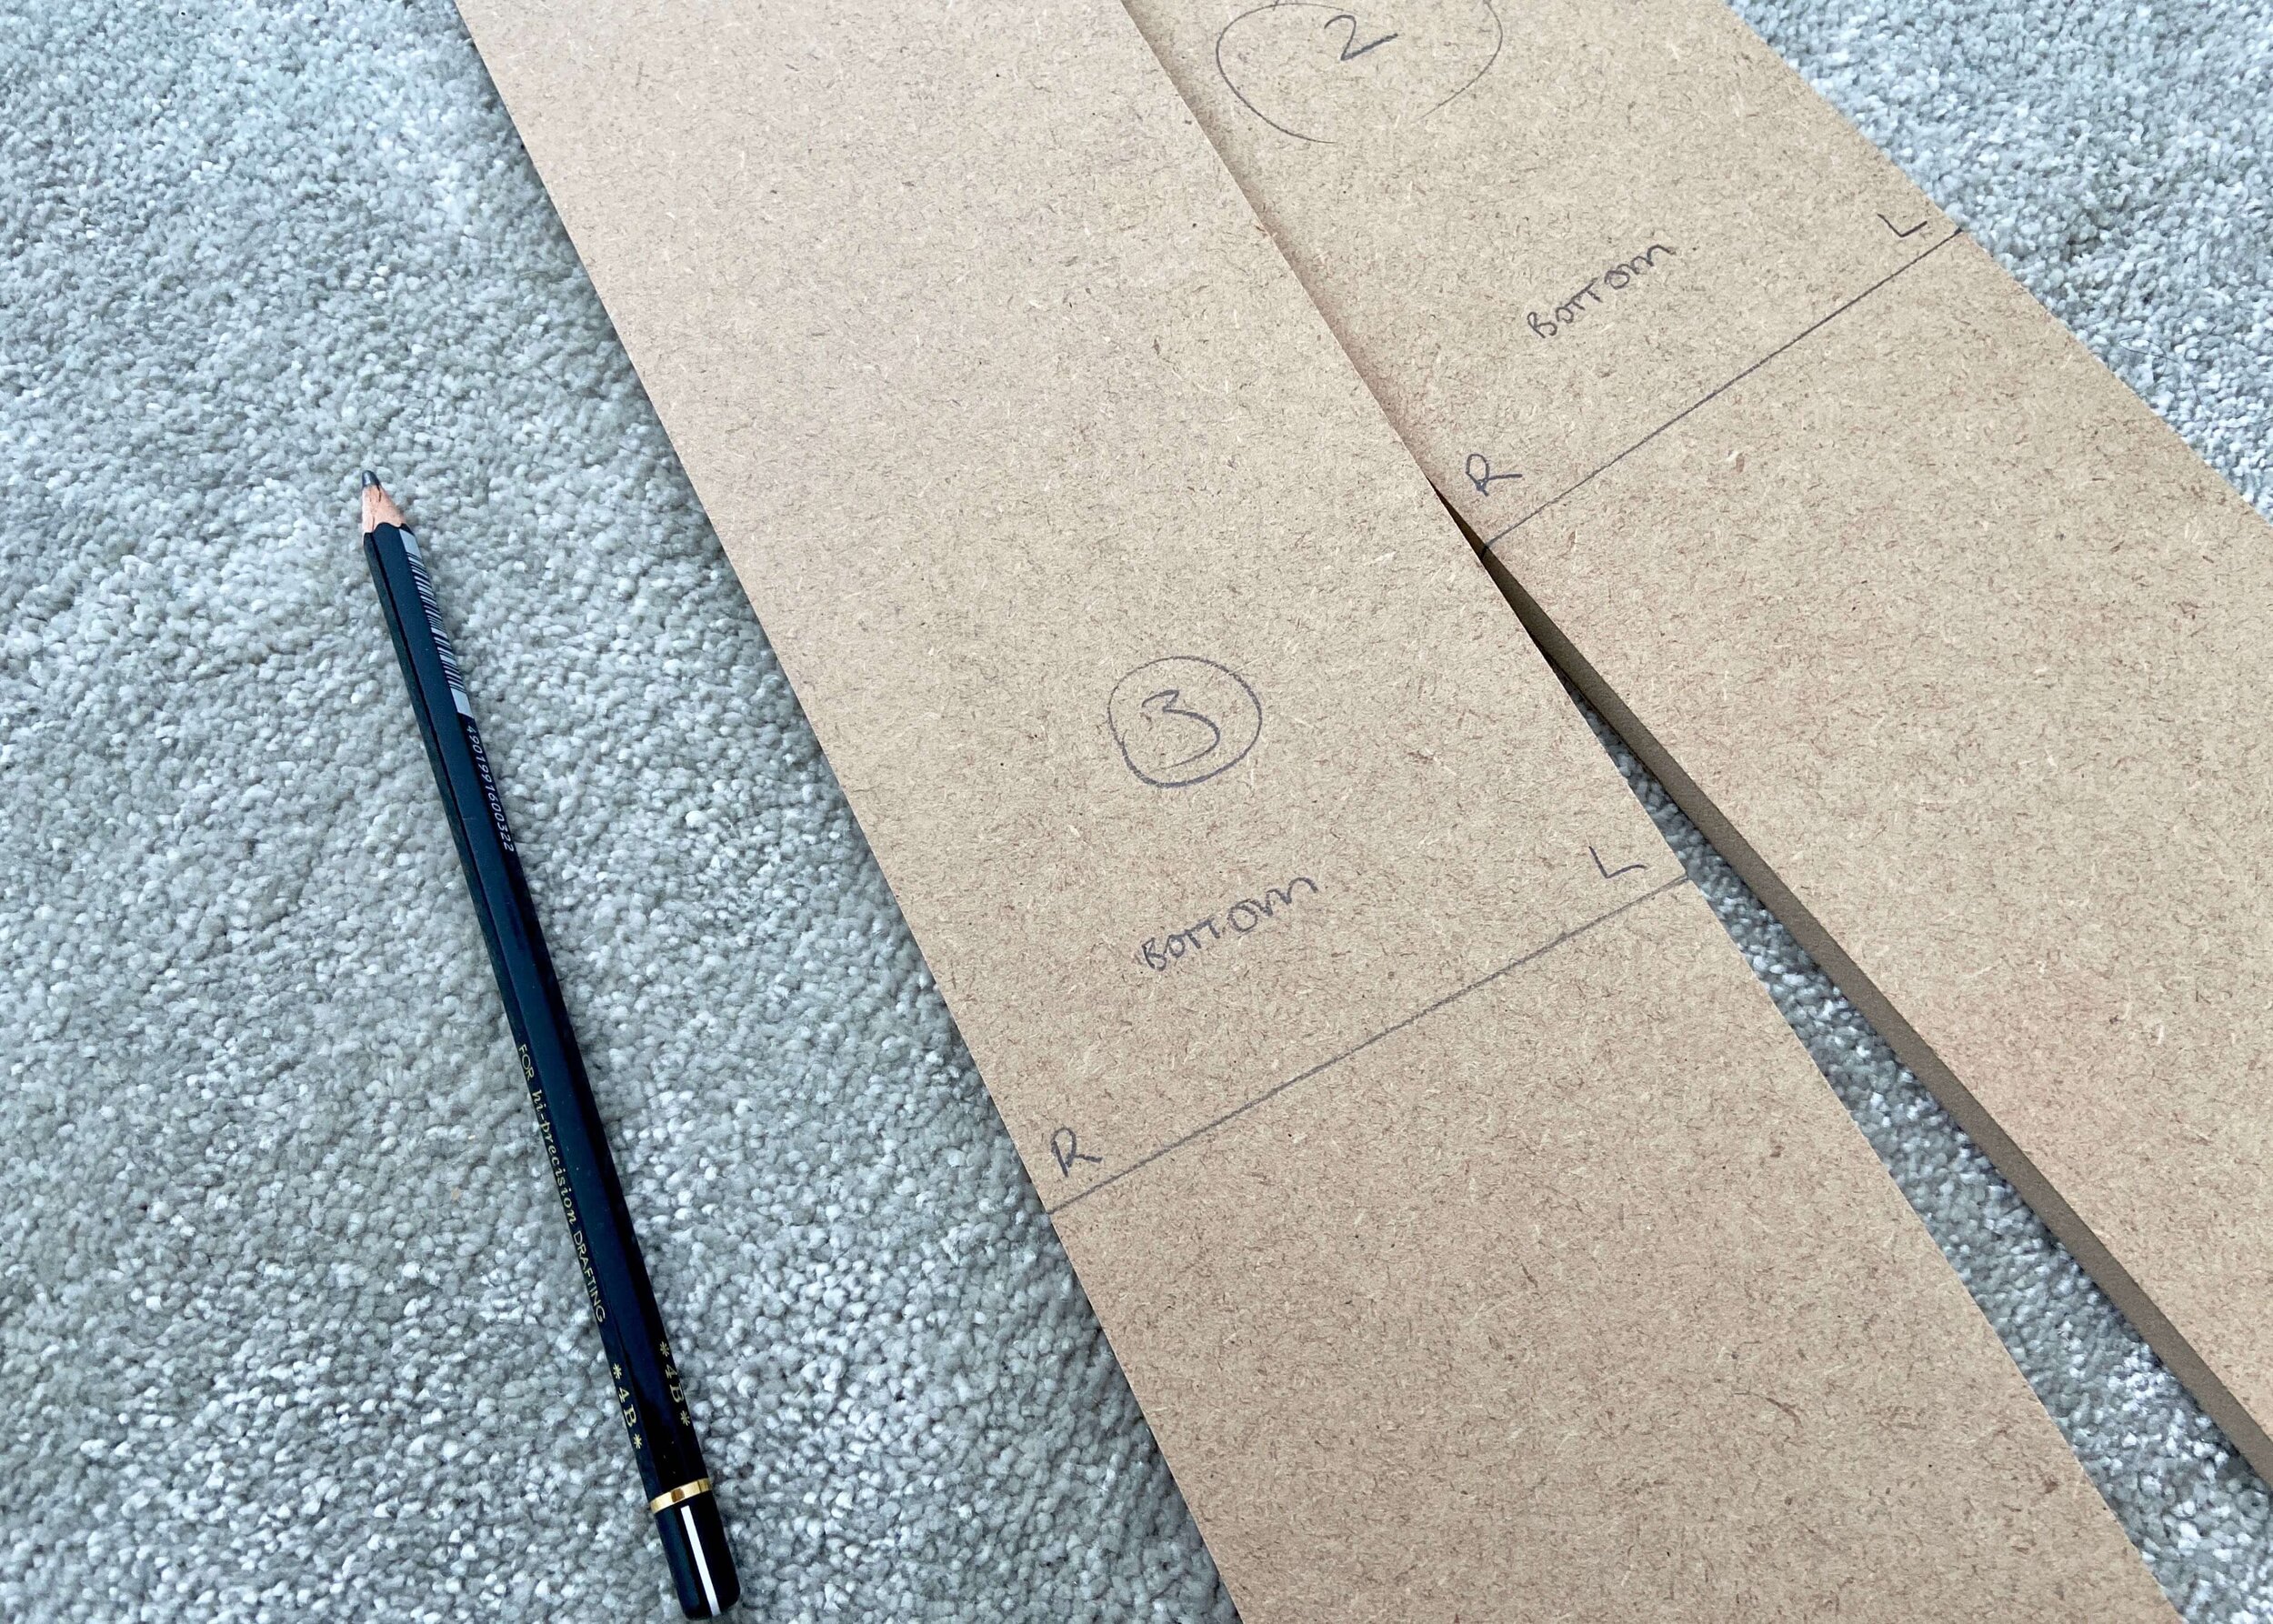
2.
Next, subtract the total width of all panels from the total width of the wall and divide the result by the number of spaces you’ll have in between panels. Using this and the panels, start mapping out and marking where your panels will go.

3.
Paint your MDF strips with a primer that is appropriate for MDF. It’s important to do this step as otherwise your MDF will absorb your paint and expand.

4.
Use no more nails on the back of your panels and stick them on where you’ve marked. Don’t line them up with the walls (as walls are often not straight!) use a spirit level for each panel.

5.
If you need to cut around a plug socket, hold the panel in position on top of the socket. Mark on your panel the top and bottom of the socket, and mark on the wall where your panel ends. Measure the distance from this to the edge of the socket, and draw out a rectangle on the underside of the panel with these measurements. Cut out this rectangle and stick this panel to the wall.
6.
If like me, you couldn’t get MDF sheets cut to your specific height, then you may need to stick one on top of the other to create one wall height panel. If so, prime and stick on the bottom sections of the panels first and then go along marking how much to cut off each of your second panels so that it will fit on top.

7.
I found it best to measure for each specific top part of the panel one at a time so that I knew it fit. Once again, walls may not be straight, and so you can’t guarantee that each panel will need to be cut to the same length.
8.
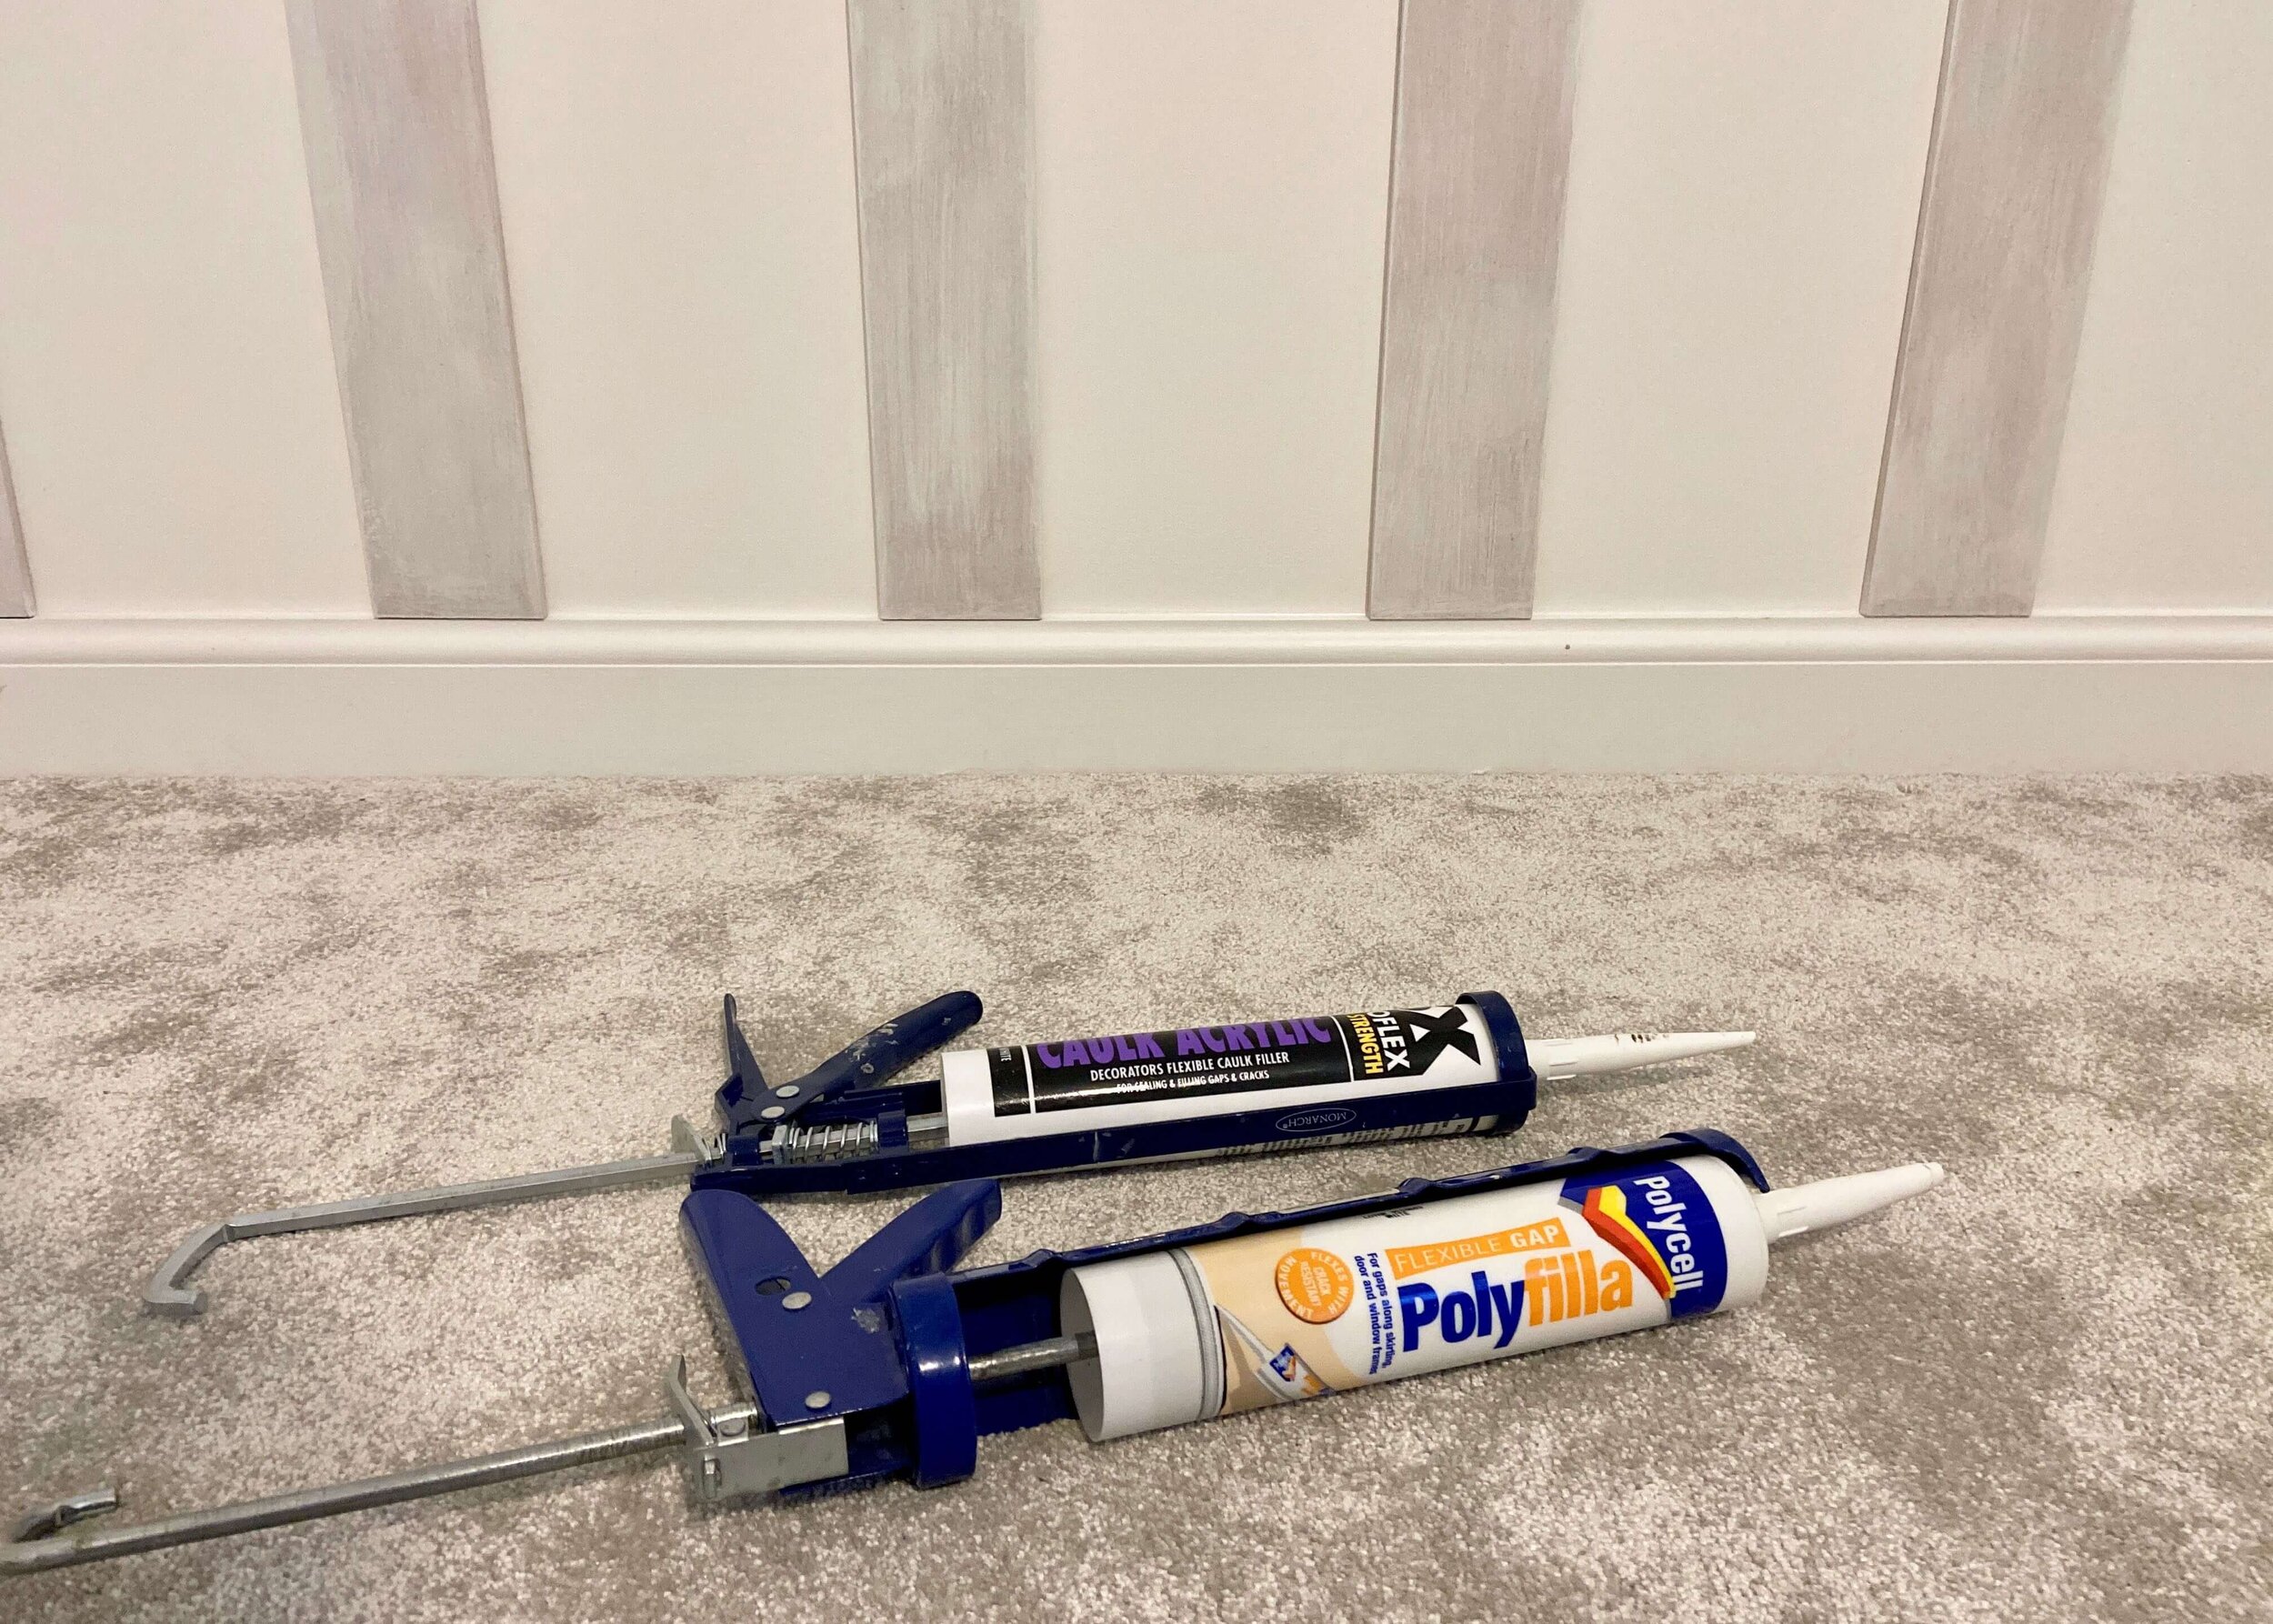
When all your panels are stuck to the wall, leave them to dry. Next, use wood filler or polyfilla to fill the gaps in between the two panels and once dry sand them smooth. Use decorators caulk to fill any gaps between the panels and the walls.

9.
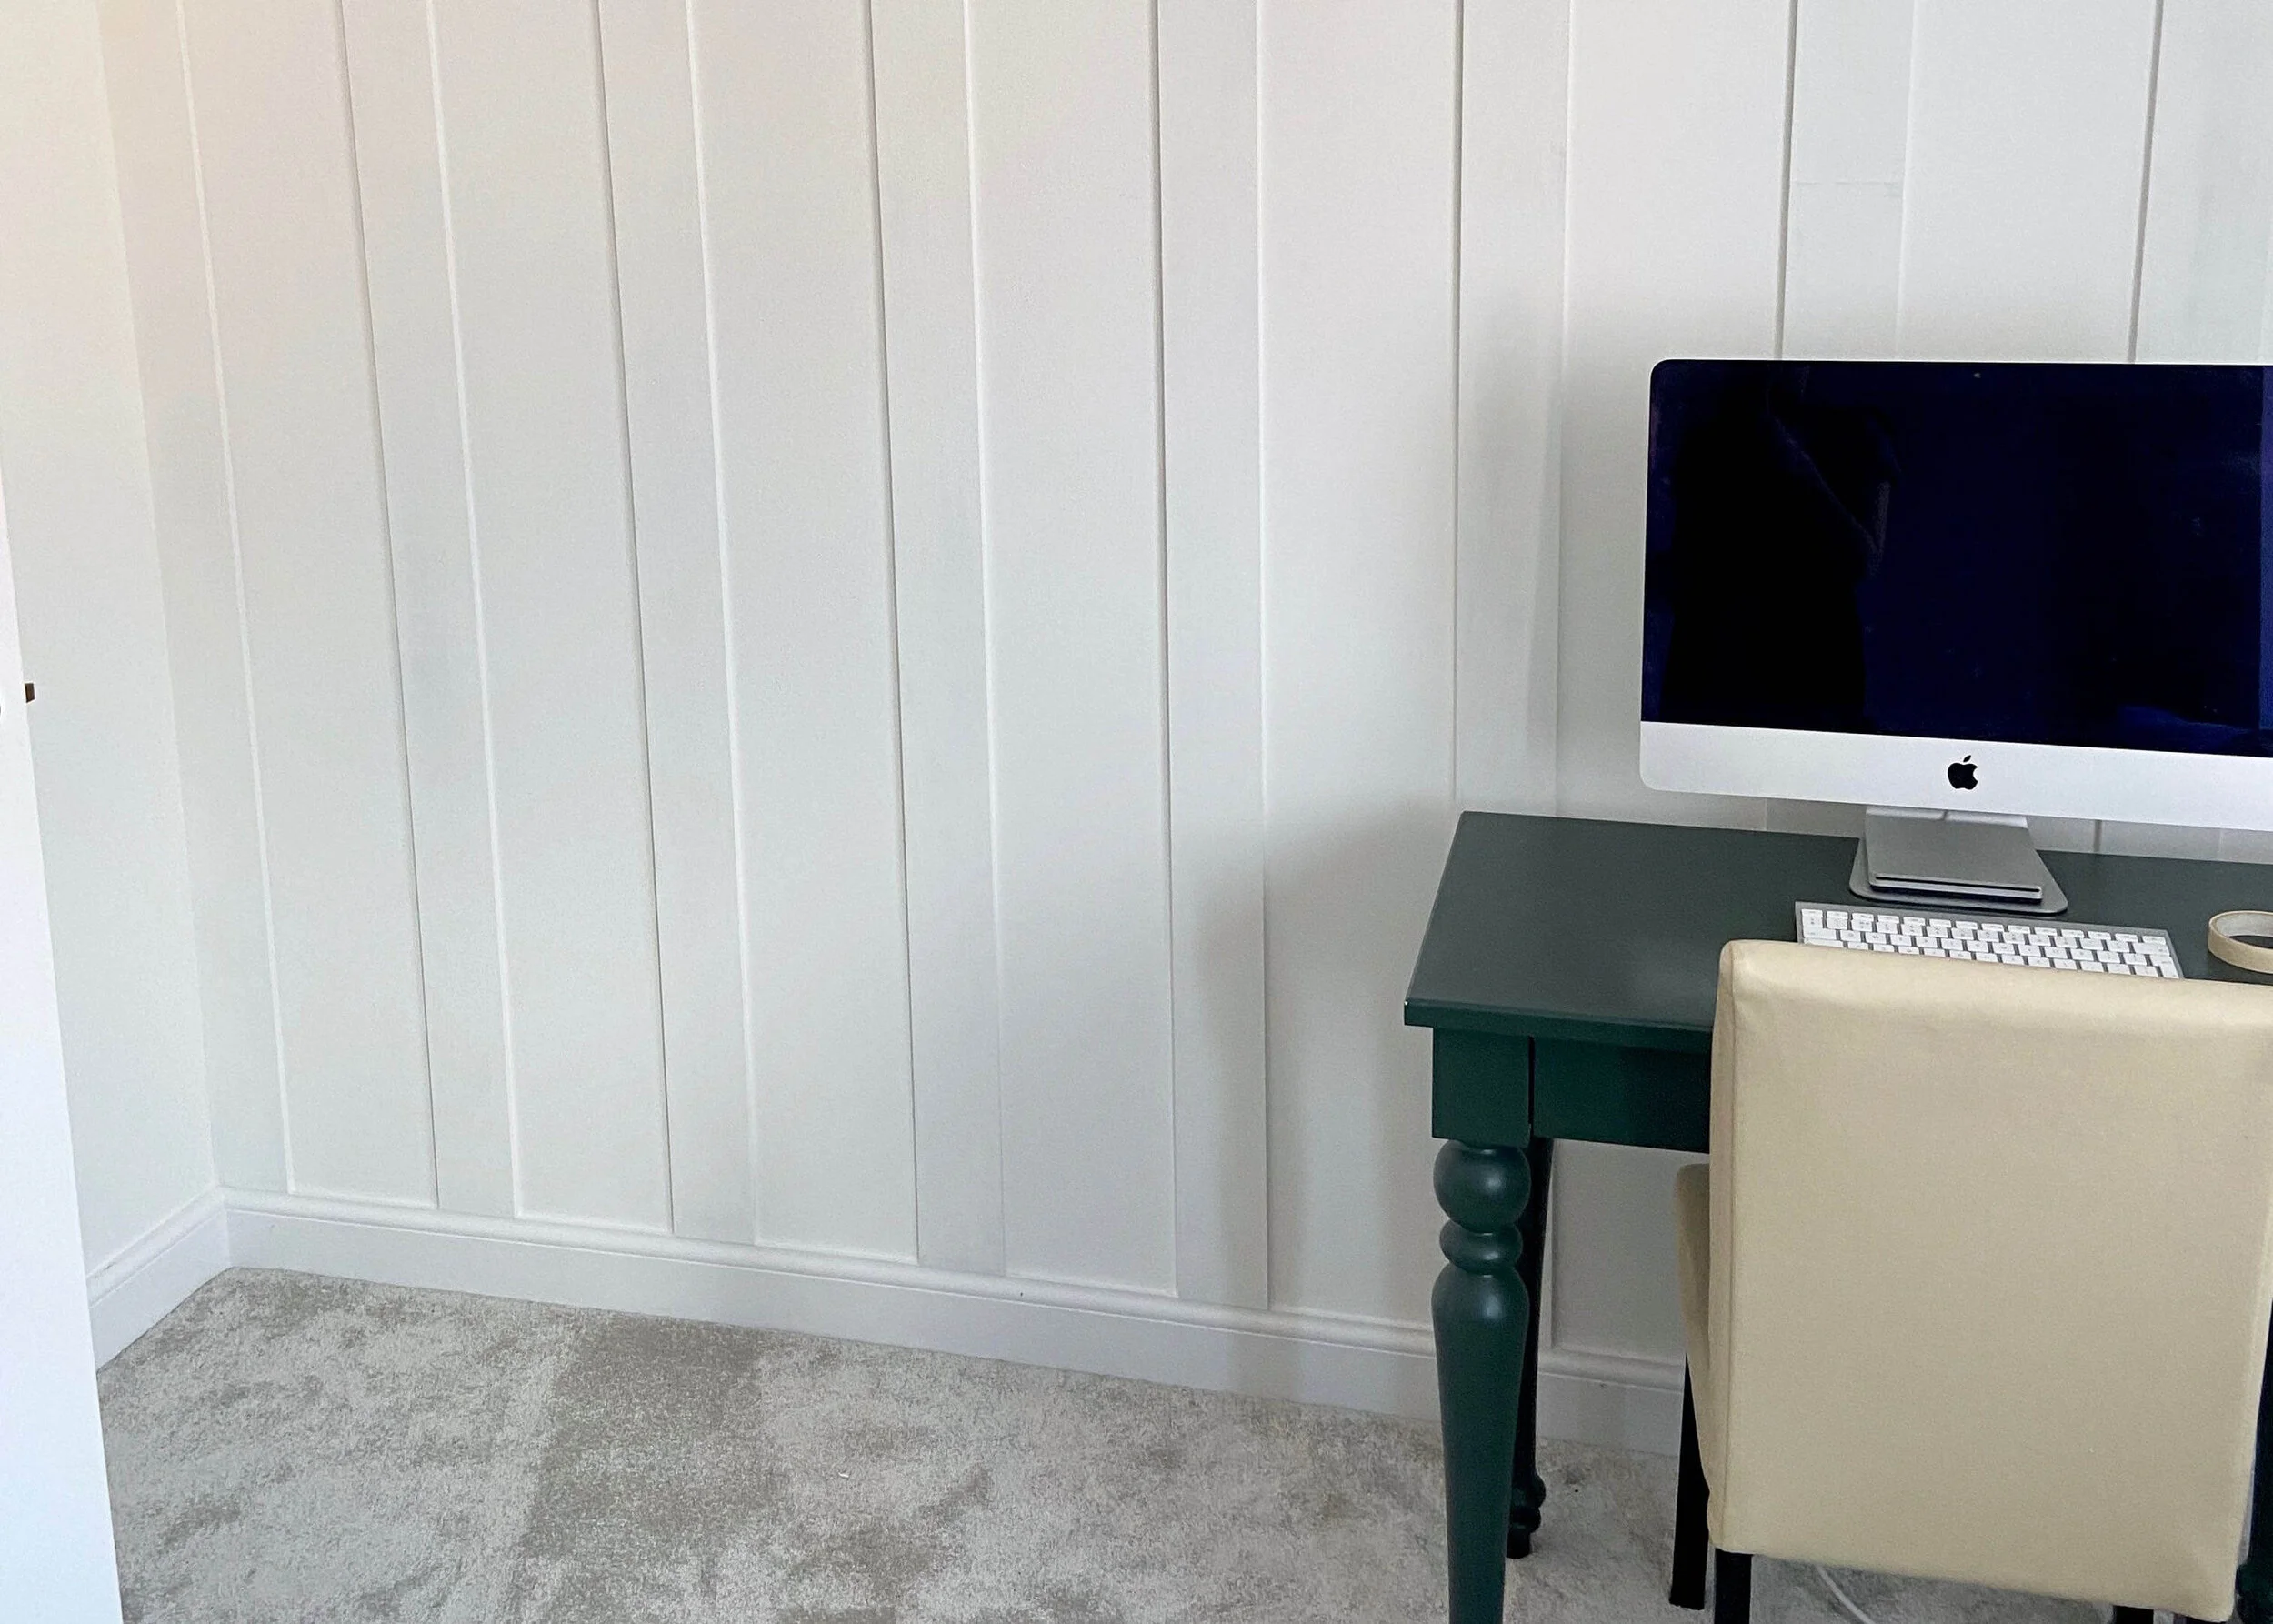
Once all of this is dry, you can paint your panels with your choice of paint. We went for a white to match our walls and I love how the panelling just gives our wall some texture. We will most likely paint this wall a different colour once we’ve decided on it, but for now I’m enjoying it’s subtlety.
10.
We found we had some cracking in the paint at some of the junctions between panels and so we went back, re-sanded these and re-primed them, before painting them again.


